IMPORTANT DISCLAIMER: This guide references the International Building Code (IBC), Chapter 15 (Roof Assemblies and Rooftop Structures); the International Fire Code (IFC) §1205; ASTM E108, Standard Test Methods for Fire Tests of Roof Coverings; UL 790, Standard Test Methods for Fire Tests of Roof Coverings; ASTM E119, Standard Test Methods for Fire Tests of Building Construction and Materials; UL 1703 / UL 61730 / UL 2703 (photovoltaics); UL 1256; FM 4450/4470; and the International Wildland-Urban Interface Code (IWUIC). NFPA 256 was previously used for roof covering tests and is no longer an active primary standard; ASTM E108 and UL 790 are the primary test methods. Codes and standards vary by edition and are frequently amended by state and local jurisdictions. Section numbers cited here follow the model codes and may differ in your adopted edition. Local amendments and the edition adopted by your Authority Having Jurisdiction (AHJ) always control. This guide is a starting point only. Always verify the requirements applicable to your project with your local AHJ.
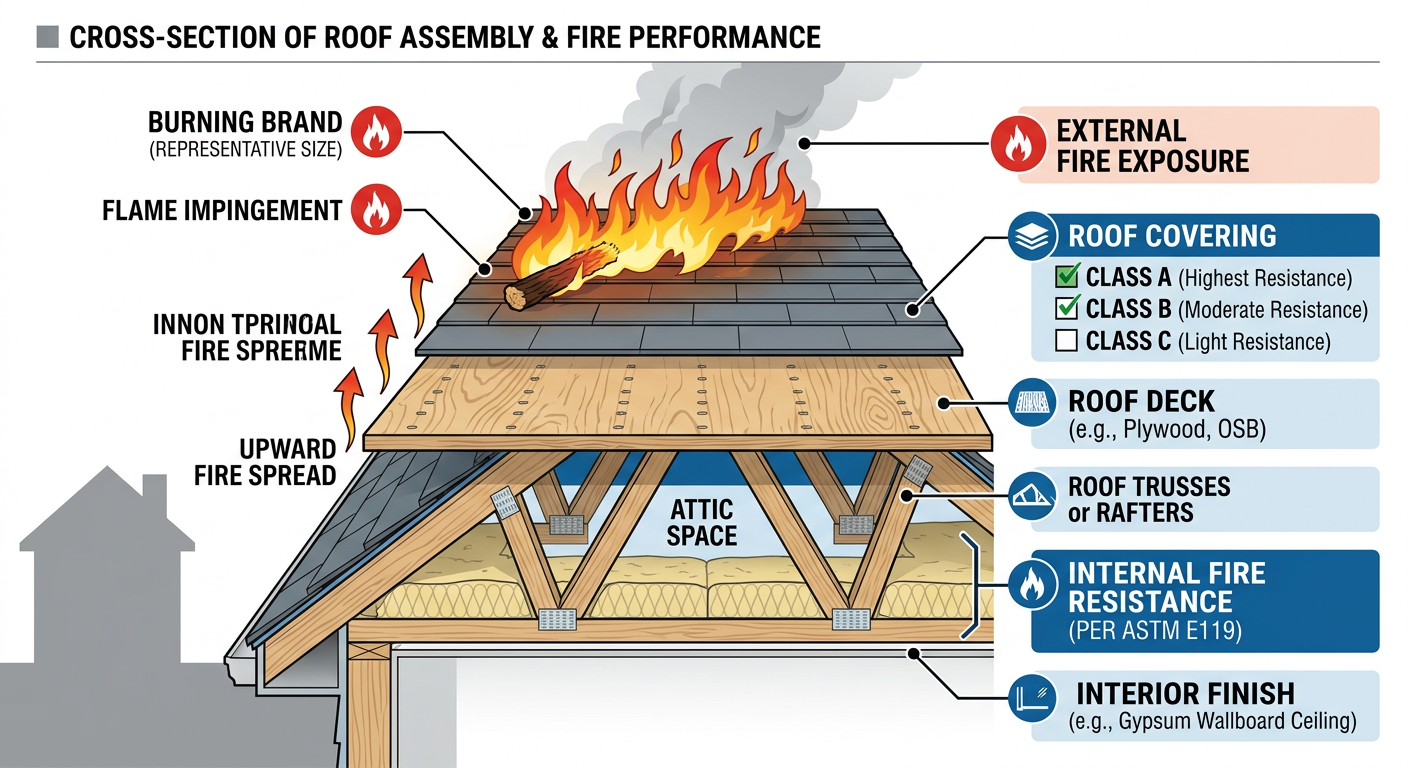
Roof assemblies are where two separate fire safety concepts meet, and where they are most often confused. A roof assembly has an external fire classification (Class A, B, or C) that measures its resistance to fire originating outside the building. It also may need an internal fire-resistance rating (measured in hours) that measures its ability to contain a fire from below. These are different tests, different standards, and different compliance tracks.
The IBC requires one or both, depending on construction type, occupancy, and location. A roof can be Class A for external exposure and still fail its internal fire-resistance requirement. A roof can be fire-resistance rated from below and still be vulnerable to a burning brand landing on top.
This article covers the external classification system, the test methods behind it, internal fire resistance, insulation and deck considerations, rooftop penetrations and equipment, photovoltaic arrays, vegetative roofs, reroofing, and wildland-urban interface exposures.
◆ Section 1: Why Roof Assemblies Are Different
A roof assembly is a system of layers (covering, underlayment, deck, insulation, and structure), each contributing to fire performance.
| Factor | Challenge |
|---|---|
| Two separate fire exposures | Fire from outside (burning brands, flames) and fire from inside (below the roof) |
| Classification vs. resistance | Class A/B/C is external; hourly rating is internal |
| System dependence | The rating belongs to the complete assembly, not the covering alone |
| Deck combustibility | Combustible and noncombustible decks change performance |
| Rooftop equipment | PV arrays, skylights, hatches, and HVAC equipment can compromise the assembly |
| Wildland exposure | Ember storms and radiant heat require ignition-resistant construction |
| Reroofing | Replacement or recover work can silently change the tested assembly |
Key point: The external fire classification (Class A/B/C) and the internal fire-resistance rating (hours) are independent requirements. A roof that meets one does not automatically meet the other.
Key Article: Article 131 — Fire-Resistance-Rated Assemblies and UL Listings
Pro Tip: When reviewing roof submittals, look for two separate pieces of evidence: the Class A/B/C listing for the roof covering assembly, and the hourly fire-resistance rating for the roof structure where required.
◆ Section 2: External Fire Classification — Class A, B, and C
The external fire classification measures how a roof covering performs when exposed to fire originating outside the building.
A. The Three Classes
ASTM E108 and UL 790 define three classes of fire exposure:
| Class | Fire Exposure | Fire Protection to Deck | Flying Brand Hazard |
|---|---|---|---|
| Class A | Severe | High degree | Not expected |
| Class B | Moderate | Moderate degree | Not expected |
| Class C | Light | Light degree | Not expected |
The classification is not a measure of how long the roof will resist fire. It is a comparative rating of performance under specific test conditions.
B. The Test Methods
ASTM E108 and UL 790 are technically equivalent and include the following tests:
| Test | What It Measures |
|---|---|
| Intermittent-Flame Exposure | Resistance to repeated flame exposure from a gas burner |
| Spread of Flame | Distance flames travel across the covering |
| Burning Brand | Resistance to a burning brand placed on the surface |
| Flying Brand | Whether the covering sheds flaming material that could ignite other surfaces |
| Rain Test | Whether fire performance is degraded by prolonged rain exposure (a durability test, not a leak test) |
C. How the Classes Differ in the Test
The severity of each test increases with the class. Approximate criteria (confirm against the current standard):
| Test | Class A | Class B | Class C |
|---|---|---|---|
| Intermittent flame cycles | 15 | 8 | 3 |
| Maximum flame spread | 6 ft | 8 ft | 13 ft |
| Burning brand | Largest (about 2,000 g) | Medium (about 500 g) | Smallest (about 9 g) |
In all classes, the covering must not slip from position, must not allow flame penetration of the deck, and must not present a flying brand hazard.
Key point: A “Class A” roof is not a fire-resistive roof. It is a roof covering assembly that has passed the most severe external fire exposure test in ASTM E108/UL 790.
Key Article: Article 18 — Roofing Materials and Fire Ratings for Commercial Buildings
Pro Tip: The UL Online Certifications Directory is the authoritative source for verifying that a specific roof assembly has been tested and listed. Product categories for roof assemblies include TFWZ, TFXX, TGDY, TGFU, and TGGN.
◆ Section 3: How Much Classification Does the Code Require?
IBC §1505.1 and Table 1505.1 set the minimum roof covering classification by type of construction. In general, most construction types require at least Class B, and some combustible types (for example, Type VB) permit Class C, subject to table footnotes. Always check the footnotes and your adopted edition.
Three provisions often catch designers out:
- Unclassified roofing (§1505.5). Limited use of nonclassified coverings is allowed only where Table 1505.1 and local fire-district rules permit.
- Fire-retardant-treated wood shingles and shakes (§1505.6). These achieve classification only when the treatment is listed and has passed the rain/weathering test.
- Special-purpose roofs (§1505.7). Heavy timber, ballasted, and similar roofs have their own provisions.
Local overlays can raise the minimum. Fire districts, hazard severity zones, and WUI maps often require Class A regardless of the Table 1505.1 minimum.
Pro Tip: Treat Table 1505.1 as a floor. Check for a local fire-district or WUI overlay before you finalize the roof covering.
◆ Section 4: Internal Fire Resistance — ASTM E119
The internal fire-resistance rating measures how long a roof assembly can contain a fire from below while maintaining structural integrity.
A. ASTM E119
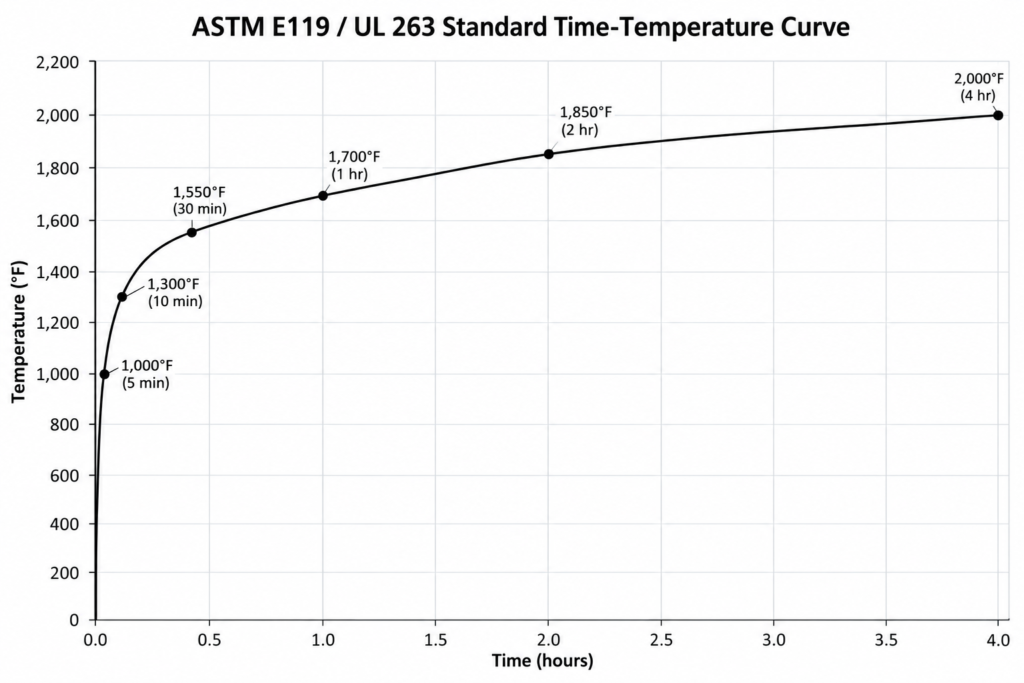
ASTM E119 is the test method for fire-resistance ratings of building construction, including roof assemblies. The test evaluates:
- Load-carrying capacity during fire exposure
- Integrity (passage of flames or hot gases)
- Insulation (temperature rise on the unexposed side)
The rating is expressed in hours (1, 1½, 2, 3, or 4).
B. When Internal Fire Resistance Is Required
The IBC requires fire-resistance-rated roof construction based on:
- Building construction type (IBC Table 601)
- Occupancy separation requirements (IBC Table 508.4)
- Specific building elements (for example, roof assemblies serving as horizontal separations)
C. The 20-Foot Roof Exception
Table 601 includes a provision that, for many occupancies, fire protection of roof construction (including framing and decking) is not required where every part of the roof is 20 feet or more above the floor immediately below. It does not apply to certain occupancies (such as Group F-1, H, M, and S-1). Roofs over high-bay spaces are often unrated for this reason, so check this exception before assuming a rating is required.
Key point: A roof assembly’s internal fire-resistance rating is separate from its external fire classification. The IBC may require a 1-hour or 2-hour roof assembly, and that rating comes from ASTM E119 (or UL 263), not ASTM E108.
Key Article: Article 131 — Fire-Resistance-Rated Assemblies and UL Listings
Pro Tip: The UL Fire Resistance Directory lists roof-ceiling assemblies (P series) that have been tested to ASTM E119. Confirm that the listed design matches your framing, membrane, insulation, and penetrations.
◆ Section 5: Roof Coverings and Fire Performance
The roof covering is the outermost layer, the material exposed to external fire.
A. Common Roof Coverings and Their Classifications
| Roof Covering | Typical Classification | Notes |
|---|---|---|
| Asphalt shingles | Class A (fiberglass-based) | Most common residential and light commercial |
| Metal panels | Class A (over noncombustible deck) | Tested assemblies required over combustible decks |
| Single-ply membrane | Class A, B, or C depending on assembly | TPO, EPDM, PVC; classification depends on underlayment and deck |
| Built-up roofing | Class A (with gravel surfacing) | Gravel provides protection |
| Modified bitumen | Class A, B, or C | Depends on cap sheet and assembly |
| Wood shakes/shingles | Class C (untreated); Class A (FRT) | Fire-retardant-treated wood required for Class A |
| Slate and tile | Class A | Noncombustible; classification depends on underlayment |
B. Exceptions to Testing
The IBC includes exceptions where certain roof assemblies are assigned a Class A rating without testing:
- Steel, copper, or other metal panel roof systems installed over noncombustible purlins or joists
- Metal panel roof systems fabricated from minimum 16 oz./sq. ft. sheet copper installed over combustible decks
Important limitation: Steel panel roof systems installed over combustible decks are not included in the exceptions and require testing to determine their classification.
Key point: The classification belongs to the assembly, not the covering material alone. A Class A shingle over a combustible deck with a combustible underlayment may not achieve Class A.
Pro Tip: When specifying a roof covering, require the manufacturer’s UL listing for the complete assembly: covering, underlayment, and deck type.
◆ Section 6: Roof Decks and Insulation
The deck and insulation beneath the covering contribute to both external classification and internal fire resistance.
A. Combustible vs. Noncombustible Decks
UL 790 distinguishes between combustible and noncombustible decks:
- Combustible deck: Wood sheathing, OSB, plywood (materials that do not comply with ASTM E136)
- Noncombustible deck: Metal, concrete, poured gypsum (materials that comply with ASTM E136)
The classification listing specifies which deck type the assembly was tested over.
B. Insulation
Above-deck thermal insulation must be covered with an approved roof covering (IBC §1508) and must pass the tests required by the code. Foam plastic insulation adds further requirements under IBC Chapter 26.
C. Insulated Steel Deck Assemblies (UL 1256 and FM 4450)
Insulated steel roof decks are a special case. They are commonly evaluated for interior fire exposure under UL 1256 (Fire Test of Roof Deck Constructions) or FM 4450 (Approval Standard for Class 1 Insulated Steel Deck Roofs). This is different from the Class A/B/C external test and different from the ASTM E119 rating. Insurers frequently require FM Class 1 roofs, so a project can have three separate roof listings: external class, internal rating, and insurer approval.
Key point: Changing the insulation type, thickness, attachment, or placement from the tested assembly can void the classification.
Pro Tip: “Equivalent” insulation is not equivalent for fire performance unless it is part of a tested listing. Ask early whether the owner’s insurer requires FM Class 1.
◆ Section 7: Skylights, Hatches, and Roof Penetrations
Skylights and other roof penetrations interrupt the roof covering and can compromise both external classification and internal fire resistance.
A. Skylights
Skylights must be listed and labeled for fire classification where required. The skylight assembly must be compatible with the classification of the roof assembly it interrupts.
B. Roof Hatches and Smoke Vents
Roof hatches, smoke-and-heat vents (IBC §910), and curb-mounted equipment are part of the roof assembly. Their curbs, covers, and flashing must maintain the roof’s classification, and smoke vents must be listed for their use.
C. Other Penetrations
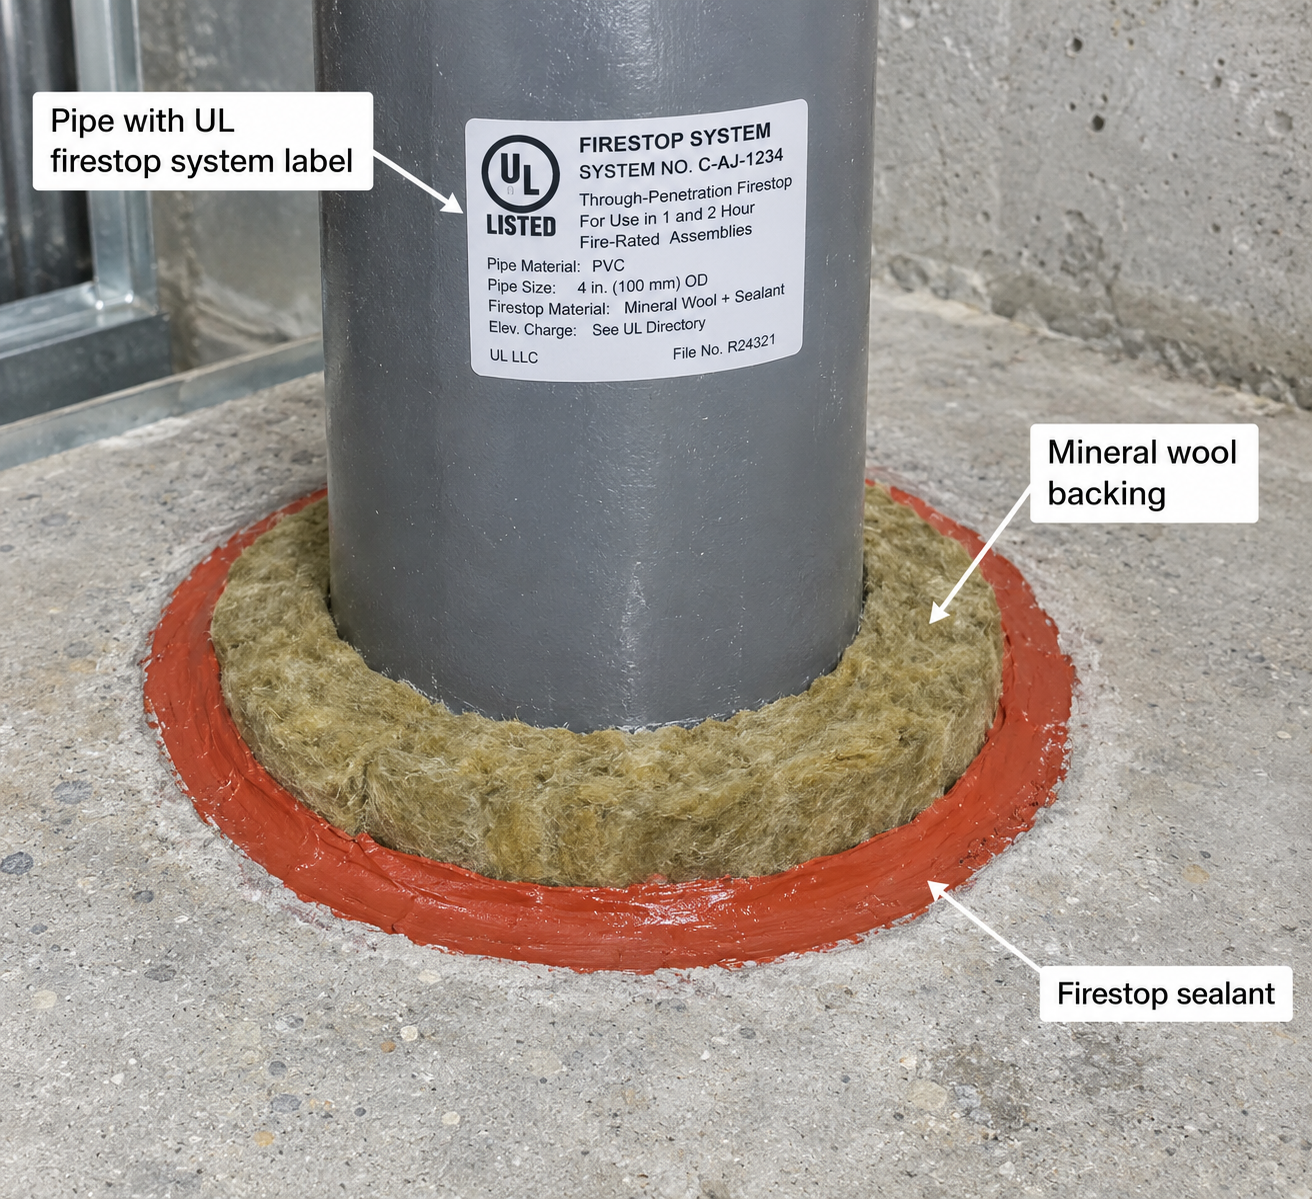
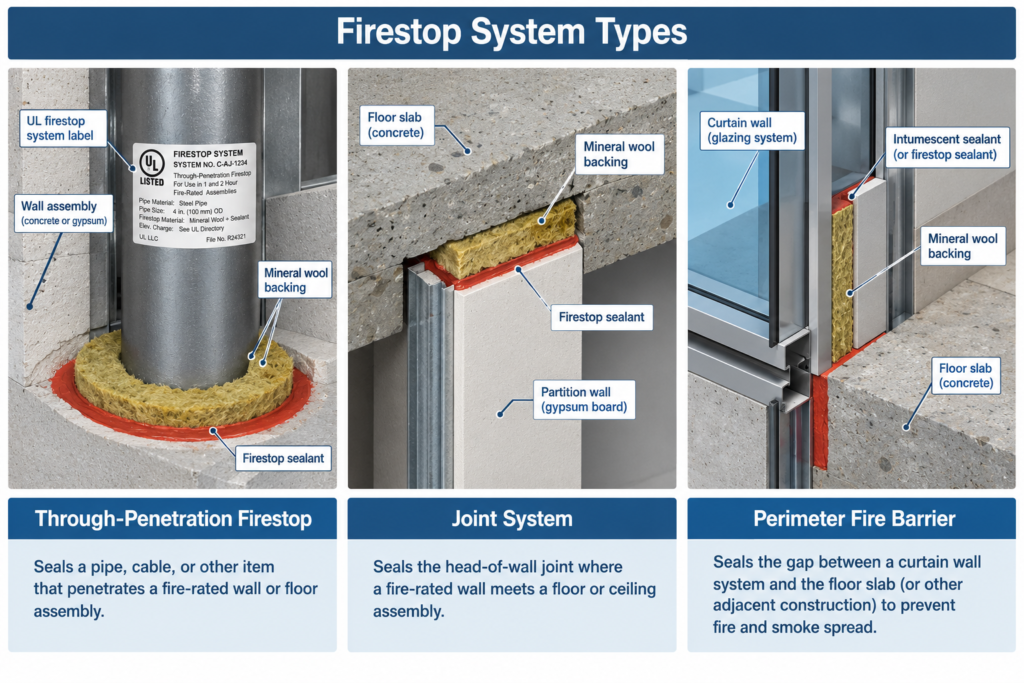
HVAC curbs, vents, pipes, and conduit must be flashed and sealed in a manner that maintains the roof assembly’s fire performance. Penetrations of rated roof-ceiling assemblies also need listed firestop systems.
Key point: A roof assembly that is Class A in the field but has unlisted skylights or improperly flashed penetrations is not Class A in practice.
Pro Tip: Include skylights, hatches, and penetrations in the roof assembly submittal review. Require listings for all components that interrupt the covering.
◆ Section 8: Fire Walls, Parapets, and Roof Edges
Roofs interact with walls in ways that affect fire spread between buildings and between fire areas:
- Fire walls must be continuous through the roof and typically extend above it (IBC §706). Look at the parapet height, the allowed exceptions, and how the roof covering terminates at the wall.
- Parapets on exterior walls are required in some conditions to limit fire spread (IBC §705). Height, construction, and roof-covering termination all matter.
- Roof edges, valleys, and eaves are common ignition points in ember exposure, which is why WUI codes regulate them.
Pro Tip: Show parapet heights and roof-covering terminations on the roof plan. They are a frequent source of plan-review comments.
◆ Section 9: Photovoltaic Arrays and Fire Classification
Rooftop photovoltaic arrays add a new layer to roof fire performance.
A. Fire Classification of PV Systems
- Rooftop-mounted PV panel systems (IBC §1505.9): tested, listed, and identified with a fire classification per UL 2703 (the mounting system and module as a combination). The fire classification must comply with Table 1505.1 based on the construction type of the building.
- Building-integrated PV (§1505.8): BIPV products installed as the roof covering must be tested, listed, and labeled for fire classification like any other roof covering.
- PV modules are listed to UL 1703 or UL 61730-1/-2.
Important nuance: The required PV classification comes from the building’s construction type (Table 1505.1), not from the classification of the underlying roof assembly. Still, a PV system installed over a roof must be installed according to its listing, so confirm that the listing permits the roof and mounting height you’ve chosen.
B. Firefighter Access and Pathways (IFC §1205)
Requirements depend on occupancy:
| Building Type | Typical Requirement (2021 IFC) |
|---|---|
| Group R-3 pathways | Two 36-in. pathways on separate roof planes from lowest roof edge to ridge; at least one 36-in. pathway for each roof plane with an array |
| Group R-3 ridge setback | 18 in. each side where array covers 33% or less of roof area; 36 in. where more than 33% (alternatives exist, for example for sprinklered buildings) |
| Other than R-3 perimeter | 6-ft clear perimeter; may reduce to 4 ft if either roof axis is 250 ft or less |
| Other than R-3 interior | Pathways at no more than 150-ft intervals; 4 ft around roof hatches |
| Smoke ventilation | Options include wider pathways or vent cut-outs |
Note: Older editions had different setbacks (for example, hip/valley clearances and 3-ft ridge limits). Many jurisdictions allow exceptions where the fire official determines rooftop operations will not be employed.
C. Rapid Shutdown
The NEC requires rapid shutdown that reduces PV conductor voltage within a specified time. This is an electrical safety requirement, not a fire classification requirement, but it is part of the overall fire safety strategy.
Key point: PV arrays are listed for fire classification separately from the roof assembly. Both must comply with their respective requirements.
Key Article: Article 152 — Solar Panel and PV System Fire Safety (planned)
Pro Tip: Coordinate PV layout with the fire service early. Pathway and setback requirements can significantly affect array layout and energy production.
◆ Section 10: Vegetative (Green) Roofs and Rooftop Amenities
Vegetative roofs and rooftop decks add combustible loads that standard Class A/B/C listings may not address:
- Vegetative roofs generally need a roof system tested and listed with the vegetation system in place (for example, through ASTM E108/UL 790 testing and the design standards the code references, such as ANSI/SPRI VR-1 and FM Global approvals).
- Rooftop decks, pavers, and walkways can change exposure and should match the listed assembly.
- Irrigation and maintenance affect fire performance, since dry plant material is fuel.
Pro Tip: Do not assume a listed membrane retains its classification under a green roof. Ask for a listing that includes the vegetation system.
◆ Section 11: Reroofing and Roof Recover
Reroofing is where many Class A roofs lose their classification.
- Replacement or recovery materials must comply with Chapter 15, including the required classification (IBC §1511).
- Adding a second layer, new insulation, or a different membrane over an existing roof changes the assembly. The new combination must be listed or otherwise acceptable.
- Existing roofs can hide combustible layers, damaged decks, or wet insulation that should be addressed before recovering.
Pro Tip: Treat reroofing like new construction for fire purposes. Require the same assembly listing evidence.
◆ Section 12: Wildland-Urban Interface
Buildings in WUI areas face additional roof fire requirements.
A. Ignition-Resistant Construction
The IWUIC establishes ignition-resistant construction classes (Class 1, 2, and 3) based on wildfire exposure. Roof coverings must be ignition-resistant materials, and higher-exposure classes generally require Class A roof assemblies.
B. Fire-Resistance-Rated Construction
Where fire-resistance-rated construction is required, the rating is determined per ASTM E119 or UL 263 for exposure from the exterior side.
C. Roof Covering and Detailing Requirements
WUI codes typically require Class A roof assemblies. Many jurisdictions add:
- Noncombustible or ember-resistant treatments at roof valleys, eaves, and edges
- Ember-resistant vents (screened or tested vent products)
- Enclosed eaves and spark arresters on chimneys
- Gutter and debris-management provisions
Key point: WUI requirements are in addition to, not instead of, the base IBC requirements. A roof that meets the IBC may still need additional protection in a WUI area.
Pro Tip: Verify the site’s WUI classification early. It can affect roof covering selection, attic ventilation, and eave detailing.
◆ Section 13: Design Checklist for Roof Assemblies
| Item | Status | Notes |
|---|---|---|
| External fire classification determined | ☐ | Per IBC Table 1505.1 and local overlays |
| Class A/B/C listing verified | ☐ | ASTM E108 / UL 790; complete assembly |
| Deck type confirmed | ☐ | Combustible vs. noncombustible per listing |
| Roof covering matches listing | ☐ | No substitutions without new listing |
| Underlayment matches listing | ☐ | Part of the tested assembly |
| Insulation matches listing | ☐ | Type, thickness, attachment |
| Insulated steel deck evaluated | ☐ | UL 1256 / FM 4450 where applicable |
| Insurer requirements (FM Class 1) | ☐ | Confirm with owner |
| Internal fire resistance determined | ☐ | Table 601, Table 508.4, 20-ft exception |
| ASTM E119 listing verified | ☐ | For assemblies requiring hourly rating |
| Skylights, hatches, penetrations listed | ☐ | Match assembly classification |
| Fire walls and parapets coordinated | ☐ | Heights and terminations |
| PV system fire classification | ☐ | UL 2703 per §1505.9; BIPV per §1505.8 |
| PV roof access pathways | ☐ | IFC §1205 for occupancy; verify local edition |
| Vegetative roof listing | ☐ | If applicable |
| Reroofing/recover compliance | ☐ | Classification maintained |
| WUI ignition-resistant construction | ☐ | If applicable; verify local requirements |
| AHJ coordination | ☐ | Early engagement on classification and exceptions |
◆ Section 14: Common Mistakes and How to Avoid Them
| Mistake | Why It’s a Problem | How to Fix |
|---|---|---|
| Confusing Class A with fire-resistance rating | Different tests, different purposes | Track external classification and internal resistance separately |
| Assuming the covering alone determines class | Classification belongs to the assembly | Verify the complete assembly listing |
| Substituting underlayment or insulation | Voids the listing | Match the tested assembly exactly |
| Using metal panels over combustible deck without testing | Exception does not apply | Test the assembly or use a listed system |
| Ignoring the 20-ft roof exception | Over-specifying rated roofs | Check Table 601 note and occupancy limits |
| Ignoring PV fire classification | Code violation | Require UL 2703 listing per §1505.9 |
| Using outdated PV pathway dimensions | Plan-review rejection | Check the adopted IFC §1205 edition |
| Overlooking insurer roof requirements | Coverage or premium issues | Confirm FM Class 1 or insurer needs early |
| Recovering a roof without checking the assembly | Classification lost | Treat reroofing as a new assembly |
| Skipping WUI requirements | Increased wildfire risk | Verify WUI classification; use ignition-resistant materials |
| No AHJ coordination on exceptions | Rejected submittals | Engage early; document exceptions |
◆ Section 15: Conclusion
Roof assemblies present two separate fire safety requirements: the external fire classification (Class A/B/C) measured by ASTM E108/UL 790, and the internal fire-resistance rating (hours) measured by ASTM E119. Both may be required, depending on building type and occupancy, and neither substitutes for the other.
The classification belongs to the complete assembly (covering, underlayment, deck, and insulation), not to individual components. Insulated steel decks, vegetative roofs, and reroofing each add their own verification steps. Photovoltaic arrays carry a separate UL 2703 classification requirement and firefighter access pathways under the IFC. WUI areas add ignition-resistant construction requirements.
A roof that is Class A for external fire exposure may still fail its internal fire-resistance requirement, and vice versa. The two tracks must be verified independently.
Key Takeaways:
- External fire classification (Class A/B/C) measures resistance to fire from outside; internal fire resistance (hours) measures containment from below.
- ASTM E108 and UL 790 are the test methods for Class A/B/C; ASTM E119 is the test method for hourly ratings.
- The classification belongs to the assembly, not the covering alone.
- Table 1505.1 sets the minimum class by construction type; local overlays can raise it.
- Combustible vs. noncombustible decks affect the classification listing, and the metal panel exception applies only over noncombustible decks.
- Roofs 20 ft or more above the floor may be exempt from fire-resistance rating in many occupancies.
- Insulated steel decks may need UL 1256 or FM 4450 evaluation in addition to Class A/B/C.
- Rooftop PV systems need UL 2703 fire classification (§1505.9); BIPV is covered by §1505.8; pathways follow IFC §1205.
- Reroofing and vegetative roofs can void a listed classification if not specifically evaluated.
- WUI areas require ignition-resistant construction, including Class A roof assemblies.
Take Action Today:
- Determine the required external fire classification for your building type and location.
- Verify the Class A/B/C listing for the complete roof assembly.
- Confirm the deck type matches the listing.
- Determine whether an internal fire-resistance rating applies, and check the 20-ft exception.
- Confirm insulation and insurer (FM) requirements.
- Verify skylights, hatches, and penetrations are listed and match the assembly.
- Coordinate PV layout with the adopted IFC pathway requirements.
- Check reroofing, vegetative roof, and WUI requirements where they apply.
- Engage the AHJ early on any exceptions.
Continue Reading from Our Series:
-
Related guide: Fire-Resistance-Rated Assemblies and UL Listings (Article 131)
-
Learn more: Roofing Materials and Fire Ratings for Commercial Buildings (Article 18)
-
Read more: Mass Timber and Engineered Wood Fire Safety (Article 140)