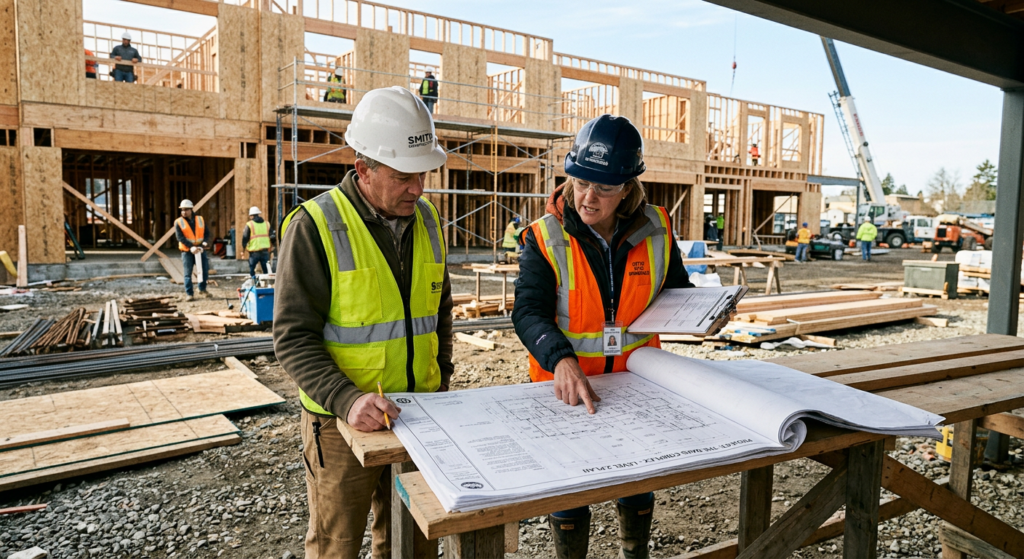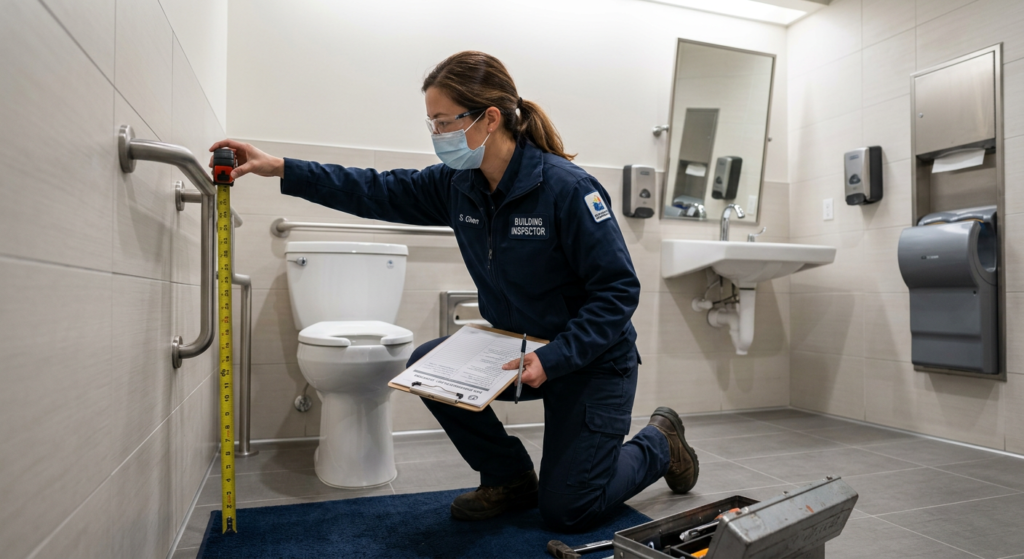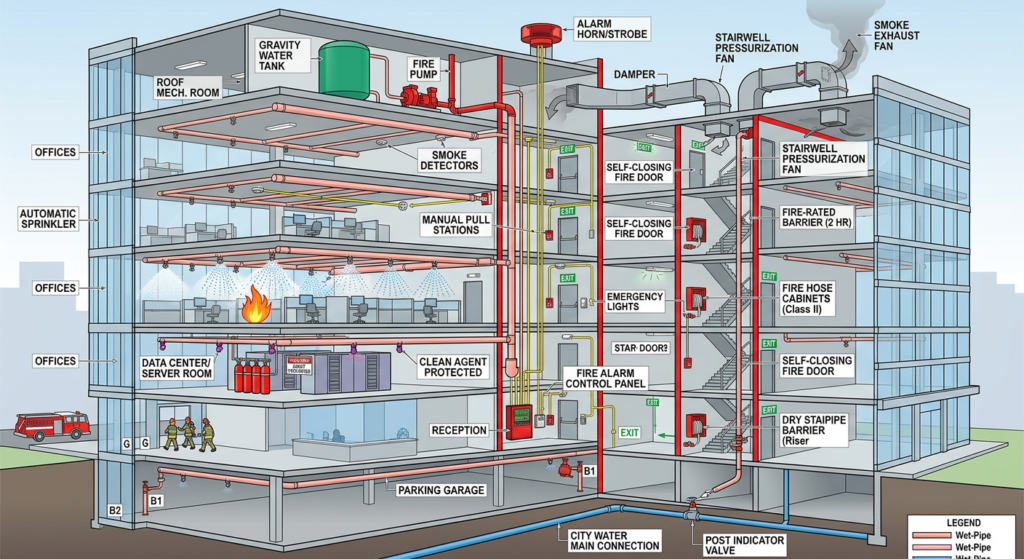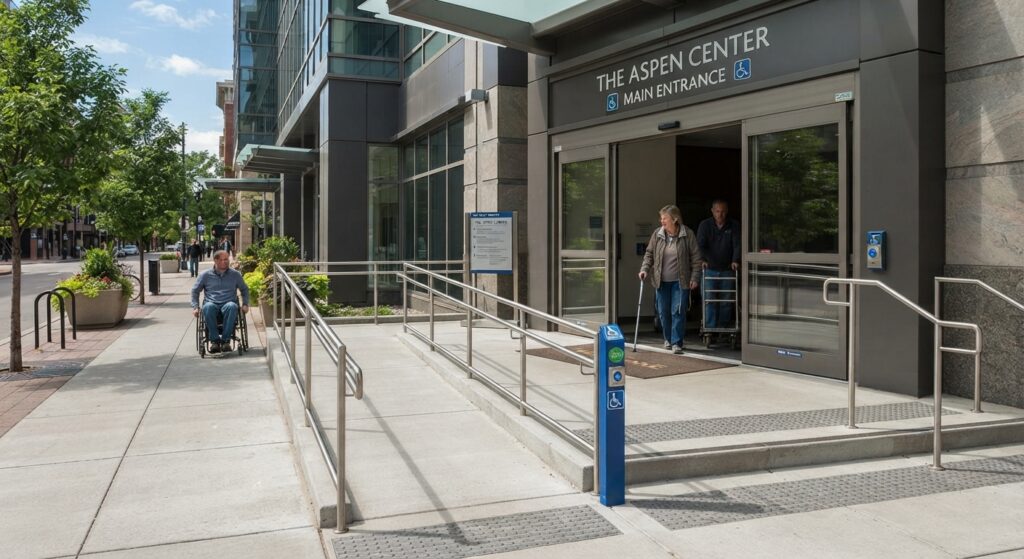
Author: admin

  • Fire Door Requirements and Regulations for Commercial Buildings

    Fire Door Requirements and Regulations for Commercial Buildings

    Fire doors are one of the most critical—and most frequently violated—components of commercial building fire safety. A properly installed and maintained fire door can save lives by containing fire and smoke, allowing occupants to evacuate safely.

    Yet, fire doors are often overlooked, improperly installed, or damaged, rendering them ineffective during an emergency.

    This guide covers the essential fire door requirements, including:

    • NFPA 80 (Fire Door Standards)
    • IBC (International Building Code)
    • OSHA (Occupational Safety and Health Administration)
    • ADA (Accessibility compliance)
    Fire-rated door with visible certification label and overhead door closer

    Section 1: What Is a Fire Door?

    A fire door is a specially constructed door assembly designed to resist fire and smoke for a specific period, allowing occupants to evacuate and firefighters to control the fire.

    ComponentPurpose
    Door LeafThe door panel itself—constructed of fire-resistant materials.
    FrameMetal or wood frame that supports the door and holds it in place.
    HardwareHinges, handles, locks, and closers that maintain the door’s integrity.
    Fire Rating LabelA certification label indicating the door’s fire-resistance rating (e.g., 20, 45, 60, 90 minutes).
    GasketingIntumescent seals that expand when heated, blocking smoke and fire.

    Pro Tip: Never remove or paint over the fire rating label—it is required for inspection and compliance.


    Section 2: Key Fire Door Regulations [1]

    There are three primary regulatory bodies governing fire doors:

    RegulationWhat It Covers
    NFPA 80Installation, inspection, testing, and maintenance of fire doors.
    IBC (Chapter 7)Fire-resistance-rated construction requirements, including doors.
    OSHAWorkplace safety requirements, including exit routes and door operation.
    ADAAccessibility requirements for door hardware and clearances.
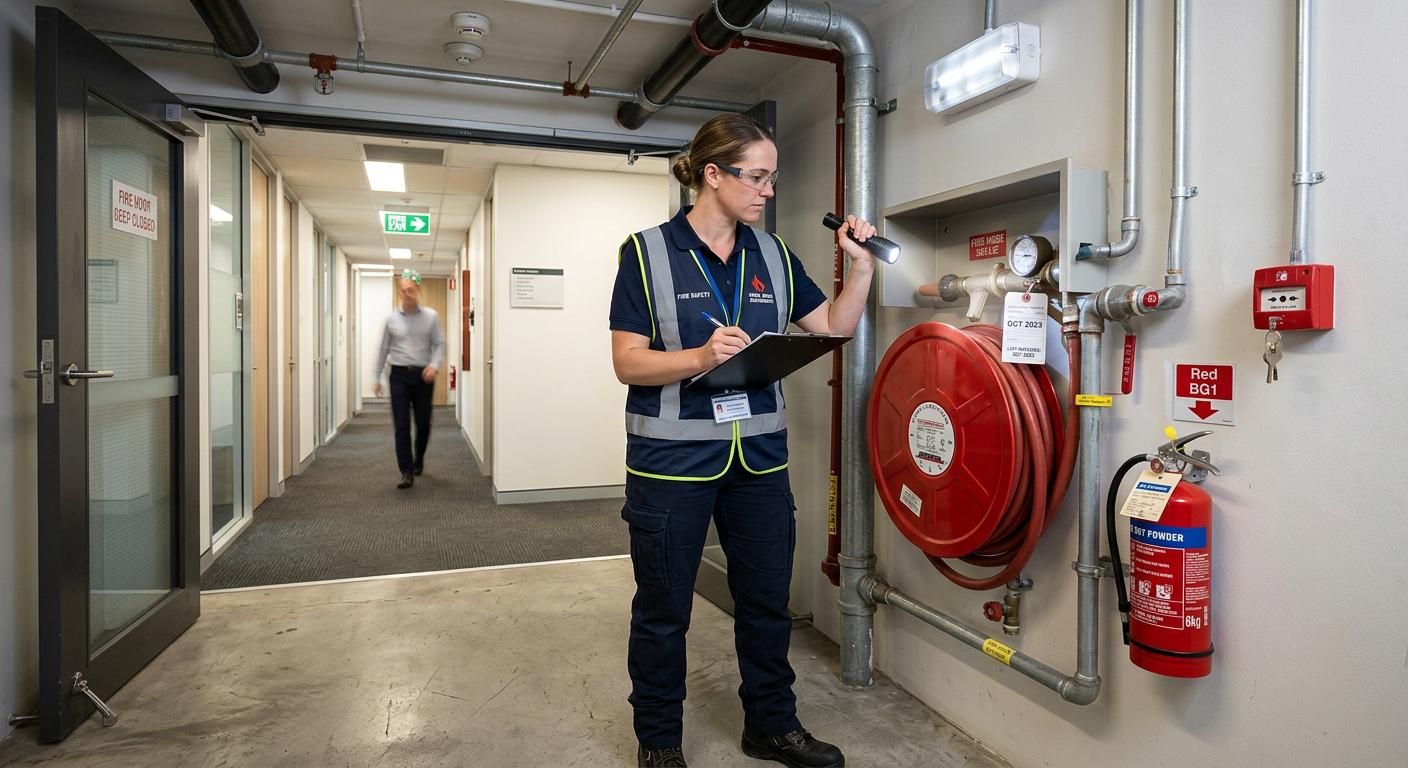
    Inspector checking a fire door's certification label and condition

    Section 3: Fire Door Ratings (NFPA 80) [2]

    Fire doors are classified by their fire-resistance rating—the number of minutes they can withstand fire and smoke.

    RatingTypical UseFire-Resistance
    20-MinuteSmoke barriers, corridors in sprinklered buildings20 minutes
    45-MinuteStairwell enclosures, hazardous areas45 minutes
    60-MinuteHigh-hazard areas, boiler rooms60 minutes
    90-MinuteFire walls, high-risk areas90 minutes
    3-HourFire walls between buildings180 minutes

    Important: The rating must match the wall’s fire-resistance rating. A 90-minute door cannot be installed in a 60-minute-rated wall.


    Section 4: Installation Requirements (IBC and NFPA 80)

    RequirementDetailsCode Reference
    Labeling [3]All fire doors must have a permanent certification label from an approved testing laboratory.NFPA 80, 6.2.1
    Clearance (top & sides) [3]Maximum 1/8 inch between the door and frame at the head, jambs, and meeting stiles (for both steel and most wood fire doors)NFPA 80, 6.3.1
    Undercut (bottom) [3]Maximum 3/4 inch clearance from the bottom of the door to the floor or threshold (no raised sill); 3/8 inch max where a raised sill is presentNFPA 80, 6.3.1
    Door Closers [3]Fire doors must be equipped with automatic closing devices.NFPA 80, 6.4.4
    Latching [3]Doors must latch automatically when closed.NFPA 80, 6.4.5
    Hold-Open Devices [3]Hold-open devices must release automatically when the fire alarm activates.NFPA 80, 6.4.6

    Common Violation: Fire doors propped open with doorstops or wedges. This renders them completely useless during a fire.

    Commercial emergency exit door with push bar and illuminated exit sign

    Section 5: Inspection, Testing, and Maintenance (NFPA 80) [3]

    NFPA 80 requires regular inspection and maintenance of fire doors to ensure they function properly.

    Inspection TypeFrequencyWhat to Check
    Visual InspectionMonthlyCheck for visible damage, proper closing, and intact labels.
    Operational TestAnnuallyOpen and close the door; verify it latches automatically.
    Drop Test (for automatic closing devices)AnnuallyTest that hold-open devices release when the alarm activates.
    Full InspectionAnnuallyProfessional inspection of all components; documentation required.

    Documentation: All inspections must be recorded and kept for inspection by authorities. NFPA 80 requires that records be maintained for at least 3 years.

    Fire door inspection log and maintenance checklist on a clipboard

    Section 6: Common Fire Door Violations

    ViolationWhy It’s a ProblemHow to Fix It
    Missing or illegible fire rating labelNo way to verify the door’s rating.Replace the door or contact the manufacturer for a replacement label.
    Door propped openDoor won’t contain fire or smoke.Install automatic hold-open devices (must release during alarms).
    Damaged or missing door closerDoor won’t close automatically.Replace or repair the closer immediately.
    Excessive clearance gapsSmoke and fire can bypass the door.Adjust the door or install gasketing.
    Paint over the label or hardwareObstructs inspection; may affect operation.Remove paint carefully; never paint over moving parts.
    Blocked door (furniture, equipment)Door cannot be opened in an emergency.Keep the area clear at all times.
    Door does not latch properlyDoor may not stay closed during a fire.Adjust or replace the latch mechanism.

    Section 7: Accessibility Requirements (ADA) [4]

    Fire doors must also comply with ADA accessibility requirements.

    RequirementDetailsCode Reference
    Opening ForceMaximum 5 lbs force to open interior doors; 8.5 lbs for exterior doors.ADA 404.2.8
    Clear Opening WidthMinimum 32 inches clear width.ADA 404.2.3
    HardwareLever-style handles required; no round knobs.ADA 404.2.6
    ThresholdMaximum 1/2 inch height (with beveled edges).ADA 302.4
    Closing SpeedDoor must take at least 5 seconds to close from 90 degrees to 12 degrees.ADA 404.2.8

    Tip: When specifying fire doors, select hardware that meets both fire safety and ADA requirements.

    Accessible fire door with lever handle and clear opening width

    Section 8: Fire Door Hardware Requirements [3]

    Fire door hardware is specifically designed to maintain the door’s fire-resistance rating.

    Hardware TypeRequirement
    HingesMust be fire-rated and listed by a testing laboratory.
    LocksMust not interfere with the door’s ability to close and latch.
    Door ClosersMust be installed and adjusted to close the door within required time.
    Panic BarsRequired on doors that serve as exits in high-occupancy areas.
    GasketingIntumescent seals required on the edges of the door.
    Fire door hardware components including hinges, closer, and push bar

    Conclusion

    Fire doors are a critical life-safety feature in commercial buildings. They are not just a code requirement—they are a life-saving investment.

    Take Action Today:

    1. Inspect all fire doors for visible damage, proper closing, and intact labels.
    2. Schedule an annual professional inspection to ensure compliance with NFPA 80.
    3. Train staff never to prop fire doors open.
    4. Keep inspection records for at least 3 years.

    References & Notes

    [1] 2024 International Building Code (IBC), Chapter 7 — Fire and Smoke Protection Features; Occupational Safety and Health Administration (OSHA) 29 CFR 1910.36 — Design and Construction of Exit Routes.

    [2] NFPA 80, Standard for Fire Doors and Other Opening Protectives, 2022 Edition, Chapter 4 — Fire Door Assemblies (Ratings and Classifications); UL 10B/10C — Fire Tests of Door Assemblies.

    [3] NFPA 80, 2022 Edition, Section 6.3.1 (Clearances and Undercuts), Section 6.4 (Hardware), and Chapter 5 (Inspections, Testing, and Maintenance).

    [4] 2010 ADA Standards for Accessible Design, Section 404 — Doors, Doorways, and Gates; Section 302.4 — Thresholds.

  • Modern Office Design Trends for Commercial Buildings

    Modern Office Design Trends for Commercial Buildings

    The modern office is evolving. Gone are the days of cubicles, closed doors, and sterile environments. Today’s commercial spaces prioritize flexibility, wellness, and collaboration to attract and retain top talent.

    Office design is no longer just about aesthetics—it is a strategic business decision. A well-designed office can:

    • Boost employee productivity and satisfaction.
    • Attract premium tenants willing to pay higher rents.
    • Reduce turnover and improve employee retention.

    This guide explores the top modern office design trends shaping the future of commercial real estate.


    Trend 1: Biophilic Design

    Biophilic design integrates natural elements into the built environment, connecting occupants with nature.

    FeatureExamplesBenefits
    Living WallsVertical gardens, moss wallsImproves air quality, reduces stress
    Natural LightLarge windows, skylights, glass wallsBoosts mood, increases productivity
    Indoor PlantsPotted plants, green spacesReduces noise, enhances aesthetics
    Natural MaterialsWood, stone, bambooCreates warmth, biophilic connection
    Water FeaturesIndoor fountains, aquariumsPromotes relaxation and focus

    Why It Matters: Research shows that employees in biophilic offices report 15% higher well-being and 6% higher productivity [1].

    Office interior with a living wall and abundant natural light

    Trend 2: Flexible and Hybrid Workspaces

    The post-pandemic world demands flexibility. Employees no longer want to be tied to a single desk from 9-to-5.

    FeatureExamplesBenefits
    Activity-Based WorkspacesQuiet zones, collaboration areas, social hubsSupports different work styles
    Hot DeskingUnassigned seating, bookable desksMaximizes space efficiency
    Remote IntegrationVideo conferencing, hybrid meeting roomsSupports hybrid work models
    Mobile FurnitureLightweight chairs, modular tablesEasy reconfiguration
    Bookable Meeting PodsAcoustic phone booths, huddle roomsPrivacy for calls and focused work

    Why It Matters: Employees who have greater choice in where and how they work tend to report higher engagement and are more likely to stay with their employer, making flexibility an increasingly important factor in talent retention.

    Flexible office workspace with modular furniture and collaborative zones

    Trend 3: Wellness-Centric Design

    Wellness is no longer a luxury—it is a requirement. Employees expect offices that support their physical and mental health.

    FeatureExamplesBenefits
    Ergonomic FurnitureAdjustable desks, ergonomic chairsReduces strain and injuries
    Healthy MaterialsLow-VOC paints, non-toxic finishesImproves indoor air quality
    Fitness FacilitiesGyms, yoga studios, bike storageEncourages physical activity
    Wellness RoomsQuiet rooms, meditation spacesReduces stress and burnout
    Healthy Food OptionsCafes with nutritious mealsSupports healthy eating habits

    Why It Matters: Companies that invest in workplace wellness features tend to see improved employee health outcomes and productivity, though the size of the effect varies significantly by organization and the specific wellness measures implemented.

    Office wellness room with calming design and yoga mats

    Trend 4: Smart Office Technology

    Technology is transforming the workplace, making offices smarter, safer, and more efficient.

    FeatureExamplesBenefits
    IoT SensorsOccupancy sensors, smart lighting, temperature controlsOptimizes energy use and comfort
    Smart Meeting RoomsAuto-scheduling, video conferencing, wireless presentationImproves meeting efficiency
    Digital WayfindingInteractive touchscreens, mobile appsSimplifies navigation
    Contactless AccessMobile entry, facial recognitionEnhances security and hygiene
    Room Booking SystemsDesk and meeting room booking via appMaximizes space utilization

    Why It Matters: Smart building technologies — including occupancy sensors and automated lighting and climate controls — can meaningfully reduce energy costs and improve the employee experience, though actual savings depend on the systems installed and building size.

    Smart meeting room with video conferencing and touchscreen controls

    Trend 5: Acoustic Comfort

    Sound quality is one of the most overlooked aspects of office design. Poor acoustics lead to distraction, stress, and reduced productivity.

    FeatureExamplesBenefits
    Acoustic PanelsWall and ceiling panels, bafflesAbsorbs noise and reduces echo
    Carpet and Soft FlooringArea rugs, acoustic tilesReduces footfall noise
    Acoustic FurnitureSoundproof pods, phone boothsProvides quiet spaces for focus
    Background Sound MaskingWhite noise, ambient sound systemsCovers distracting conversations

    Why It Matters: Poor acoustics are consistently cited as one of the top workplace distractions. A 2015 World Green Building Council report found that background noise in open offices can reduce productivity by up to 66% [2].

    Acoustic panels on walls and ceiling in a modern office

    Trend 6: Adaptive Reuse and Sustainable Design

    Sustainability is no longer an afterthought—it is a core design principle. Adaptive reuse (converting existing buildings) is becoming increasingly popular.

    FeatureExamplesBenefits
    Adaptive ReuseConverting warehouses, factories, or churches into officesReduces construction waste and costs
    Sustainable MaterialsRecycled, reclaimed, and locally sourced materialsReduces carbon footprint
    Energy EfficiencySolar panels, high-performance windows, smart controlsLowers operating costs
    Green CertificationsLEED, WELL, BREEAM certificationIncreases property value and marketability

    Why It Matters: Tenant demand for sustainable office space has been rising, and some tenants are willing to pay a rent premium for it — though survey data on how many tenants and how much of a premium varies considerably by market and year, with willingness-to-pay figures generally in the low single digits to low double digits rather than a fixed universal number.

    Historic warehouse converted into a modern creative office

    Trend 7: Community and Social Spaces

    Offices are becoming social hubs where employees gather, connect, and build relationships.

    FeatureExamplesBenefits
    Breakout AreasLounge seating, game rooms, cafesEncourages casual interaction
    Event SpacesTown halls, training rooms, rooftop terracesHosts company events and clients
    Community AmenitiesShowers, bike storage, pet-friendly policiesSupports work-life balance
    Art and BrandingMurals, branded installations, curated artStrengthens company culture

    Why It Matters: Offices designed to foster social connection tend to see stronger employee engagement and a greater sense of belonging, contributing to a more positive workplace culture overall.

    Modern office social space with lounge seating and cafe

    Conclusion

    The modern office is a strategic asset, not just a place to work. By embracing these design trends—biophilic design, flexible workspaces, wellness, smart technology, acoustics, sustainability, and community—you can create spaces that attract and retain top tenants.

    Take Action Today:

    1. Audit your current office space against these trends.
    2. Identify upgrades that offer the highest ROI.
    3. Consult with a design professional to implement changes.
    4. Market your building’s features to attract premium tenants.

    References & Notes

    [1] Human Spaces, “The Global Impact of Biophilic Design in the Workplace,” 2015; Cornell University / View, Inc. daylight workplace study, 2018.

    [2] World Green Building Council, “Health, Wellbeing & Productivity in Offices: The Next Chapter for Green Building,” 2015 — cited productivity impact of background noise in open-plan offices.

  • R-Value and Energy Code Requirements for Commercial Buildings

    R-Value and Energy Code Requirements for Commercial Buildings

    Energy efficiency is no longer a luxury—it is a requirement. Building codes across the United States mandate minimum insulation levels (R-values) for commercial buildings to reduce energy consumption, lower operating costs, and minimize environmental impact.

    Understanding R-value requirements is critical for:

    • Avoiding costly redesigns and permit delays.
    • Reducing heating and cooling costs for building owners.
    • Ensuring compliance with local and national energy codes.

    This guide breaks down R-value fundamentals, energy code requirements, and practical strategies for compliance.


    Section 1: What Is R-Value?

    R-value is a measure of thermal resistance—the ability of a material to resist heat flow. The higher the R-value, the better the insulation performs.

    ConceptExplanation
    Thermal ResistanceThe ability of a material to resist heat transfer.
    Higher R-ValueBetter insulation performance.
    Lower R-ValuePoorer insulation performance.
    MeasurementR-value is expressed as ft²·°F·hr/Btu (US customary units).

    Example: A wall with R-20 insulation resists heat flow twice as effectively as a wall with R-10 insulation.

    Cross-section diagram showing wall insulation layers with R-value labels

    Section 2: Key Energy Codes for Commercial Buildings [1]

    There are two primary energy codes governing commercial buildings in the United States:

    CodeWhat It Is
    IECC (International Energy Conservation Code)Model code adopted by most states; sets minimum energy efficiency requirements.
    ASHRAE 90.1The industry standard for commercial building energy efficiency; often referenced by IECC.

    Which Code Applies? Your state or local jurisdiction will adopt a specific version of these codes. Check with your local building department to determine which applies.

    Copies of IECC and ASHRAE 90.1 energy codes stacked on a desk

    Section 3: R-Value Requirements by Climate Zone (Commercial — IECC 2021 Table C402.1.3, “All Other” Occupancies) [2]

    Climate ZoneRoof (insulation entirely above deck)Steel-Framed WallWood-Framed WallMass Wall
    Zone 1 (Hot/Humid — S. Florida)R-20 ciR-13 + R-6.5 ciR-13 or R-0 + R-9.5 ciR-5.7 ci
    Zone 2 (Hot/Dry — AZ, S. TX)R-25 ciR-13 + R-7.5 ciR-13 + R-3.8 ciR-6 ci
    Zone 3 (Mild — CA Coast, SE)R-25 ciR-13 + R-7.5 ciR-13 + R-3.8 ciR-6.9 ci
    Zone 4 (Mixed — Mid-Atlantic)R-25 ciR-13 + R-7.5 ciR-13 + R-3.8 ci or R-20R-9.5 ci
    Zone 5 (Cold — NY, Chicago, MA)R-30 ciR-13 + R-10 ciR-13 + R-7.5 ci or R-20 + R-3.8 ciR-9.5 ci
    Zone 6 (Very Cold — MN, ND)R-30 ciR-13 + R-12.5 ciR-20 + R-3.8 ci or R-13 + R-11.4 ciR-11.4 ci
    Zone 7 (Extreme Cold — MT, ND)R-35 ciR-13 + R-12.5 ciR-27 (2×6 cavity) or R-13 + R-7.5 ciR-15.2 ci
    Zone 8 (Subarctic — AK)R-35 ciR-13 + R-16.5 ciR-13 + R-15.6 ciR-15.2 ci

    (“ci” = continuous insulation, applied over/across framing to reduce thermal bridging — distinct from cavity insulation between studs. Values shown are for the R-value compliance path; the U-factor compliance path in Table C402.1.4 is an alternative method.)

    These figures reflect the 2021 IECC’s base “All Other” (non-residential) requirements. Actual compliance also depends on: which specific assembly subtype applies (e.g., metal building walls/roofs have separate values from steel-framed or wood-framed), mass wall weight/heat-capacity thresholds, thermal spacer block requirements for metal-frame assemblies, and any local amendments. Always verify against the current IECC or ASHRAE 90.1 edition adopted by your jurisdiction — several states amend these tables to be more stringent (e.g., Washington State) — and confirm with your local building department or a licensed mechanical/energy engineer before finalizing a design.

    Map of the United States showing IECC climate zones for energy code compliance

    Section 4: Types of Insulation and Their R-Values [3]

    Different insulation materials have different R-values per inch of thickness.

    Insulation TypeR-Value per InchBest Use
    Fiberglass BattR-2.9 to R-3.8Walls, attics, floors
    Spray Foam (Closed Cell)R-6.0 to R-7.0Walls, roof decks, air sealing
    Spray Foam (Open Cell)R-3.5 to R-4.0Interior walls, attics
    Cellulose (Blown)R-3.2 to R-3.8Attics, wall cavities
    Mineral WoolR-3.3 to R-4.2Walls, fire-resistant applications
    Rigid Foam Board (XPS)R-4.5 to R-5.0Exterior walls, foundations, roofs
    Rigid Foam Board (Polyiso)R-5.0 to R-7.0Roofs, exterior walls
    Structural Insulated Panels (SIPs)R-3.5 to R-4.0Walls, roofs

    Pro Tip: Always verify the manufacturer’s stated R-value with independent testing (ASTM C518).

    Different types of insulation materials including fiberglass, foam board, and spray foam

    Section 5: Continuous Insulation vs. Cavity Insulation [2]

    Energy codes distinguish between cavity insulation (between studs) and continuous insulation (uninterrupted layer over the framing).

    TermDefinitionWhy It Matters
    Cavity InsulationInsulation placed between framing members (studs).Allows thermal bridging through the framing.
    Continuous Insulation (CI)Insulation placed over the exterior sheathing.Reduces thermal bridging and improves overall R-value.

    Why Continuous Insulation Is Important:

    IssueExplanation
    Thermal BridgingWood and steel studs conduct heat, bypassing cavity insulation.
    Effective R-ValueThe actual R-value of a wall is lower than the sum of its parts due to thermal bridging.
    CI SolutionAdds a continuous layer of insulation over the framing, dramatically improving performance.

    Example: A wall with R-19 cavity insulation may have an effective R-value of only R-12 due to thermal bridging. Adding R-5 continuous insulation brings the effective R-value to R-17.

    Rigid foam continuous insulation being installed over exterior wall sheathing

    Section 6: Compliance Strategies

    StrategyDetails
    Design EarlyWork with a mechanical engineer to model energy performance early in the design process.
    Use Energy ModelingSoftware like EnergyPlus or IESVE can simulate building performance and optimize R-values.
    Consult Local CodesCheck with the local building department for amendments or more stringent requirements.
    Consider Whole-Building ApproachInsulation is only one piece—air sealing, windows, and HVAC systems all impact energy performance.

    Section 7: Common Mistakes and How to Avoid Them

    MistakeWhy It’s a ProblemHow to Fix It
    Using the wrong climate zone dataLeads to under-insulated buildings.Confirm your climate zone with the local building department.
    Ignoring continuous insulation requirementsResults in thermal bridging and higher energy bills.Design with continuous insulation in mind from the start.
    Not accounting for compressed insulationR-value decreases when insulation is compressed (e.g., in electrical boxes).Use insulation that fits the cavity depth or use spacers.
    Failing to seal air leaksAir infiltration bypasses insulation, reducing its effectiveness.Combine insulation with air sealing (spray foam, caulking, weatherstripping).

    Section 8: The Future of Energy Codes

    Energy codes are becoming more stringent over time. Here is what to expect:

    TrendWhat It Means
    Net Zero Energy BuildingsIncreasing push for buildings that produce as much energy as they consume.
    ElectrificationPhasing out fossil fuels; requiring electric heating, cooking, and charging.
    Embodied CarbonCodes may soon regulate the carbon footprint of building materials, not just operational energy.
    Smart ControlsIntegration of building automation and energy management systems.
    Modern commercial building with solar panels and energy-efficient design

    Conclusion

    Understanding R-value requirements is essential for any commercial building project. By selecting the right insulation types, addressing continuous insulation, and complying with local energy codes, you can reduce energy costs, improve occupant comfort, and protect your investment.

    Take Action Today:

    1. Determine your climate zone and required R-values.
    2. Select appropriate insulation materials for your project.
    3. Design with continuous insulation to reduce thermal bridging.
    4. Use energy modeling to verify compliance.
    5. Consult with a mechanical engineer for expert guidance.

    References & Notes

    [1] 2021 International Energy Conservation Code (IECC), Chapter 4 [CE] — Commercial Energy Efficiency; ANSI/ASHRAE/IES Standard 90.1-2019, Energy Standard for Buildings Except Low-Rise Residential Buildings.

    [2] 2021 IECC, Section C402.1.3 and Table C402.1.3 — Opaque Thermal Envelope Insulation Component Minimum Requirements (“All Other” occupancy column); local jurisdictional amendments may impose stricter values.

    [3] ASTM C518, Standard Test Method for Steady-State Thermal Transmission Properties by Means of the Heat Flow Meter Apparatus (basis for manufacturer-stated R-value/inch figures).

  • Portable Fire Extinguishers – Requirements by Occupancy and Location

    Portable Fire Extinguishers – Requirements by Occupancy and Location

    Portable fire extinguishers are your first line of defense against small fires in commercial buildings. However, simply having extinguishers on-site is not enough—they must be the right type, placed in the right locations, and supported by trained personnel.

    This comprehensive guide covers:

    • Which occupancies require portable fire extinguishers.
    • What types to install in different building locations.
    • Proper mounting and placement requirements.
    • Training requirements for building occupants.

    Section 1: Occupancy Requirements for Portable Fire Extinguishers [1]

    NFPA 101, the Life Safety Code, specifies which occupancies require portable fire extinguishers. The requirements depend on the occupancy type and whether the building is sprinklered.

    Occupancy TypeDoes Sprinkler Status Affect the Requirement?Portable Extinguisher Required?Code Reference
    AmbulatoryNo — required regardless of sprinklers✅ YesNFPA 101, 20.3.5.2 & 9.7.4.1
    BusinessNo — required regardless of sprinklers✅ YesNFPA 101, 38.3.5 & 9.7.4.1
    HealthcareNo — required regardless of sprinklers✅ YesNFPA 101, 18.3.5.6 & 9.7.4.1
    MercantileNo — required regardless of sprinklers✅ YesNFPA 101, 36.3.5.3
    EducationalNot applicable — verify against the current chapter text❌ No (check sprinkler requirements)NFPA 101, 14.3.5
    One & Two Family DwellingsNot applicable — verify against the current chapter text❌ No (check sprinkler requirements)NFPA 101, 24.3.5.1
    Hotels & DormitoriesYes — required in hazardous areas lacking sprinkler protection✅ Required in hazardous areas without sprinklersNFPA 101, 28.3.5.8
    ApartmentsYes — required in hazardous areas lacking sprinkler protection✅ Required in hazardous areas without sprinklersNFPA 101, 30.3.5.12
    StorageNot applicable❌ NoNFPA 101, 42.3.5

    Key Takeaway: Even when not required, providing portable fire extinguishers in all commercial buildings is a best practice that can save lives and property.

    Fire extinguisher mounted on a wall in a commercial corridor with clear signage

    Section 2: Fire Extinguisher Types by Location [2]

    Different building areas present different fire hazards. Selecting the right extinguisher type for each location is critical for effective fire response.

    Note: The table below reflects regional fire and life safety practice (Gulf Cooperation Council / Middle East civil defence guidance) and uses metric extinguisher sizes and travel distances. It is not derived from NFPA 10. Readers in U.S. jurisdictions should instead apply NFPA 10 Table 6.2.1.1 (Class A) and Table 6.3.1.1 (Class B) for extinguisher sizing and travel-distance requirements — see [2] below.

    LocationRecommended Extinguisher TypesMax Travel Distance
    Offices9 Ltr Water (Class A) + 2 kg CO2 (Class B/C)15 m
    Common Circulation Areas (Corridors, Lobbies)9 Ltr Water + 5 kg CO222.5 m
    Electrical Rooms, Mechanical Plant Rooms4.5 kg Dry Powder (ABC) + 5 kg CO29 m
    Parking Areas4.5 kg ABC Dry Powder + 2 kg CO2 + Foam Trolley (20 Gal)15 m (30 m along driveways)
    Transformer Rooms4.5 kg Dry Powder + 5 kg CO2 + 25 kg Dry Powder Trolley9 m
    HV / LV Rooms4.5 kg Dry Powder + 5 kg CO2 + 12 kg Dry Powder Trolley9 m
    Diesel Generator Rooms4.5 kg Dry Powder + 5 kg CO2 + 20 Gal Foam Trolley9 m
    Garbage Collection Rooms6 kg Dry Powder (ABC)9 m
    LibrariesABC Dry Powder (Class A, B, C) + 2 kg CO215 m
    Laboratories9 Ltr Water + 2 kg CO2 + 4.5 kg Dry Powder9 m
    Gymnasiums9 Ltr Water + 4.5 kg Dry Powder15 m
    TheatersABC Dry Powder (Class A, B, C) + 2 kg CO215 m
    Kitchens2 kg CO2 + 4.5 kg Dry Powder + Foam Extinguisher9 m
    Patient Rooms9 Ltr Water + 2 kg CO2 + 4.5 kg Dry Powder15 m
    Hotels9 Ltr Water + 2 kg CO2 + 4.5 kg Dry Powder15 m

    Important Note on Libraries and Theaters: Water extinguishers are not recommended for these locations due to the presence of electrical equipment. ABC Dry Powder is a safer, more effective alternative.

    Different types of fire extinguishers showing color codes and classification labels

    Section 3: Mounting and Placement Requirements [1]

    Proper mounting ensures that extinguishers are accessible, visible, and secure.

    RequirementDetails
    Maximum Mounting HeightTop of the fire extinguisher must be no more than 1.5 meters (5 feet) above the finished floor.
    Minimum Mounting HeightBottom of the fire extinguisher must be at least 10 cm (4 inches) from the finished floor.
    AccessibilityExtinguishers must not be blocked by furniture, equipment, or storage.
    VisibilityExtinguishers must be clearly visible or marked with a visible sign.
    SecuringExtinguishers must be securely mounted on a wall or placed in an approved stand/cabinet.

    Compliance Tip: For extinguishers weighing over 18 kg (40 lbs), the maximum mounting height is 1.07 m (3.5 feet).


    Section 4: Training Requirements [2]

    Having fire extinguishers is not enough—your staff must know how to use them.

    RequirementDetails
    Who Must Be TrainedAt least 10% of Security Personnel, Occupants, Employees, and Supervisory Personnel.
    Training ContentBasic fire awareness, extinguisher types, proper use, and operation in emergency situations.
    FrequencyInitial training upon hire and annual refresher training thereafter.
    DocumentationAll training must be documented and records retained for inspection.

    Pro Tip: Consider incorporating “hands-on” training where staff can practice using a fire extinguisher on a controlled fire (using a training prop).

    Employees participating in fire extinguisher training

    Section 5: Additional Resources

    For more information, refer to these trusted resources:


    Conclusion

    Portable fire extinguishers are a critical component of any commercial building’s fire safety plan. By understanding:

    1. Which occupancies require extinguishers.
    2. What types to install in each location.
    3. How to properly mount and place them.
    4. Who needs to be trained and how often.

    You can ensure your building is prepared for fire emergencies.

    Take Action Today:

    1. Audit your building’s fire extinguishers.
    2. Replace any incorrect types (especially water extinguishers in libraries/theaters).
    3. Schedule annual training for your staff.
    4. Document all inspections and training.

    References & Notes

    [1] NFPA 101, Life Safety Code, 2024 Edition — occupancy chapters as cited per row (9.7.4.1, 20.3.5.2, 38.3.5, 18.3.5.6, 36.3.5.3, 14.3.5, 24.3.5.1, 28.3.5.8, 30.3.5.12, 42.3.5); NFPA 10, Standard for Portable Fire Extinguishers, 2024 Edition — Section 6.1.3 (Mounting Height).

    [2] Regional fire and life safety code guidance (Gulf Cooperation Council / Middle East civil defence practice) governing extinguisher type, agent quantity, and travel distance by building area and occupant training percentage; figures presented here are metric-native and are not derived from NFPA 10. Readers in U.S. jurisdictions should apply NFPA 10 Table 6.2.1.1 (Class A) and Table 6.3.1.1 (Class B) travel-distance and sizing requirements instead.

  • Fire Extinguisher Types and Placement Requirements for Commercial Buildings

    Fire Extinguisher Types and Placement Requirements for Commercial Buildings

    Fire extinguishers are your first line of defense against small fires in commercial buildings. However, not all extinguishers are created equal—and placing the wrong type in the wrong location can be a costly mistake.

    Industry research indicates that approximately 80% of fires are successfully extinguished using a portable fire extinguisher before the fire department arrives [1]. Having the right extinguisher, properly placed and maintained, can mean the difference between a minor incident and a catastrophic loss.

    This guide covers the five main types of fire extinguishers, their uses, and NFPA 10 placement requirements for commercial buildings.


    The Five Main Types of Fire Extinguishers

    Fire extinguishers are classified by the type of fire they are designed to extinguish. Using the wrong type can be ineffective or even dangerous.

    TypeClassFire ClassTypical UseColor Code
    WaterClass AOrdinary combustibles (wood, paper, cloth, plastic)Offices, schools, warehousesRed
    Carbon Dioxide (CO2)Class B & CFlammable liquids (gas, oil, grease) and electrical firesKitchens, server rooms, mechanical roomsRed (with black band)
    Dry ChemicalClass A, B, CMulti-purpose (most common)General commercial useRed (with white band)
    Wet ChemicalClass KCooking oils and fats (commercial kitchens)Commercial kitchens, restaurantsRed (with yellow band)
    Dry PowderClass DCombustible metals (magnesium, titanium, aluminum)Industrial settings, metalworkingRed (with blue band)
    Close-up of a fire extinguisher label showing Class A, B, and C ratings

    Section 1: Choosing the Right Extinguisher for Your Building

    Selecting the right fire extinguisher depends on the type of fire hazards present in your building.

    Occupancy TypeRecommended ExtinguisherReason
    Office (Business)Dry Chemical (ABC)Covers paper, electrical equipment, and general office hazards.
    Commercial KitchenWet Chemical (Class K) + Dry Chemical (ABC)Class K for cooking oil fires; ABC for other fires.
    Server Room / Data CenterCarbon Dioxide (CO2)Leaves no residue and is safe for sensitive electronics.
    Warehouse / StorageDry Chemical (ABC)Covers a wide range of potential fire hazards.
    Industrial / ManufacturingDry Powder (Class D) or specialized extinguishersBased on specific materials being handled.

    Compliance Tip: NFPA 10 requires that extinguishers be selected based on the specific fire hazards present in the area. A single type may not be sufficient for all areas of your building.


    Section 2: NFPA 10 Placement Requirements

    NFPA 10 sets specific requirements for the placement and distribution of fire extinguishers in commercial buildings.

    RequirementDetailsCode Reference [2]
    AccessibilityExtinguishers must be readily accessible and not blocked by furniture or equipment.NFPA 10, 6.1.3
    Mounting HeightHandle must be no more than 3.5 feet (1.07 m) above the floor for extinguishers weighing over 40 lbs, and no more than 5 feet (1.5 m) for those under 40 lbs.NFPA 10, 6.1.3.9
    Travel Distance (Class A)Maximum travel distance to an extinguisher is 75 feet (22.9 m).NFPA 10, 6.2.1.1
    Travel Distance (Class B)Maximum travel distance is 50 feet (15.2 m) for flammable liquid hazards.NFPA 10, 6.3.1.1
    Travel Distance (Class C)No maximum distance, but extinguishers should be located where electrical hazards exist.NFPA 10, 6.4
    VisibilityExtinguishers must be visible or marked with a clearly visible sign.NFPA 10, 6.1.3.10
    MountingExtinguishers must be mounted on a wall or placed in a stand/cabinet.NFPA 10, 6.1.3.8

    Common Violations:

    • Extinguishers placed too high or too low.
    • Extinguishers blocked by storage or furniture.
    • Missing or damaged signage.
    • Extinguishers not inspected monthly.
    Fire extinguisher mounted at correct height with clear signage

    Section 3: Installation and Mounting Requirements

    Proper installation ensures that extinguishers are secure, accessible, and compliant with NFPA 10.

    RequirementDetails
    Mounting BracketExtinguishers must be securely mounted to prevent falling.
    Wall ClearanceExtinguishers must be installed with sufficient clearance to allow full extinguisher removal from the wall for larger models.
    CabinetsExtinguishers in cabinets must be visible through a glass panel or marked with a sign.
    Floor StandsExtinguishers over 40 lbs may be placed on floor stands, but they must be secured.

    Pro Tip: Always follow the manufacturer’s installation instructions for the specific extinguisher model.


    Section 4: Inspection and Maintenance

    Fire extinguishers require regular inspection and maintenance to remain operational.

    Inspection TypeFrequencyWhat to Check [2]
    Visual InspectionMonthlyPressure gauge in the green zone, no visible damage, pin and seal intact, accessible location.
    Maintenance CheckAnnuallyProfessional inspection of mechanical parts, refilling if needed.
    Hydrostatic TestingEvery 5–12 yearsPressure testing to ensure the cylinder is safe for use.

    Compliance Tip: Document all inspections and maintenance activities. This is essential for regulatory compliance and insurance purposes.

    Maintenance technician inspecting a fire extinguisher

    Section 5: Common Mistakes and How to Avoid Them

    MistakeWhy It’s a ProblemHow to Fix
    Using the wrong type of extinguisherCan be ineffective or dangerous for the fire class.Identify the fire hazards in each area and choose the correct type.
    Extinguisher blocked by storageDelays access during an emergency.Keep the area around extinguishers clear at all times.
    Extinguisher mounted too highDifficult for shorter staff to access.Mount at the correct height (handle 3.5–5 feet above floor).
    Not conducting monthly inspectionsExtinguisher may be discharged or damaged when needed.Assign a staff member to conduct monthly visual inspections.
    Using outdated or damaged extinguishersMay fail to operate correctly.Replace or service extinguishers that are expired or damaged.

    Conclusion

    Fire extinguishers are a critical component of any commercial building’s fire safety plan. By selecting the right types for your hazards and following NFPA 10 placement requirements, you can protect your building, your occupants, and your business.

    Take Action Today:

    1. Audit your extinguishers—identify the types and locations.
    2. Check mounting heights and travel distances to ensure compliance.
    3. Schedule a professional maintenance check for all extinguishers.
    4. Train staff on how to use extinguishers correctly.

    References & Notes

    [1] EnGauge Inc. fire extinguisher effectiveness research, as cited in industry safety compilations; National Association of Fire Equipment Distributors (NAFED), “The Effectiveness of Portable Fire Extinguishers: An Overview,” 1976–2010 survey data. Note: this figure is widely attributed to NFPA in secondary sources, but does not appear as a published NFPA statistic itself.

    [2] NFPA 10, Standard for Portable Fire Extinguishers, 2024 Edition — Sections 6.1.3 (Mounting, Location, and Marking), 6.2.1.1 (Class A Travel Distance), 6.3.1.1 (Class B Travel Distance), 6.4 (Class C Hazards), and Chapter 7 (Inspection, Maintenance, and Recharging).

  • How to Photograph Commercial Interiors Like a Pro

    How to Photograph Commercial Interiors Like a Pro

    Commercial interior photography is more than just pointing a camera and pressing the shutter. It requires a combination of technical skill, artistic vision, and an understanding of what makes a space appealing to buyers, tenants, and investors.

    High-quality interior photography can:

    • Attract premium tenants and command higher rents.
    • Accelerate property sales by showcasing the space’s best features.
    • Enhance your brand as a professional who values quality presentation.

    Whether you are a real estate agent, property manager, or architect, these tips will help you capture stunning commercial interiors.


    1. Invest in a Wide-Angle Lens

    A wide-angle lens is essential for interior photography. It allows you to capture the full scale and layout of a room, making even small spaces feel open and inviting.

    RecommendationDetails
    Focal Length16–35mm (full-frame) or 10–20mm (crop sensor).
    Why It WorksCaptures more of the space, highlights design features, and creates a sense of depth.
    Pro TipAvoid going too wide (below 14mm) to prevent extreme distortion at the edges.
    Wide-angle view of a modern office interior with large windows and open space

    2. Use Natural Light Whenever Possible

    Natural light is the most flattering light source for interior photography. It creates a warm, inviting atmosphere and highlights the true colors of the space.

    StrategyDetails
    Shoot During the DaySchedule shoots when the sun is high but not directly shining in.
    Turn Off Harsh Overhead LightsOverhead fluorescent lighting creates unflattering shadows and color casts.
    Use ReflectorsBounce natural light into dark corners using a white foam board or reflector.
    Avoid Direct SunlightHarsh sunlight creates high contrast and blown-out highlights.

    Pro Tip: If the space has large windows, shoot on a slightly overcast day—the clouds act as a giant diffuser and create soft, even light.

    Bright office interior with natural light streaming through large windows

    3. Master the Art of Composition

    Good composition makes a photo feel balanced and intentional. These techniques will elevate your interior shots:

    TechniqueDetails
    Leading LinesUse lines (e.g., corridors, table edges) to draw the viewer’s eye into the space.
    Rule of ThirdsPlace key elements off-center for a more dynamic composition.
    Vertical LinesKeep vertical lines straight—avoid tilting the camera up or down to prevent distortion.
    Frame Within a FrameUse doorways or windows to frame the scene and add depth.

    Pro Tip: When composing a shot, step back and look at the scene as a whole. Remove unnecessary clutter and rearrange furniture if needed.

    Elegant lobby with curved staircase and modern lighting

    4. Use a Tripod for Sharp, Consistent Images

    A tripod is essential for commercial interior photography. It ensures sharp images, especially in low-light conditions.

    AdvantageDetails
    SharpnessEliminates camera shake for crisp, clear images.
    ConsistencyAllows you to capture multiple images from the exact same angle for HDR blending.
    Low-Light PerformanceEnables longer exposure times without introducing blur.
    PrecisionHelps you carefully compose your shot without rushing.

    Pro Tip: Use a remote shutter release or your camera’s 2-second timer to eliminate any vibration from pressing the shutter button.


    5. Shoot Multiple Exposures for HDR Blending

    Commercial interiors often have extreme contrast—bright windows and dark corners. A single exposure cannot capture both.

    SolutionDetails
    Auto Exposure Bracketing (AEB)Take 3–5 exposures (underexposed, normal, overexposed).
    HDR BlendingMerge the exposures in post-processing (software like Lightroom, Photomatix, or Photoshop).
    Why It WorksRetains detail in both the highlights (windows) and shadows (dark corners).

    Pro Tip: When blending HDR images, aim for a natural look. Overcooked HDR photos look unnatural and turn off potential tenants.

    Well-balanced interior shot showing detail in windows and interior

    6. Highlight Architectural Features

    Every commercial property has unique features that make it special. Highlighting these features in your photography attracts the right kind of attention.

    Features to HighlightWhy They Matter
    High CeilingsCreates a sense of spaciousness and prestige.
    Large WindowsShows abundant natural light and views.
    Exposed BeamsAdds character and industrial appeal.
    Custom MillworkDemonstrates quality craftsmanship and attention to detail.
    Modern FixturesSignals a well-maintained, updated property.

    Pro Tip: Focus on the features that differentiate the property from competitors. If it has a beautiful lobby, make that the hero shot.

    Close-up of architectural detail showing exposed beams and modern fixtures

    7. Stage the Space Before Shooting

    Staging is not just for residential properties—it is equally important for commercial interiors.

    Staging TipDetails
    DeclutterRemove personal items, excess furniture, and clutter.
    Add DecorUse plants, artwork, and coffee table books to create warmth.
    Arrange FurnitureCreate a logical flow that guides the viewer’s eye through the space.
    Turn On LightsUse floor and table lamps to add warmth and depth.

    Pro Tip: If the space is completely empty, use CGI (computer-generated imagery) or rent temporary furniture to show how the space could look.

    Staged commercial office with modern furniture and decor

    Conclusion

    Commercial interior photography is an investment, not an expense. High-quality photos attract better tenants, command higher rents, and close deals faster.

    By implementing these 7 tips—investing in a wide-angle lens, using natural light, mastering composition, using a tripod, shooting HDR, highlighting architectural features, and staging the space—you will dramatically improve the visual appeal of your listings.

    Take Action Today:

    1. Schedule your next interior shoot during the golden hour.
    2. Use a tripod and shoot bracketed exposures.
    3. Stage the space and highlight its best features.
  • A Complete Guide to the Chapter Organization of NFPA 101

    A Complete Guide to the Chapter Organization of NFPA 101

    Navigating the NFPA 101 Life Safety Code can be intimidating. With hundreds of pages and thousands of requirements, knowing where to find specific information is half the battle.

    Fortunately, NFPA 101 follows a highly structured, consistent format for every occupancy type. Once you understand this organization, you can quickly find the exact code requirements for any building—whether it is an assembly space, a hospital, or a high-rise office.

    Here is a comprehensive breakdown of how NFPA 101 is organized.


    Occupancy Chapters (The Core of NFPA 101)

    The heart of the Life Safety Code is its occupancy-specific chapters. Each chapter applies to a specific building type and follows the exact same 7-section structure [1].

    The primary occupancy chapters are:

    ChapterOccupancy Type
    12Assembly (e.g., theaters, restaurants, arenas)
    14Educational (Schools, colleges)
    16Daycare (Adult and child care centers)
    18Healthcare (Hospitals, nursing homes)
    20Ambulatory Healthcare (Outpatient clinics, surgical centers)
    22Detention and Correctional (Jails, prisons)
    24One & Two Family Dwellings
    26Lodging or Rooming Houses (Bed & Breakfasts, boarding houses)
    28Hotels & Dormitories
    30Apartments
    32Residential Care (Group homes, assisted living)
    36Mercantile (Retail stores, shops)
    38Business (Offices, banks)
    40Industrial (Factories, warehouses with processing)
    42Storage (Warehouses, distribution centers)

    Why This Matters: If you are designing a retail store, you only need to read Chapter 36 (Mercantile) plus the general requirements in Chapters 1–9.

    A collage of different commercial building types including office, retail, and hospital buildings.

    The 7-Section Structure of Every Occupancy Chapter

    Every occupancy chapter (12 through 42) is organized into seven (7) sections. This consistent structure makes it easy to find the rules that apply to your specific building.


    Section 1: General (Occupancy Chapter 1) [2]

    This section defines the scope of the chapter and clarifies how it applies to new and existing buildings. It covers fundamental requirements such as:

    • Application: Whether the rules apply to new construction, renovations, or existing buildings.
    • Classification of Occupancy: How to correctly classify a building (e.g., Is this a Business or a Mercantile space?).
    • Multiple Occupancies: Rules for buildings that contain more than one occupancy type (e.g., a retail store on the ground floor and offices above).
    • Hazard of Contents: Classification of contents as Low, Ordinary, or High Hazard, which impacts construction requirements.
    • Minimum Construction Requirements: The basic fire-resistance ratings required for the building type.
    Commercial building undergoing renovation with scaffolding

    Section 2: Means of Egress (Occupancy Chapter 2) [3]

    This is the most critical section for occupant safety. Chapter 7 of NFPA 101 applies to ALL occupancies, but Chapter 2 of the occupancy chapters tailors these rules to the specific building type.

    Key topics include:

    • Egress Components: Requirements for doors, stairs, ramps, and exit passageways.
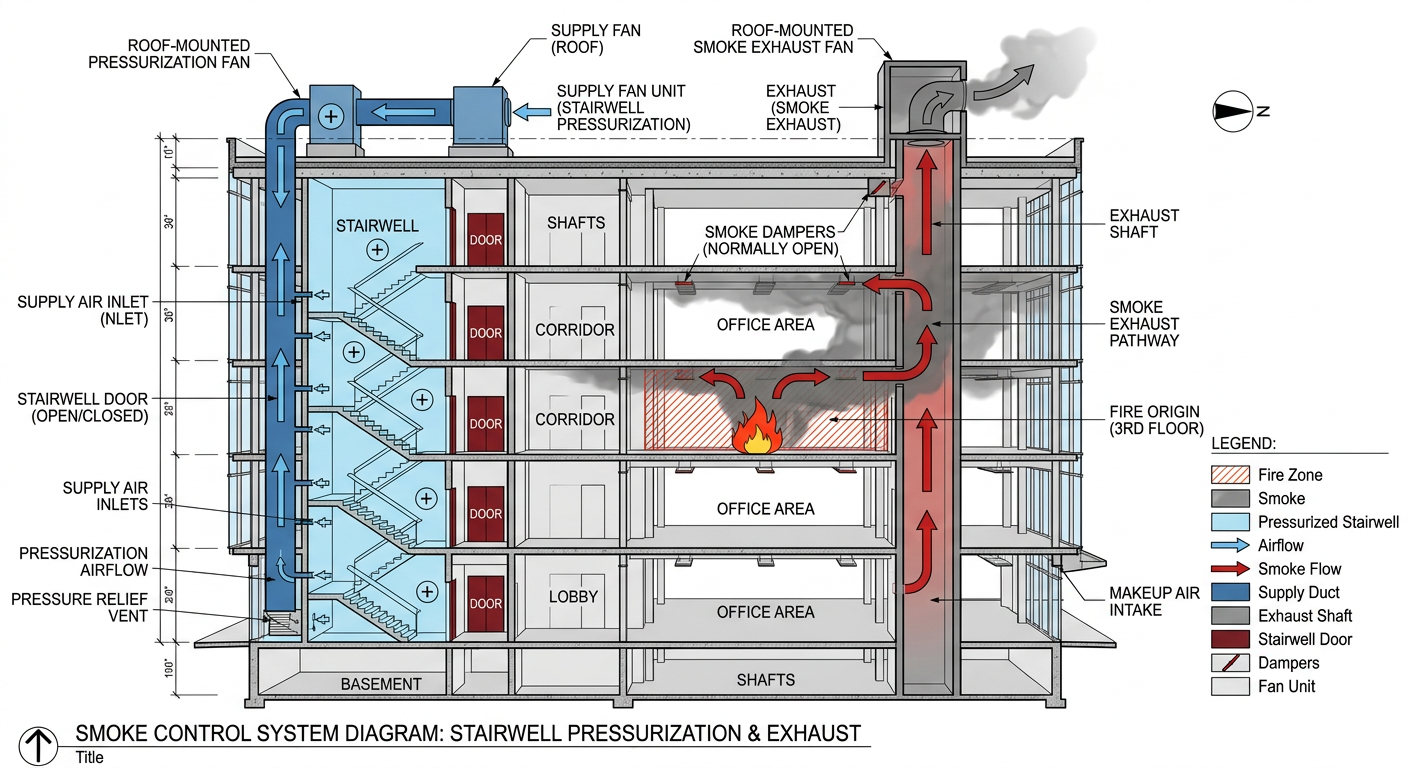
    • Smokeproof Enclosures: Special stair enclosures required for high-rise buildings.
    • Capacity of Means of Egress: How to calculate the required width of exits based on occupant load.
    • Number of Means of Egress: How many exits are required (we covered this in Article 7).
    • Travel Distance: How far occupants must travel to reach an exit.
    • Emergency Lighting and Marking: Exit signs and illumination requirements.
    Commercial emergency exit door with push bar and illuminated exit sign

    Section 3: Protection (Occupancy Chapter 3) [4]

    This section mandates the fire protection features required for the occupancy. Many of these are directly tied to the building’s construction type and height.

    • Vertical Openings: Protection of stairwells, elevator shafts, and atriums to prevent fire spread between floors (8.6).
    • Interior Finish: Restrictions on wall and ceiling finishes (e.g., limiting the use of wood paneling in corridors) (10.2).
    • Detection, Alarm, and Communication Systems: Requirements for smoke detectors, pull stations, and voice alarms (9.6).
    • Extinguishing Requirements: When sprinklers or standpipes are mandatory (9.7).
    • Subdivision of Building Spaces (Smoke Compartments): Requiring large buildings to be divided into smoke-resistant compartments (8.5).

    Section 4: Special Provisions (Occupancy Chapter 4) [5]

    This section addresses unique building features that require extra safety measures. Provisions can vary by occupancy.

    • High-Rise Buildings (11.8): Stricter requirements for buildings over 75 feet tall.
    • Limited Access/Underground Buildings (11.7): Rules for buildings where fire department access is challenging.
    • Atriums, Stages, and Platforms: Specific fire safety rules for these architectural features.

    Section 5: Building Services (Occupancy Chapter 5) [6]

    This section ensures that building utilities and systems do not create fire hazards.

    • Utilities (9.1): Electrical wiring and gas piping requirements.
    • HVAC Systems (9.2): Heating, ventilation, and air conditioning rules.
    • Elevators, Escalators, and Conveyors (9.4): Fire safety features for these mechanical systems.
    • Rubbish/Laundry Chutes (9.5): Fire-rated construction and sprinklers for chutes.
    Commercial building rooftop HVAC system

    Section 6: Special Occupancy Provisions (Occupancy Chapter 6) [7]

    This section is often a “catch-all” for occupancies that do not fit neatly into the standard categories.

    • Example: Daycare homes may be covered here if they are not large enough to meet the full requirements of the Educational or Daycare chapters.
    • Example: Special storage facilities (like aircraft hangars or parking garages) may have unique regulations housed in this section of the Storage chapter.

    Section 7: Operating Features (Occupancy Chapter 7) [8]

    This section focuses on the operational and management aspects of fire safety—things that are not built into the physical structure but must be done by the building management.

    • Fire Exit Drills: How often building evacuations must be practiced.
    • Maintenance and Planning: Ensuring equipment (fire alarms, sprinklers) are kept in working order.
    • Smoking Regulations: Where smoking is prohibited.
    • Construction and Repairs: Safety measures to be taken while the building is being renovated.
    Commercial building fire drill with employees evacuating via stairwell

    Why This Matters for Building Owners and Managers

    Understanding the structure of NFPA 101 is not just for code officials—it is a practical tool for building professionals.

    1. Saves Money: By knowing which sections apply to your project, you avoid over-designing (and over-spending) on features that are not required.
    2. Faster Plan Review: When you submit plans to the fire marshal, referencing specific NFPA 101 sections demonstrates professionalism and speeds up the review process.
    3. Simplifies Compliance: You only need to read the chapters that apply to your specific occupancy type, plus Chapters 1–9 for general rules.

    Conclusion

    The NFPA 101 Life Safety Code is meticulously organized. By understanding that every occupancy chapter is divided into the same 7 sections—General, Means of Egress, Protection, Special Provisions, Building Services, Special Occupancies, and Operating Features—you can quickly locate the information you need.

    This structure makes NFPA 101 one of the most user-friendly model codes in the United States. Master this organization, and you master the code.


    References & Notes

    [1] NFPA 101, Life Safety Code, 2024 Edition — Occupancy Chapters 12 through 42.

    [2] NFPA 101, 2024 Edition, Section [X].1 — General (per occupancy chapter).

    [3] NFPA 101, 2024 Edition, Section [X].2 — Means of Egress; see also Chapter 7, Means of Egress (general requirements).

    [4] NFPA 101, 2024 Edition, Section [X].3 — Protection; Chapter 8, Features of Fire Protection (Sections 8.5, 8.6, 10.2); Chapter 9, Building Service and Fire Protection Equipment (Section 9.6, 9.7).

    [5] NFPA 101, 2024 Edition, Section [X].4 — Special Provisions; Section 11.7, Limited Access and Underground Buildings; Section 11.8, High-Rise Buildings.

    [6] NFPA 101, 2024 Edition, Section [X].5 — Building Services; Chapter 9, Sections 9.1, 9.2, 9.4, 9.5.

    [7] NFPA 101, 2024 Edition, Section [X].6 — Special Occupancy Provisions (occupancy-specific, e.g., 16.6 for Day-Care Homes).

    [8] NFPA 101, 2024 Edition, Section [X].7 — Operating Features.

  • How to Design a Commercial Kitchen That Meets IBC and Health Codes

    How to Design a Commercial Kitchen That Meets IBC and Health Codes

    Designing a commercial kitchen is one of the most complex challenges in commercial architecture. It requires balancing functionality, safety, and compliance with multiple codes—including the International Building Code (IBC), NFPA, and local health department regulations.

    A well-designed commercial kitchen is not just about aesthetics; it is about:

    • Ensuring food safety and preventing contamination.
    • Protecting occupants from fire and smoke hazards.
    • Maximizing efficiency for staff workflow.
    • Avoiding costly fines and permit delays.

    This guide covers the most critical code requirements for commercial kitchen design.


    Section 1: IBC Occupancy Classification

    The IBC classifies commercial kitchens based on their use and occupancy type. [9]

    Occupancy TypeIBC ClassificationKey Requirements
    Restaurant KitchenAssembly (A-2)Must meet egress, fire suppression, and ventilation requirements.
    Cafeteria/Institutional KitchenAssembly (A-2) or Business (B)Depends on seating capacity and primary use.
    Commercial BakeryFactory/Industrial (F-1)May have additional requirements for flour dust and equipment.

    Compliance Tip: Verify your occupancy classification early in the design process, as it impacts everything from egress to fire suppression.

    Commercial kitchen floor plan showing equipment layout and workflow

    Section 2: Fire Suppression and Protection

    Commercial kitchens are high-risk areas for fires. The IBC and NFPA have strict requirements for fire suppression and protection.

    RequirementDetailsCode Reference
    Automatic Fire SuppressionAll commercial cooking equipment (fryers, grills, ranges) must have an automatic fire suppression system.NFPA 96, IBC Section 904 [1]
    Wet Chemical SystemsSystems must use wet chemical agents (not water) to suppress grease fires.NFPA 96 [2]
    Fire ExtinguishersClass K fire extinguishers must be readily accessible within 30 feet of cooking equipment.NFPA 10, IBC Section 906 [3]
    Fire-Rated ConstructionKitchens must be separated from dining areas with fire-rated walls and doors (minimum 1-hour rating).IBC Section 508 [4]
    Ventilation HoodsAll cooking equipment must be under a ventilation hood that meets NFPA 96 standards.NFPA 96, IMC Section 506 [5]

    Common Violation: Missing or improperly maintained fire suppression systems, lack of Class K extinguishers, or hoods that are not cleaned regularly.

    Fire suppression system nozzles above commercial cooking equipment

    Section 3: Ventilation and Exhaust Requirements

    Proper ventilation is critical for commercial kitchens to remove heat, smoke, and grease-laden vapors.

    RequirementDetailsCode Reference
    Exhaust HoodsAll cooking equipment must be covered by an exhaust hood that captures grease and smoke.NFPA 96, IMC Section 506 [5]
    Makeup AirKitchens must have adequate makeup air to replace air exhausted by hoods.IMC Section 401 [6]
    Grease DuctsDucts must be constructed of steel and have access panels for cleaning.NFPA 96 [2]
    Cleaning ScheduleHoods and ducts must be cleaned regularly (frequency depends on usage).NFPA 96 [2]

    Compliance Tip: Work with a mechanical engineer to calculate the correct exhaust and makeup air rates for your kitchen.

    Commercial kitchen ventilation hood with ductwork

    Section 4: Health and Sanitation Codes

    Local health departments have strict requirements for commercial kitchens to prevent foodborne illness.

    RequirementDetails
    Handwashing SinksAt least one handwashing sink must be accessible in the kitchen (not in restrooms).
    Three-Compartment SinkRequired for dishwashing if a commercial dishwasher is not installed.
    Food StorageFood must be stored at least 6 inches off the floor on shelving.
    Separate AreasRaw meat preparation must be separated from ready-to-eat food preparation.
    Grease TrapsRequired to prevent grease from entering the sewer system.
    FlooringMust be non-absorbent, slip-resistant, and easy to clean (e.g., tile or sealed concrete).

    Common Violation: Missing handwashing sinks, improper food storage, or floors that are difficult to clean.

    Commercial kitchen handwashing sink with soap and towel dispenser

    Section 5: Egress and Accessibility

    Commercial kitchens must meet IBC egress and ADA accessibility requirements.

    RequirementDetailsCode Reference
    Minimum Two ExitsKitchens with an occupant load of more than 50 must have at least two exits.IBC Section 1006 [7]
    Clear WidthExit doors must have a clear opening width of at least 32 inches.IBC Section 1010 [7]
    Accessible RouteKitchens must have an accessible route to all work areas.ADA, IBC Chapter 11 [8]
    Door HardwareLever handles (not round knobs) are required.ADA, IBC Chapter 11 [8]

    Compliance Tip: Ensure all exit doors swing in the direction of travel and are not blocked by equipment or storage.

    Commercial kitchen exit door with push bar hardware

    Section 6: Equipment and Utility Requirements

    Commercial kitchens have unique equipment and utility requirements.

    RequirementDetails
    Electrical LoadMust accommodate heavy electrical loads (ovens, fryers, refrigerators).
    Gas LinesMust be properly sized and installed by a licensed professional.
    PlumbingMust handle high water usage and grease-laden wastewater.
    LightingMust provide adequate illumination for food preparation (minimum 50 foot-candles). [10]
    VentilationMust remove heat and fumes; separate from HVAC system.

    Compliance Tip: Engage a licensed mechanical, electrical, and plumbing (MEP) engineer during the design phase.


    Conclusion

    Designing a commercial kitchen that meets IBC, NFPA, and health codes requires careful planning and coordination with multiple professionals. By addressing these requirements early in the design process, you can:

    • Avoid costly redesigns and construction delays.
    • Ensure the safety of staff and occupants.
    • Comply with all applicable codes and regulations.
    • Create an efficient, functional space that supports your business operations.

    References & Notes

    [1] 2024 International Building Code (IBC), Section 904.12 — Commercial Cooking Systems.

    [2] NFPA 96, Standard for Ventilation Control and Fire Protection of Commercial Cooking Operations.

    [3] NFPA 10, Standard for Portable Fire Extinguishers, Section 6.6.2 (30-ft. travel distance for Class K extinguishers).

    [4] 2024 IBC, Section 508 — Mixed Use and Occupancy.

    [5] NFPA 96; 2024 International Mechanical Code (IMC), Section 506 — Commercial Kitchen Hoods.

    [6] 2024 IMC, Section 401 — General (Ventilation Air).

    [7] 2024 IBC, Section 1006 — Number of Exits and Exit Access Doorways, and Section 1010 — Doors.

    [8] 2010 ADA Standards for Accessible Design; 2024 IBC, Chapter 11 — Accessibility.

    [9] 2024 IBC, Table 302.1 — Occupancy Classification.

    [10] FDA Food Code, Section 6-303.11 — Lighting, Intensity (minimum 50 foot-candles at food preparation surfaces).

  • Building Code Setback Requirements for Commercial Properties

    Building Code Setback Requirements for Commercial Properties

    Setback requirements are one of the most fundamental—and often confusing—aspects of commercial building codes. A setback is the minimum distance a building must be located from the property line, street, or other structures.

    Understanding setbacks is critical for:

    • Maximizing usable space on your property.
    • Avoiding costly redesigns and permit delays.
    • Ensuring compliance with local zoning and IBC regulations.

    In this article, we break down the key setback requirements for commercial properties.


    Section 1: What Are Setbacks?

    A setback is a regulated distance that a building or structure must be set back from a property line, street, or other boundary. Setbacks serve several important purposes:

    PurposeExplanation
    Fire SafetyPrevents fire from spreading between buildings.
    AccessAllows emergency vehicles to access the building.
    Light & AirEnsures adequate natural light and ventilation.
    AestheticsCreates consistent streetscapes and prevents overcrowding.
    InfrastructureAllows space for utilities, sidewalks, and landscaping.

    Setbacks are typically established by local zoning ordinances, but the International Building Code (IBC) also provides minimum requirements for fire safety and structural integrity [1].

    Architectural site plan showing building setbacks

    Section 2: IBC Setback Requirements

    The IBC does not prescribe specific setback distances—those are determined by local zoning. However, the IBC does require that setbacks accommodate:

    RequirementDetails
    Fire SeparationBuildings must be separated by a minimum distance based on construction type and occupancy. [2]
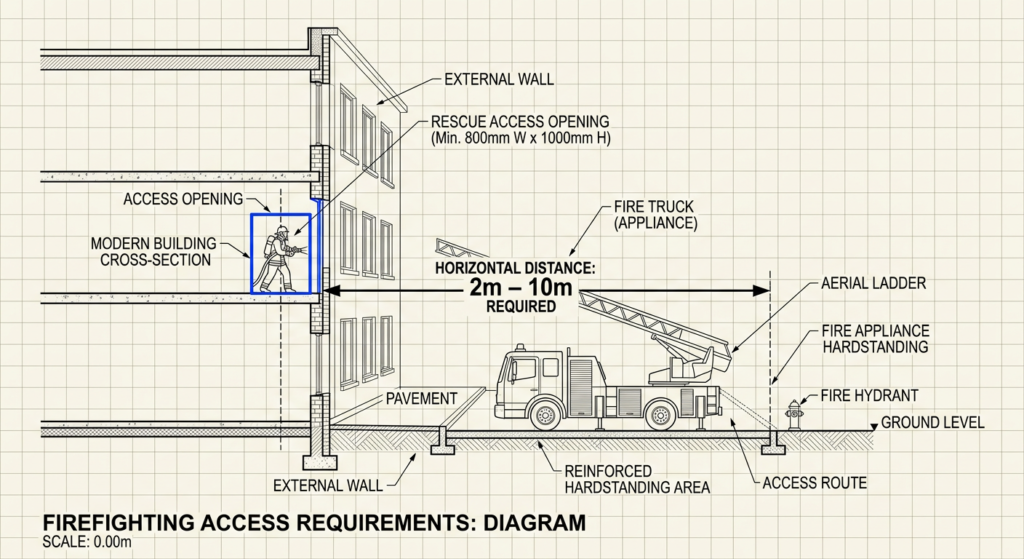
    Access for FirefightersBuildings must have adequate clearance for fire apparatus access roads. [3]
    Structural IntegritySetbacks must consider foundation requirements and soil conditions.

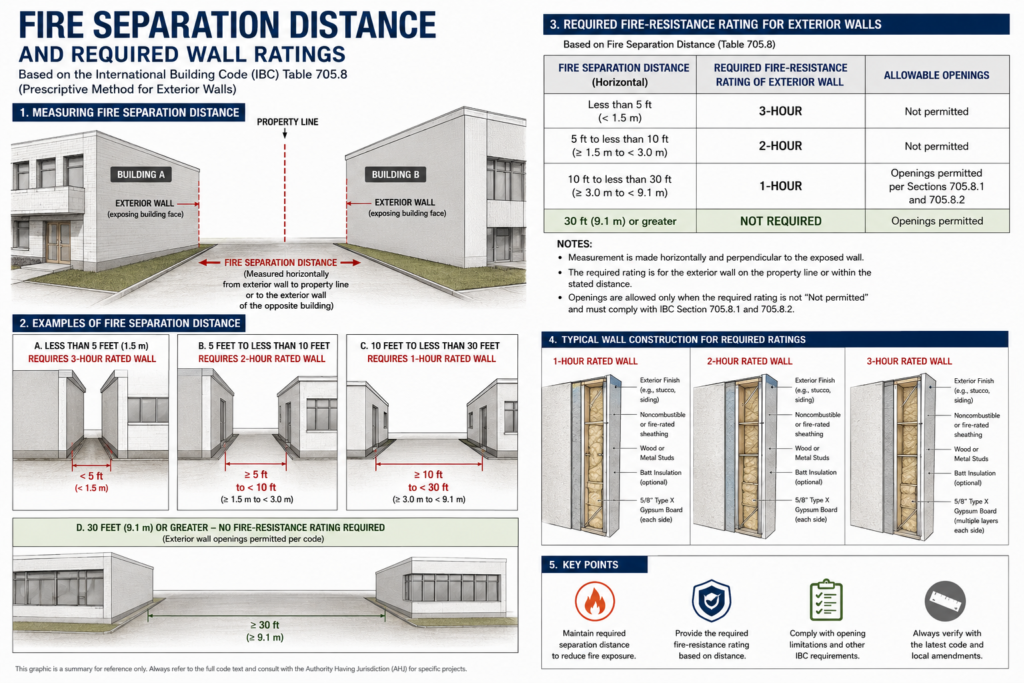
    Key IBC Reference: IBC Section 705 (Fire Separation Distance) governs the minimum distance a building’s exterior walls must maintain from property lines based on construction type, with closer distances requiring higher fire-resistance ratings [2]. Separately, the International Fire Code (IFC) Section 503 requires fire apparatus access roads to be provided within a specified distance of the building [3].

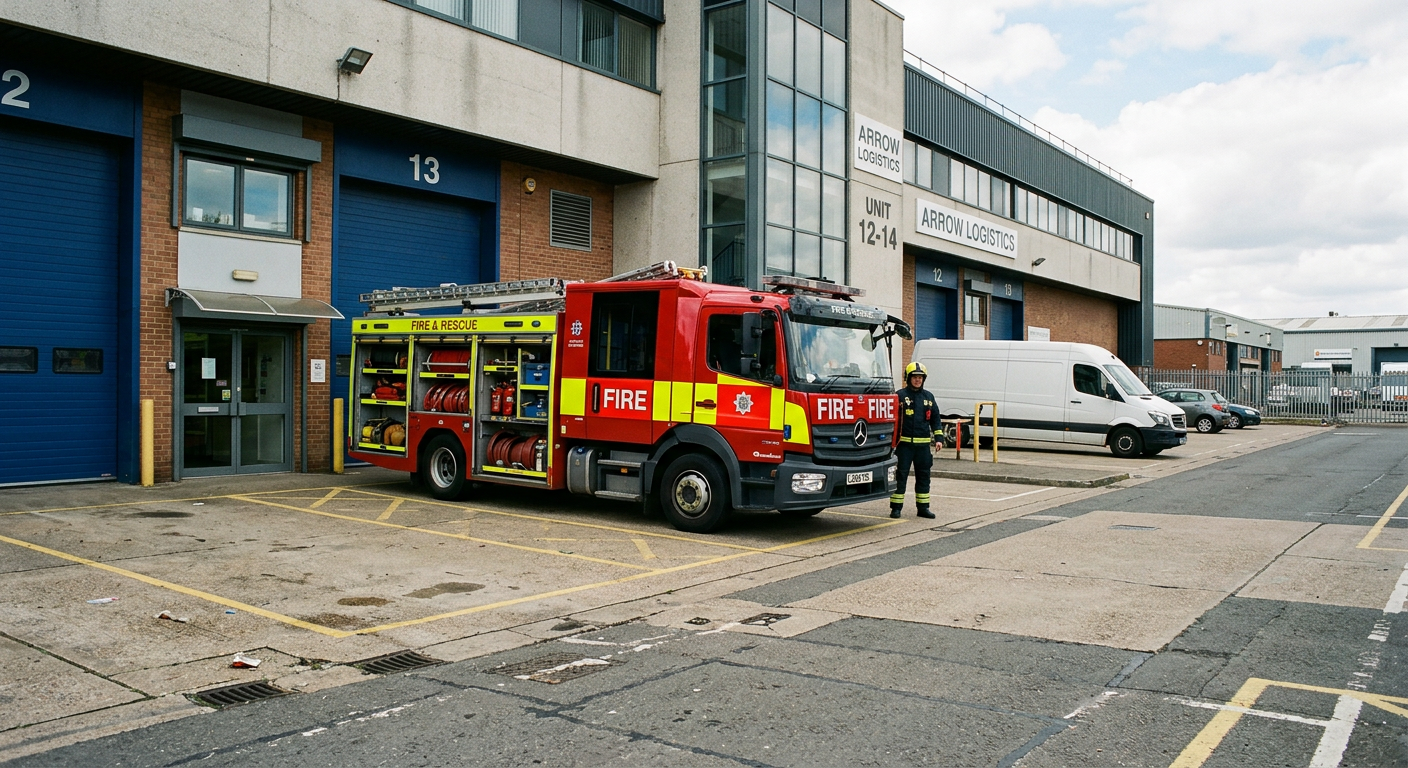
    Fire truck parked next to commercial building showing access

    Section 3: Front Setbacks

    The front setback is the distance between the front property line (typically the street) and the front face of the building.

    RequirementDetails
    Typical DistanceVaries by zone: often 10–30 feet for commercial properties.
    PurposeProvides space for sidewalks, landscaping, parking, and utilities.
    ExceptionsUrban areas may have reduced or zero setbacks for “build-to” lines.

    Common Violation: Building too close to the street, blocking sidewalks, or failing to provide adequate pedestrian access.

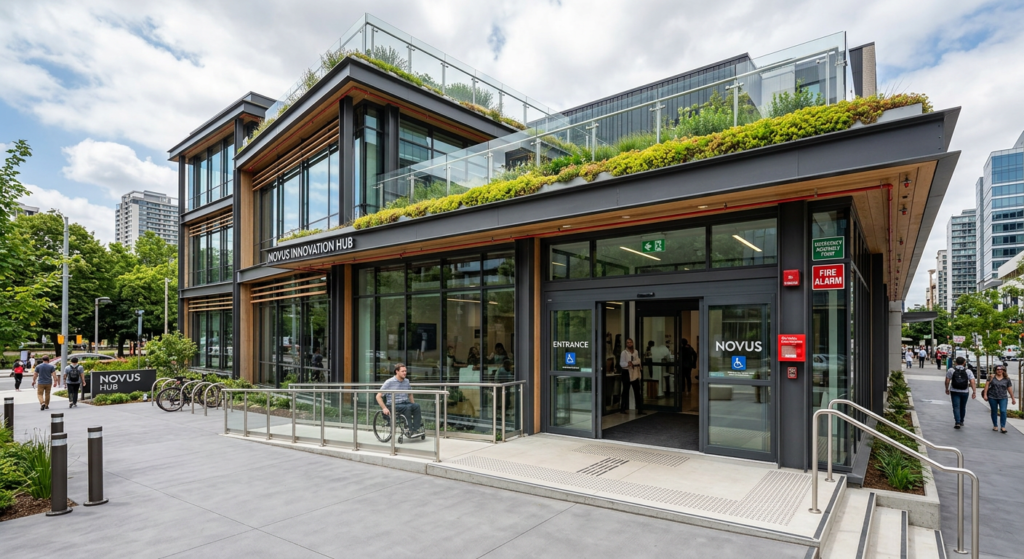
    Modern commercial building with front setback and landscaping

    Section 4: Rear and Side Setbacks

    Rear setbacks are the distance from the rear property line to the building. Side setbacks are the distance from the side property lines to the building.

    RequirementDetails
    Typical Side SetbackOften 5–10 feet per side for commercial properties.
    Typical Rear SetbackOften 10–20 feet for commercial properties.
    PurposeProvides access for maintenance, fire safety, and utilities.
    ExceptionsZero-lot-line developments may have reduced setbacks on one or both sides.

    Common Violation: Building too close to the property line, blocking access for maintenance or emergency vehicles.

    Service lane behind commercial building showing rear setback

    Section 5: How to Determine Setback Requirements for Your Project

    Here is a step-by-step guide to determining the setback requirements for your commercial project:

    StepAction
    1Contact your local building department or planning commission.
    2Obtain a copy of your local zoning ordinance or land use code.
    3Identify your property’s zoning classification (e.g., C-1, C-2, Commercial).
    4Look up the setback requirements for that zoning classification.
    5Verify any special conditions (e.g., historic districts, flood zones).
    6Consult with a licensed architect or land surveyor for verification.

    Pro Tip: Many cities have online zoning maps where you can input your address and find setback requirements instantly.


    Section 6: Common Setback Exceptions and Variances

    In some cases, you may be able to obtain a variance or exception to setback requirements.

    ExceptionDetails
    Build-to LinesUrban areas may require buildings to be built to a specific distance (often right up to the sidewalk).
    Planned Unit Developments (PUDs)May have different setback requirements than standard zoning.
    Historic DistrictsMay have stricter or different setback requirements to preserve character.
    VariancesGranted by the local zoning board if strict compliance would cause undue hardship.

    Important: Variances are not guaranteed and typically require public hearings. Always consult with your local planning department early in the design process.


    Conclusion

    Setback requirements are a critical consideration for any commercial building project. By understanding the rules early in the design process, you can:

    • Avoid costly redesigns and permit delays.
    • Maximize usable space on your property.
    • Ensure compliance with both IBC and local zoning regulations.

    Take Action Today:

    1. Check your property’s zoning classification.
    2. Look up the setback requirements for your zone.
    3. Consult with a local architect or building official before starting design.

    References & Notes

    [1] 2024 International Building Code (IBC), Chapter 5 — General Building Heights and Areas.

    [2] 2024 IBC, Section 705 — Fire Separation Distance, and Table 705.5 — Fire-Resistance Rating Requirements Based on Fire Separation Distance.

    [3] 2024 International Fire Code (IFC), Section 503 — Fire Apparatus Access Roads.

    [4] Local zoning ordinances / municipal land use codes — front, side, and rear setback distances are established at the local jurisdiction level, not by the IBC.

  • NFPA 101 – Required Number of Means of Exit by Occupancy Type

    NFPA 101 – Required Number of Means of Exit by Occupancy Type

    Understanding the required number of means of exit is critical for building safety and NFPA 101 compliance. This quick-reference table summarizes the minimum number of exits required for different occupancy types based on the Life Safety Code.

    Always verify with your local authorities and the latest edition of NFPA 101 for complete requirements.


    Required Number of Means of Exit by Occupancy Type

    Occupancy Type (New Building)Code ReferenceNumber of Means of Exit
    AMBULATORY (Sprinklered or Not Sprinklered)(20.2.4 and 7.4)Minimum Two (2)
    ASSEMBLY (Sprinklered or Not Sprinklered)(12.2.4 and 7.4)Minimum Two (2) for occupant loads of 50 or more
    BUSINESS (Sprinklered or Not Sprinklered)(38.2.4 and 7.4)Minimum Two (2) on every storey. Single exit permitted only in limited cases — e.g., ≤3 storeys with ≤30 occupants per storey and ≤100 ft travel (38.2.4.4), or a sprinklered two-storey single-tenant building with ≤100 ft travel (38.2.4.6).
    HEALTHCARE(18.2.4 and 7.4)Minimum Two (2) on every storey
    EDUCATIONAL(14.2.4 and 7.4) (14.2.5.4)Minimum Two (2) on every storey. Room shall have at least Two (2) doors if area > 93 sqm or Occupant Load > 50 persons.
    ONE & TWO FAMILY DWELLINGS(N/A)No Requirements
    HOTELS AND DORMITORIES(28.2.4 and 7.4)Minimum Two (2) on every storey
    APARTMENTS(30.2.4 and 7.4)Minimum Two (2). Single exit permitted only for buildings of ≤4 storeys with ≤4 dwelling units per storey, fully sprinklered, ≤35 ft travel from a unit door to the exit, with 1-hour-rated stair and corridor enclosure.
    MERCANTILE(36.2.4 and 7.4)Minimum Two (2) on every storey. Single exit permitted only in a Class C store (≤3,000 sq ft, one storey) with ≤100 ft travel, fully sprinklered (36.2.4.4).
    STORAGE(42.2.4 and 7.4)Single Exit allowed in Low hazard occupancy. Single Exit allowed in Ordinary hazard occupancy on condition that distance to exit is within the permitted Common Path of Travel distance. Minimum Two (2) if otherwise the above.
    INDUSTRIAL(40.2.4.1.1)Minimum Two (2) on every storey and not less than one exit shall be reached without traversing another storey.
    Building evacuation floor plan with exits marked in red

    NFPA 101 – 7.4.1.2

    The number of Room Exits or Storey Exits, other than for existing buildings permitted in Chapters 12 through 42, shall be as follows:

    Occupant LoadMinimum Number of Exits
    More than 500 but not more than 1000Not less than 3
    More than 1000Not less than 4

    NFPA Xchange Community Discussions

    For more insights and discussions on means of egress requirements, visit the NFPA Xchange community:


    Disclaimer

    • Code Reference: NFPA 101, 2024 edition.
    • Purpose: This is a quick reference only, not a complete restatement of the code. Some jurisdictions adopt NFPA 101 with local amendments — always confirm current requirements with your local Authority Having Jurisdiction (AHJ) or a licensed fire protection professional before relying on this table for a specific project.

    References & Notes

    [1] NFPA 101, Life Safety Code, 2024 Edition, Chapter 7 — Means of Egress (Section 7.4, Number of Exits).

    [2] NFPA 101, 2024 Edition, Chapter 12/13 — Assembly Occupancies.

    [3] NFPA 101, 2024 Edition, Chapter 38/39 — Business Occupancies.

    [4] NFPA 101, 2024 Edition, Chapter 18/19 — Health Care Occupancies.

    [5] NFPA 101, 2024 Edition, Chapter 14/15 — Educational Occupancies.

    [6] NFPA 101, 2024 Edition, Chapter 28/29 — Hotels and Dormitories.

    [7] NFPA 101, 2024 Edition, Chapter 30/31 — Apartment Buildings.

    [8] NFPA 101, 2024 Edition, Chapter 36/37 — Mercantile Occupancies.

    [9] NFPA 101, 2024 Edition, Chapter 42 — Storage Occupancies.

    [10] NFPA 101, 2024 Edition, Chapter 40 — Industrial Occupancies.

    Note: Certain occupancy chapters (Business, Apartments, Mercantile) gained expanded single-exit allowances in the 2024 edition that did not exist in earlier editions. Where your building may qualify for one of these exceptions, confirm the exact criteria against the current code text or with your AHJ.