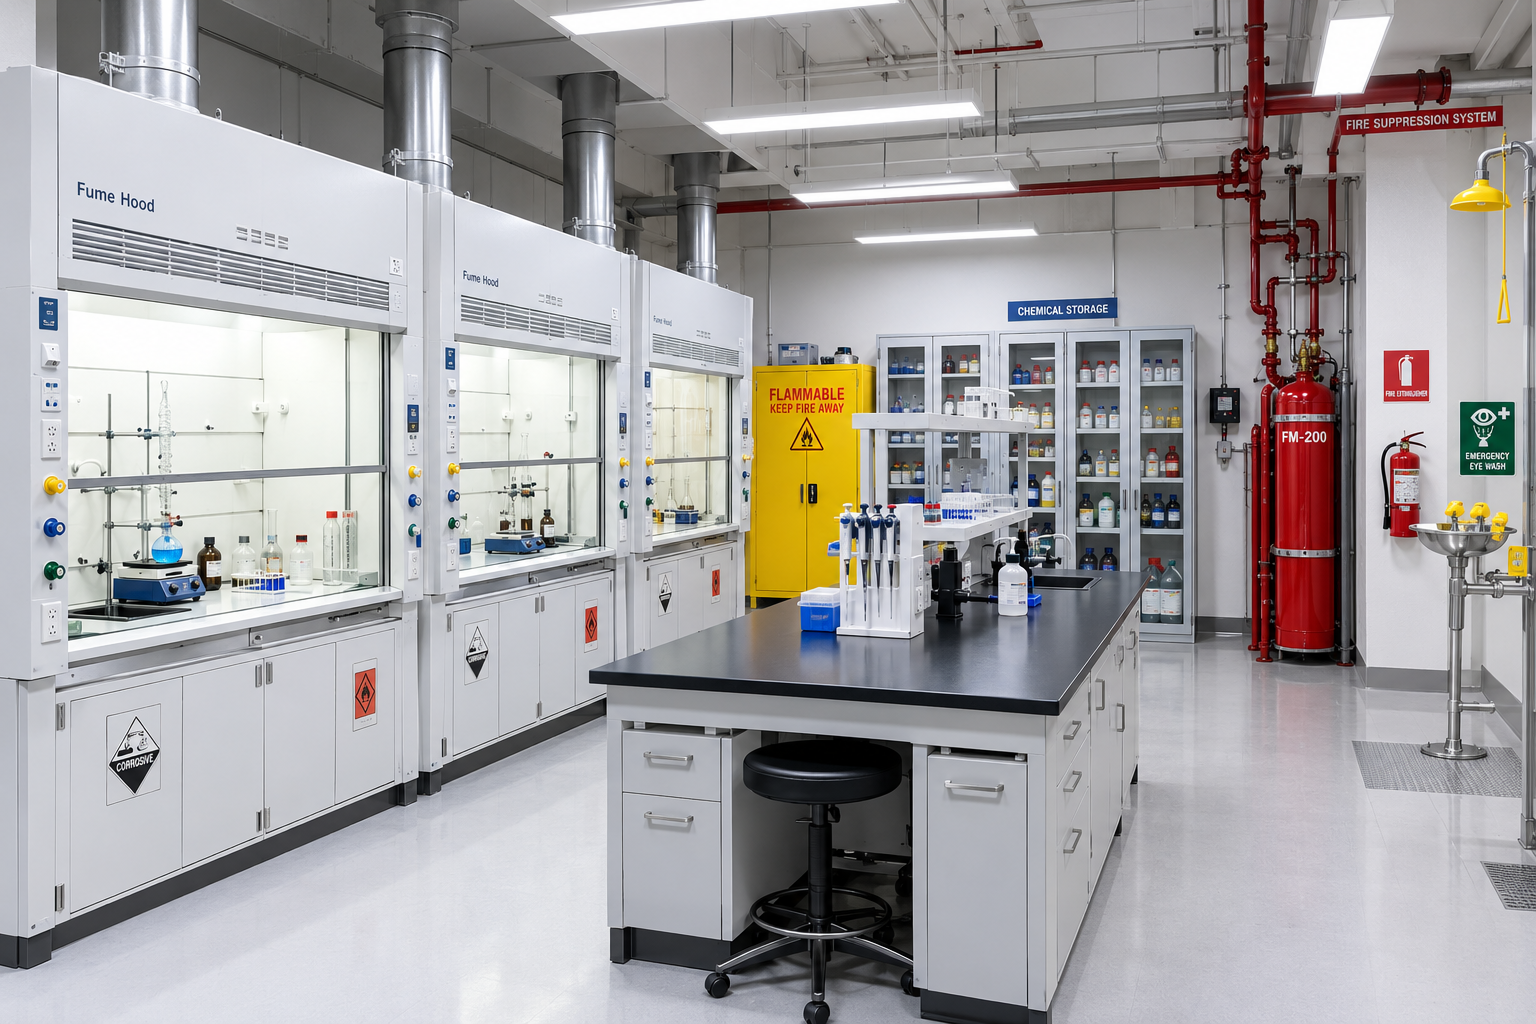
Category: Fire Safety

  • Common Path of Travel and Dead-End Corridors (NFPA 101 7.5 & 7.6)

    Common Path of Travel and Dead-End Corridors (NFPA 101 7.5 & 7.6)

    Two of the most frequently misunderstood concepts in NFPA 101 are Common Path of Travel and Dead-End Corridors.

    While they sound similar, they are distinct concepts with different code requirements. Misunderstanding these terms can lead to design errors, failed inspections, and costly redesigns.

    This guide explains:

    • What is a Common Path of Travel?

    • What is a Dead-End Corridor?

    • The key differences between them.

    • How to calculate and comply with both.

    NFPA 101 code book open to the means of egress section


    Section 1: What Is a Common Path of Travel?

    Common Path of Travel is defined as “that portion of the exit access which the occupants are required to traverse before two separate and distinct paths of egress travel to two exits are available” (NFPA 101, 3.3.71).

    In plain English: It is the distance you must walk before you have a choice of which exit to take.

    Example: Imagine you are in a small office. You walk out of your office door and down a single corridor. You cannot choose between two exits yet—there is only one way to go. The distance from your office door to the point where you can choose between Exit A and Exit B is your Common Path of Travel.

    Floor plan showing common path of travel to a divergence point


    Section 2: What Is a Dead-End Corridor?

    Dead-End Corridor is a corridor or path where there is only one direction of travel, and it does not lead to an exit.

    In plain English: It is a hallway that goes nowhere—like a cul-de-sac. If you walk into a dead-end corridor, you must turn around and go back the way you came to reach an exit.

    Example: A long hallway that ends in a storage room with no exit door. Anyone who walks down that hallway must turn around and come back to the main corridor to exit the building.

    Floor plan showing a dead-end corridor with no exit


    Section 3: Key Differences

    Feature Common Path of Travel Dead-End Corridor
    Definition Distance before you can choose between two exits. A path that ends without an exit.
    Location Occurs at the beginning of the egress path. Occurs at the end of a corridor or path.
    Code Reference NFPA 101, 7.5.1.3 NFPA 101, 7.5.1.1
    Limit Typically 15–30 m (depending on sprinklered/non-sprinklered). Typically 6–15 m (depending on occupancy).
    Solution Add an alternative exit path earlier. Extend the corridor to an exit or add an exit.

    The Golden Rule: The common path of travel is measured before two exits are available. The dead-end corridor is measured after two exits are available.


    Section 4: Common Path of Travel Limits

    NFPA 101 sets specific limits for common path of travel based on the occupancy type and whether the building is sprinklered.

    Occupancy Type Sprinklered Not Sprinklered Code Reference
    Ambulatory 30 m 23 m 20.2.5, 38.2.5.3
    Assembly 23 m (if OL > 50) 6.1 m (if OL < 50) Same 12.2.5
    Business 30 m 23 m 38.2.5.3
    Educational 30 m 23 m 14.2.5.3
    Healthcare 30 m 30 m 18.2.5.3
    Hotels & Dormitories 15 m 10.7 m 28.2.5.3, 28.2.5.4
    Apartments 15 m 10.7 m 30.2.5.3
    Mercantile 30 m 23 m 36.2.5.3
    Storage 30 m 15 m Table 42.2.5

    Section 5: Dead-End Corridor Limits

    NFPA 101 also sets specific limits for dead-end corridors.

    Occupancy Type Sprinklered Not Sprinklered Code Reference
    Ambulatory 15 m 6 m 20.2.5, 38.2.5.2
    Assembly 6 m 6 m 12.2.5.1.3
    Business 15 m 6 m 38.2.5.2.1, 38.2.5.2.2
    Educational 15 m 6 m 14.2.5.2
    Healthcare 9 m 9 m 18.2.5.2
    Hotels & Dormitories 15 m 10.7 m Table A.7.6
    Apartments 15 m 10.7 m Table A.7.6
    Mercantile 15 m 6 m Table A.7.6
    Storage 15 m 15 m Table 42.2.5

    Clear corridor with exit signage and no dead-end


    Section 6: How to Avoid Common Path of Travel and Dead-End Violations

    Strategy How It Helps
    Provide two exits early Reduces common path of travel by giving occupants a choice sooner.
    Extend corridors to exits Eliminates dead-ends by ensuring every corridor leads to an exit.
    Add additional exits Reduces both common path and dead-end distances.
    Use smoke barriers Can help subdivide spaces and reduce travel distances.
    Sprinkler the building Increases allowable distances for both common path and dead-ends.

    Section 7: Common Mistakes and How to Avoid Them

    Mistake Why It’s a Problem How to Fix
    Confusing common path with dead-end Leads to incorrect design calculations. Understand the difference: common path = before two exits; dead-end = after two exits.
    Ignoring sprinklered vs. non-sprinklered Applies the wrong distance limit. Always verify whether the building is sprinklered.
    Not accounting for occupancy type Different occupancies have different limits. Always check the specific occupancy chapter.
    Measuring incorrectly Incorrect distances lead to failed inspections. Measure along the natural path of travel (not straight-line distance).
    Not verifying with AHJ Local amendments may differ. Always confirm with your local Authority Having Jurisdiction.

    Conclusion

    Understanding the difference between Common Path of Travel and Dead-End Corridors is essential for compliant life safety design. By knowing the limits and how to measure them, you can avoid costly redesigns and ensure occupant safety.

    Take Action Today:

    1. Identify all common paths of travel in your building.

    2. Identify all dead-end corridors.

    3. Measure the distances to verify compliance.

    4. Add exits or extend corridors where needed.


    Continue Reading from Our NFPA 101 Series:

  • How to Know How Many Exits Are Required (NFPA 101 Table 7.4)

    How to Know How Many Exits Are Required (NFPA 101 Table 7.4)

    One of the most common questions in building design is: “How many exits do I need?”

    The answer is found in NFPA 101 Table 7.4 (Number of Means of Egress). The required number of exits depends on two factors:

    1. The occupant load of the space.

    2. The occupancy type (e.g., Business, Assembly, Healthcare).

    This guide walks you through the process of determining the required number of exits using NFPA 101 Table 7.4.

    NFPA 101 Table 7.4 showing the number of means of egress


    Section 1: The Golden Rule – Minimum Two Exits

    The fundamental rule of NFPA 101 is that every building or space must have at least two means of egress (NFPA 101, 7.4.1.1). This ensures that if one exit is blocked by fire or smoke, occupants can still escape through another.

    Exceptions:

    • Single exits are permitted in specific circumstances (e.g., small buildings, low occupant loads).

    • Refer to the occupancy chapters (12–42) for specific exceptions.


    Section 2: NFPA 101 Table 7.4.1.2 – Number of Exits Based on Occupant Load

    NFPA 101 Table 7.4.1.2 specifies the minimum number of exits based on the occupant load.

    Occupant Load Minimum Number of Exits
    1 to 500 2
    501 to 1,000 3
    1,001 or more 4

    Important: This table applies to room exits and storey exits for new buildings. Existing buildings are addressed separately in Chapters 12 through 42.

    Commercial building with multiple exit doors clearly marked


    Section 3: Occupancy-Specific Requirements

    While Table 7.4.1.2 provides the general rule, each occupancy chapter (12–42) may have additional requirements or exceptions.

    Occupancy Type Code Reference Requirements
    Assembly 12.2.4 Minimum 2 exits; exceptions for small occupant loads.
    Educational 14.2.4 Minimum 2 exits on every storey; rooms > 93 sqm or OL > 50 require 2 doors.
    Business 38.2.4 Minimum 2 exits on every storey.
    Healthcare 18.2.4 Minimum 2 exits on every storey.
    Hotels & Dormitories 28.2.4 Minimum 2 exits on every storey.
    Mercantile 36.2.4 Minimum 2 exits on every storey.
    Storage 42.2.4 Single exit allowed in low hazard; minimum 2 otherwise.
    Industrial 40.2.4.1.1 Minimum 2 exits on every storey; one exit shall be reached without traversing another storey.

    Pro Tip: Always check the specific occupancy chapter for additional requirements.

    Different building types representing various NFPA 101 occupancies


    Section 4: Special Cases

    Single Exits

    Single exits are permitted in specific circumstances:

    Condition Example
    Storage (Low Hazard) Single exit allowed in low hazard storage occupancies.
    Storage (Ordinary Hazard) Single exit allowed if the distance to exit is within the permitted Common Path of Travel distance.
    Small Buildings Refer to occupancy chapters for specific exceptions.

    High-Rise Buildings

    High-rise buildings (generally 75 ft or more in height) may require additional exits and special provisions (NFPA 101, Chapter 11).

    Mixed Occupancies

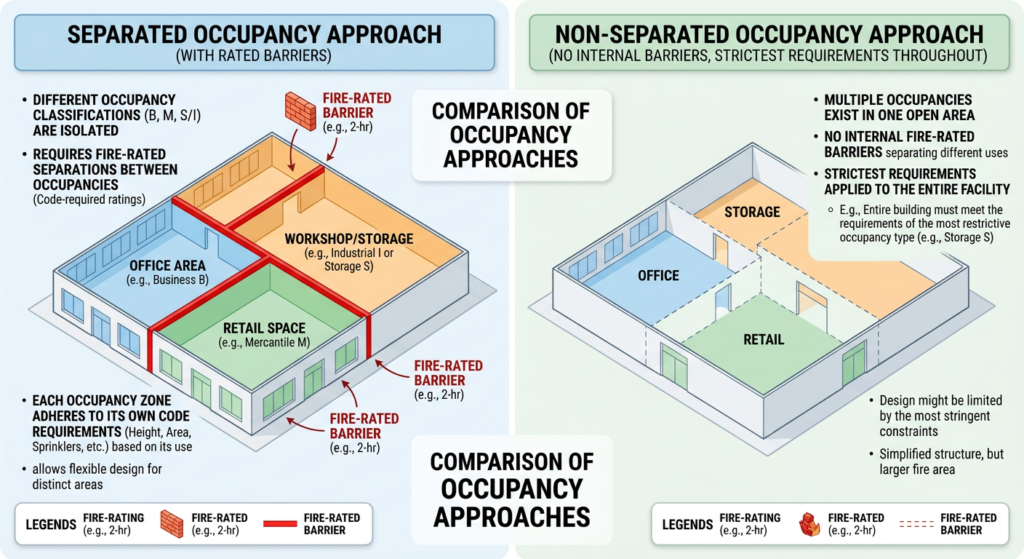
    For buildings with multiple occupancy types, the most restrictive requirements generally apply.


    Section 5: Step-by-Step Process

    Step Action
    1 Determine the occupant load using NFPA 101 Table 7.3.1.2 (see Article 34).
    2 Identify the occupancy type (e.g., Business, Assembly, Healthcare).
    3 Apply NFPA 101 Table 7.4.1.2 to determine the minimum number of exits.
    4 Check the occupancy chapter (12–42) for any additional requirements or exceptions.
    5 Verify the “probable maximum” and ensure the number of exits is sufficient.
    6 Consult with your local AHJ to confirm compliance.

    Section 6: Practical Examples

    Example 1: Business Office

    Item Value
    Occupancy Business
    Occupant Load 320 occupants
    Table 7.4.1.2 1–500 = 2 exits
    Occupancy Chapter Chapter 38: Minimum 2 exits on every storey
    Result 2 exits required

    Example 2: School

    Item Value
    Occupancy Educational
    Occupant Load 650 occupants (entire building)
    Table 7.4.1.2 501–1,000 = 3 exits
    Occupancy Chapter Chapter 14: Minimum 2 exits on every storey; rooms > 93 sqm or OL > 50 require 2 doors
    Result 3 exits required for the building; additional doors required for large rooms

    School building with multiple exit doors and corridors


    Section 7: Common Mistakes and How to Avoid Them

    Mistake Why It’s a Problem How to Fix
    Assuming two exits are always sufficient May not be true for large occupant loads. Always check the occupant load and Table 7.4.1.2.
    Ignoring occupancy-specific requirements Additional requirements may apply. Always check the occupancy chapter.
    Not considering the “probable maximum” May underestimate the actual number of people. Use the greater of the calculated value or the actual expected number.
    Not verifying with AHJ Local amendments may differ. Always confirm with your local Authority Having Jurisdiction.

    Conclusion

    Determining the required number of exits is a critical step in life safety design. By using NFPA 101 Table 7.4.1.2 and following the step-by-step process, you can ensure that your building provides adequate egress for all occupants.

    Take Action Today:

    1. Calculate the occupant load for your building (see Article 34).

    2. Apply NFPA 101 Table 7.4.1.2 to determine the minimum number of exits.

    3. Check the occupancy chapter for any additional requirements.

    4. Verify with your local AHJ to confirm compliance.


    Continue Reading from Our NFPA 101 Series:

  • How to Determine Occupant Load (NFPA 101 Table 7.3.1.2)

    How to Determine Occupant Load (NFPA 101 Table 7.3.1.2)

    Determining the occupant load of a building is one of the most fundamental steps in life safety design. The occupant load determines:

    • How many exits are required.

    • How wide the exits must be.

    • Travel distance limits.

    • Fire protection requirements.

    NFPA 101, the Life Safety Code, provides a standardized method for calculating occupant load using Table 7.3.1.2 (Occupant Load Factors).

    This guide walks you through the step-by-step process of determining occupant load using NFPA 101 Table 7.3.1.2.

    NFPA 101 Table 7.3.1.2 showing occupant load factors


    Section 1: What Is Occupant Load?

    Occupant load is the maximum number of people that a building or space is designed to accommodate. It is not necessarily the number of people actually present—it is the design capacity used to size the means of egress.

    Key Definitions:

    Term Definition
    Occupant Load The total number of people for which the means of egress must be provided.
    Gross Floor Area The total floor area of a building, including walls, corridors, columns, and shafts.
    Net Floor Area The usable floor area, excluding walls, corridors, columns, and shafts.
    Occupant Load Factor The number of square feet (or square meters) per person, used to calculate occupant load.

    The Golden Rule: The occupant load is the greater of the calculated value OR the maximum probable number of people expected in the space.

    People in a commercial office space illustrating occupant load


    Section 2: NFPA 101 Table 7.3.1.2 – Occupant Load Factors

    NFPA 101 Table 7.3.1.2 provides the occupant load factors for different types of spaces. These factors are based on the use of the space, not the building classification.

    Type of Space Occupant Load Factor (sq ft/person) Occupant Load Factor (sq m/person)
    Assembly (Concentrated) 7 ft² (net) 0.65 m² (net)
    Assembly (Less Concentrated) 15 ft² (net) 1.4 m² (net)
    Assembly (Standing) 5 ft² (net) 0.46 m² (net)
    Business Areas 100 ft² (gross) 9.3 m² (gross)
    Educational (Classrooms) 20 ft² (net) 1.9 m² (net)
    Educational (Shops/Vocational) 50 ft² (net) 4.6 m² (net)
    Healthcare (Patient Rooms) 240 ft² (net) 22.3 m² (net)
    Healthcare (Other Areas) 120 ft² (net) 11.1 m² (net)
    Hotels/Dormitories (Guest Rooms) 200 ft² (gross) 18.6 m² (gross)
    Mercantile 60 ft² (gross) 5.6 m² (gross)
    Parking Structures 300 ft² (gross) 27.9 m² (gross)
    Storage (Low/Ordinary Hazard) 500 ft² (gross) 46.5 m² (gross)
    Storage (High Hazard) 100 ft² (gross) 9.3 m² (gross)

    Important: The table specifies whether the factor is based on gross or net floor area:

    • Gross: Includes walls, corridors, columns, and shafts.

    • Net: Excludes walls, corridors, columns, and shafts.

    Diagram showing gross vs. net floor area in a commercial building


    Section 3: How to Determine Occupant Load – Step-by-Step

    Step 1: Identify the Use of the Space

    Determine how the space will be used. Is it an office? A classroom? A restaurant? The use of the space determines the occupant load factor.

    Step 2: Calculate the Floor Area

    Measure the net or gross floor area of the space (as specified in the table).

    Step 3: Apply the Occupant Load Factor

    Divide the floor area by the occupant load factor.

    Formula:

    Occupant Load = Floor Area ÷ Occupant Load Factor

    Step 4: Round Up

    Round up to the nearest whole number (if the calculation results in a fraction).

    Step 5: Consider the “Probable Maximum”

    If the calculated occupant load is less than the actual number of people likely to occupy the space, use the actual number instead.


    Section 4: Practical Examples

    Example 1: Business Office (Gross Area)

    Item Value
    Space Business office
    Occupant Load Factor 100 sq ft per person (gross)
    Floor Area 12,000 sq ft (gross)
    Calculation 12,000 ÷ 100 = 120 occupants

    Result: The occupant load is 120 occupants.


    Example 2: Assembly Space with Chairs (Net Area)

    Item Value
    Space Assembly with chairs (less concentrated)
    Occupant Load Factor 15 sq ft per person (net)
    Floor Area 1,800 sq ft (net)
    Calculation 1,800 ÷ 15 = 120 occupants

    Result: The occupant load is 120 occupants.

     Empty assembly space with chairs, used for occupant load calculations


    Section 5: Common Mistakes and How to Avoid Them

    Mistake Why It’s a Problem How to Fix
    Using the wrong factor Results in incorrect occupant load. Verify the use of the space and the correct factor (gross vs. net).
    Using gross instead of net Overestimates or underestimates the load. Check the table to confirm whether the factor is gross or net.
    Not rounding up Underestimates the occupant load. Always round up to the nearest whole person.
    Ignoring the “probable maximum” Underestimates the actual number of people. Use the greater of the calculated value or the actual expected number.
    Applying factors to the wrong area Incorrect calculations. Only apply factors to the areas they are intended for.

    Section 6: Special Considerations

    Multipurpose Rooms

    A room that serves multiple purposes (e.g., a community hall used for both dining and meetings) should be calculated based on the most restrictive use (the one that results in the highest occupant load).

    Mixed Use Buildings

    For buildings with multiple occupancy types, calculate the occupant load for each space independently, then sum them for the total building occupant load.

    Existing Buildings

    For existing buildings, the occupant load may be established by the local Authority Having Jurisdiction (AHJ) based on the actual use and layout.

    Mixed-use commercial building with different occupancy types


    Conclusion

    Determining occupant load is a critical step in life safety design. By using NFPA 101 Table 7.3.1.2 and following the step-by-step process, you can ensure that your building has adequate means of egress for all occupants.

    Take Action Today:

    1. Identify the use of each space in your building.

    2. Measure the floor area (gross or net).

    3. Apply the correct occupant load factor from NFPA 101 Table 7.3.1.2.

    4. Calculate the occupant load and round up.

    5. Consider the “probable maximum” and use the greater number.


    Continue Reading from Our NFPA 101 Series:

  • NFPA 101 Chapter Organization and Occupancy Key

    NFPA 101 Chapter Organization and Occupancy Key

    NFPA 101, the Life Safety Code, is a massive document—hundreds of pages of dense technical requirements. For many architects and building professionals, opening the code book for the first time can be intimidating.

    However, once you understand the structure and the occupancy classification system, the code becomes a powerful tool rather than an obstacle.

    This guide provides a complete overview of:

    • How NFPA 101 is organized (the 7-section structure).

    • The occupancy key (how to classify your building).

    • How to navigate the code quickly and efficiently.

    A person reading an NFPA 101 code book with a highlighter


    Section 1: The Two-Part Structure of NFPA 101

    NFPA 101 is organized into two main parts:

    Part Chapters Content
    Chapters 1–11 General Requirements Rules that apply to ALL occupancies (e.g., means of egress, protection, building services).
    Chapters 12–42 Occupancy-Specific Requirements Rules tailored to specific building types (e.g., Assembly, Business, Healthcare).

    The Golden Rule: Start with the occupancy chapter (e.g., Chapter 38 for Business), then refer back to Chapters 1–11 for general rules.


    Section 2: The Seven-Section Structure of Occupancy Chapters

    Every occupancy chapter (12 through 42) is organized into seven (7) sections. This consistent structure makes it easy to find the rules that apply to your specific building.

    Section Content Examples
    Section 1 General Application, classification of occupancy, multiple occupancies, hazard of contents, occupant load.
    Section 2 Means of Egress Doors, stairs, ramps, horizontal exits, capacity, number of exits, travel distance, emergency lighting, exit signs.
    Section 3 Protection Vertical openings, protection from hazards, interior finish, detection/alarm systems, extinguishing requirements, corridors, smoke compartments.
    Section 4 Special Provisions Limited access/underground buildings, high-rise buildings, stages, platforms, projection booths, malls.
    Section 5 Building Services Utilities, HVAC systems, elevators, escalators, rubbish chutes.
    Section 6 Special Occupancy Provisions Special occupancies (e.g., day care homes, aircraft repair, parking garages).
    Section 7 Operating Features Fire exit drills, planning, maintenance, upholstered furniture, smoking regulations, construction/repairs.

    Pro Tip: Once you memorize this 7-section structure, you can navigate any occupancy chapter in seconds.

    Diagram showing the 7-section structure of NFPA 101 occupancy chapters


    Section 3: The Occupancy Key (Chapter 6)

    NFPA 101 defines 14 occupancy types. Correctly classifying your building is the first step to finding the right code requirements.

    Occupancy Type Chapter Definition
    Assembly 12 Gathering of 50+ people for deliberation, worship, entertainment, eating, drinking, or awaiting transportation.
    Educational 14 Educational purposes through 12th grade by 6+ persons for 4+ hours/day or 12+ hours/week.
    Day Care 16 4+ clients receive care, maintenance, and supervision for less than 24 hours/day.
    Healthcare 18 Medical treatment/care of 4+ persons incapable of self-preservation.
    Ambulatory Health Care 20 Outpatient services/treatment to 4+ patients incapable of self-preservation.
    Detention & Correctional 22 Housing of 1+ persons under restraint or security.
    One & Two Family Dwellings 24 Residential buildings containing 1 or 2 dwelling units.
    Lodging/Rooming House 26 16 or fewer individuals sleeping with no personal care services.
    Hotels & Dormitories 28 17+ individuals sleeping with no individual cooking facilities.
    Apartments 30 Residential buildings with multiple dwelling units.
    Residential Board & Care 32 4+ residents receiving personal care services.
    Mercantile 36 Display and sale of merchandise.
    Business 38 Office and transaction spaces.
    Industrial 40 Manufacturing, processing, and assembly.
    Storage 42 Storage or sheltering of goods, merchandise, products, vehicles, or animals.

    Pro Tip: When classifying your building, focus on the primary use. If multiple occupancies exist, refer to Section 6.1.14 for mixed occupancy requirements.

    Collage of different building types representing various NFPA 101 occupancies


    Section 4: Hazard of Contents Classification (NFPA 101, 6.2)

    Beyond occupancy, NFPA 101 classifies the hazard of contents within a building.

    Hazard Level Definition Examples
    Low Hazard Contents of such low combustibility that no self-propagating fire can occur. Church seating, offices, corridors, toilet rooms, patient rooms, hotel guest rooms.
    Ordinary Hazard Contents likely to burn with moderate rapidity or give off a considerable volume of smoke. Parking garages, kitchens, mechanical rooms, storage rooms, retail stores, warehouses.
    High Hazard Contents likely to burn with extreme rapidity or from which explosions are likely. Saw mills, furniture upholstering using foam plastics, flammable liquid spraying.

    Why It Matters: The hazard classification affects requirements for:

    • Construction type limitations.

    • Sprinkler requirements.

    • Travel distance limits.

    • Fire extinguisher placement.


    Section 5: How to Navigate NFPA 101

    Here is a simple 5-step process for finding the requirements for your project:

    Step Action
    1 Identify your occupancy type (e.g., Business, Assembly, Healthcare).
    2 Find the appropriate occupancy chapter (e.g., Chapter 38 for Business).
    3 Navigate to the relevant section (e.g., Section 2 for Means of Egress).
    4 Apply the requirements and cross-reference with Chapters 1–11 for general rules.
    5 Verify with your local Authority Having Jurisdiction (AHJ) for any amendments.

    Pro Tip: Keep a copy of your local code amendments—many jurisdictions modify NFPA 101 requirements.


    Section 6: Special Definitions to Know

    Term Definition
    Level of Exit Discharge The story where 50% of required exits discharge directly outside at finished ground level.
    Occupant Load The maximum number of people anticipated to occupy a building or space.
    Means of Egress A continuous path of travel from any point to a public way.
    Exit Access The portion of the means of egress leading to an exit.
    Exit The portion of the means of egress separated from the building (e.g., exit stair).
    Exit Discharge The portion between the termination of an exit and a public way.

    Building evacuation floor plan with exits marked in red


    Conclusion

    Understanding the organization of NFPA 101 is the first step to becoming proficient with the Life Safety Code. By mastering:

    • The two-part structure (Chapters 1–11 and 12–42).

    • The seven-section structure of occupancy chapters.

    • The occupancy key (Chapter 6).

    • The hazard classification system (6.2).

    You can quickly find the requirements for any commercial building project.

    Take Action Today:

    1. Find your building’s occupancy classification using Chapter 6.

    2. Open the corresponding occupancy chapter (12–42).

    3. Navigate to the relevant section (1–7).

    4. Cross-reference with Chapters 1–11 for general requirements.


    Continue Reading from Our NFPA 101 Series:

    • Read more about: NFPA 101: Understanding the Life Safety Code for High-Rise Buildings (Article 5)

    • Learn more: Chapter Organization of NFPA 101 (Article 10)

    • Related guide: NFPA 101 Means of Exit Requirements (Article 7)

  • Common NFPA 101 Violations and How to Fix Them

    Common NFPA 101 Violations and How to Fix Them

    Fire inspections can be stressful—especially when you are unsure if your building is fully compliant. The most common NFPA 101 violations are often simple oversights that are easy to fix once you know what to look for.

    This guide covers the most frequently cited NFPA 101 violations in commercial buildings and provides practical solutions to address them.

    Fire marshal conducting an inspection in a commercial building corridor


    Section 1: Blocked or Obstructed Exits

    The Violation: Exit doors, corridors, or stairwells are blocked by furniture, storage, or equipment.

    Why It’s a Problem: Occupants cannot evacuate quickly during an emergency.

    Code Reference: NFPA 101, Section 7.1.3.1 (Means of egress shall be kept unobstructed).

    How to Fix It:

    • Conduct a weekly walkthrough to check all exit paths.

    • Use floor markings to identify keep-clear zones.

    • Train staff not to store items in corridors or stairwells.

    • Install “Do Not Block” signs where needed.

    Clear, unobstructed exit corridor in a commercial building


    Section 2: Fire Doors Propped Open

    The Violation: Fire doors are wedged or propped open with doorstops, chairs, or other objects.

    Why It’s a Problem: Fire doors prevent fire and smoke from spreading. If propped open, they become useless.

    Code Reference: NFPA 80, Section 6.4.4 (Fire doors must close automatically).

    How to Fix It:

    • Remove all doorstops and wedges immediately.

    • Install automatic hold-open devices that close the door when the fire alarm activates.

    • Train staff to never prop fire doors open.

    • Post signage reminding occupants of the requirement.

    Fire door with automatic hold-open device and clear signage


    Section 3: Missing or Illegible Exit Signs

    The Violation: Exit signs are missing, damaged, or not illuminated.

    Why It’s a Problem: Occupants cannot locate exits in an emergency.

    Code Reference: NFPA 101, Section 7.10.2 (Exit signs must be visible and illuminated).

    How to Fix It:

    • Inspect all exit signs monthly.

    • Replace burnt-out bulbs or damaged signs.

    • Ensure signs are illuminated (internally or externally).

    • Install additional signs if the path of egress is not obvious.

    • Verify that signs are visible from any direction of approach.

     Illuminated exit sign above a commercial door


    Section 4: Improper Fire Extinguisher Placement

    The Violation: Fire extinguishers are missing, obstructed, or mounted at the wrong height.

    Why It’s a Problem: Occupants cannot access extinguishers during a fire.

    Code Reference: NFPA 10, Section 6.1.3 (Extinguishers must be accessible and mounted correctly).

    How to Fix It:

    • Inspect all extinguishers for proper mounting.

    • Extinguishers weighing over 40 lbs: handle no more than 3.5 feet above the floor.

    • Extinguishers under 40 lbs: handle no more than 5 feet above the floor.

    • Ensure no objects block access to extinguishers.

    • Place visible signage indicating the extinguisher location.

    Fire extinguisher mounted at correct height with clear signage


    Section 5: Dead or Missing Emergency Lights

    The Violation: Emergency lights are not working, have dead batteries, or are missing.

    Why It’s a Problem: Occupants cannot see the path of egress during a power outage.

    Code Reference: NFPA 101, Section 7.9.2 (Emergency lights must function for 90 minutes).

    How to Fix It:

    • Test emergency lights monthly using the test button.

    • Conduct an annual 90-minute discharge test.

    • Replace dead batteries immediately.

    • Ensure lights are not blocked by furniture or storage.

    Emergency light fixture being tested with the test button


    Section 6: Missing Fire Alarm Detectors

    The Violation: Smoke detectors or heat detectors are missing, damaged, or not installed in required locations.

    Why It’s a Problem: The fire alarm system may not detect a fire early enough.

    Code Reference: NFPA 72, Section 17.7.4 (Detectors must be installed in all required locations).

    How to Fix It:

    • Review the building plans to verify detector locations.

    • Ensure detectors are installed on every floor and in all corridors.

    • Check for dead spots (e.g., corners, near air vents).

    • Replace damaged or outdated detectors.

    • Test detectors annually.

    Smoke detector on a commercial building ceiling


    Section 7: Insufficient Fire Alarm Testing Documentation

    The Violation: No records of fire alarm testing, inspections, or maintenance.

    Why It’s a Problem: Cannot prove compliance; may be cited for lack of documentation.

    Code Reference: NFPA 72, Section 14.2.1 (Records must be maintained).

    How to Fix It:

    • Keep inspection logs for all fire protection systems.

    • Document monthly visual inspectionsannual tests, and battery replacements.

    • Store records for at least 3 years.

    • Use a digital system for easy access and retrieval.

    Fire alarm inspection log on a clipboard


    Section 8: Exit Doors Not Swinging in the Direction of Exit

    The Violation: Exit doors swing inward instead of outward in high-occupancy spaces.

    Why It’s a Problem: During a panic, occupants may push against the door, making it impossible to open.

    Code Reference: NFPA 101, Section 7.2.1.4 (Doors must swing in the direction of exit travel when serving 50+ occupants or hazardous areas).

    How to Fix It:

    • Inspect all exit doors serving high-occupancy areas.

    • Identify doors that swing inward.

    • Reverse the swing or install new doors that swing outward.

    • Verify with your local AHJ.

    Exit door swinging outward with push bar hardware


    Section 9: Missing or Outdated Fire Safety Plan

    The Violation: No fire safety plan, or the plan is outdated.

    Why It’s a Problem: Occupants do not know what to do in an emergency.

    Code Reference: NFPA 101, Section 4.8 (Fire safety plans required for certain occupancies).

    How to Fix It:

    • Create a fire safety plan if one does not exist.

    • Update the plan annually or after any building changes.

    • Train occupants on the plan.

    • Post the plan in visible locations.

    • Conduct fire drills at least annually.


    Section 10: Missing or Damaged Fire-Resistant Construction

    The Violation: Fire-resistant walls, floors, or ceilings have holes, gaps, or damage.

    Why It’s a Problem: Fire and smoke can spread through unprotected openings.

    Code Reference: IBC, Chapter 7 (Fire-resistance-rated construction).

    How to Fix It:

    • Inspect fire barriers regularly.

    • Seal all penetrations with fire-rated materials (e.g., caulk, putty pads).

    • Repair any holes in drywall or fire-rated assemblies.

    • Ensure fire dampers are installed in duct penetrations.


    Section 11: Summary of Common Violations

    Violation How to Fix
    Blocked exits Clear obstructions; conduct weekly inspections.
    Fire doors propped open Remove wedges; install hold-open devices.
    Missing exit signs Install illuminated signs; inspect monthly.
    Improper extinguisher placement Mount at correct height; keep visible.
    Dead emergency lights Test monthly; replace batteries.
    Missing detectors Install in all required locations; test annually.
    No documentation Keep detailed inspection logs.
    Wrong door swing Reverse inward-swinging doors.
    Outdated fire safety plan Update annually; train occupants.
    Damaged fire barriers Seal penetrations; repair holes.

    Conclusion

    NFPA 101 violations are often simple oversights that are easy to correct. By addressing these common issues, you can:

    • Avoid fines and citations.

    • Ensure occupant safety.

    • Reduce liability.

    • Pass inspections with confidence.

    Take Action Today:

    1. Conduct a self-inspection of your building.

    2. Create a checklist of common violations.

    3. Prioritize fixes based on risk.

    4. Schedule a professional inspection if needed.

  • How to Read and Interpret NFPA 101 Code Tables

    How to Read and Interpret NFPA 101 Code Tables

    NFPA 101, the Life Safety Code, is a massive document—over 400 pages of dense technical requirements. For many architects and building professionals, opening the code book for the first time can be intimidating.

    However, once you understand the structure and logic behind the tables, the code becomes a powerful tool rather than an obstacle. This guide walks you through the most common NFPA 101 tables and how to interpret them.

    NFPA 101 code book open to a table with highlighted sections


    Section 1: Understanding NFPA 101 Structure

    NFPA 101 is organized into two main parts:

    Part Chapters Content
    Chapters 1–11 General Requirements Rules that apply to ALL occupancies (e.g., means of egress, protection, building services).
    Chapters 12–42 Occupancy-Specific Requirements Rules tailored to specific building types (e.g., Assembly, Business, Healthcare).

    The Golden Rule: Start with the occupancy chapter (e.g., Chapter 38 for Business), then refer back to Chapters 1–11 for general rules.


    Section 2: The “Three-Column” Table Structure

    Many NFPA 101 tables follow a three-column format, making them easy to read once you know what to look for.

    Column What It Contains
    Column 1 The condition or requirement (e.g., “Building height”).
    Column 2 The code reference (e.g., “Section 7.3.4.1”).
    Column 3 The specific requirement (e.g., “Maximum 75 feet”).

    Pro Tip: When reading a table, always check the title and scope notes above it. These tell you exactly what the table applies to (e.g., “New buildings only” or “Sprinklered buildings”).

    Close-up of a code table showing three columns with highlighted headings


    Section 3: How to Read “Means of Egress” Tables

    The Means of Egress tables (Chapter 7) are some of the most frequently referenced in NFPA 101. Here is how to interpret them.

    Example: Table 7.3.1.2 – Occupant Load Factors

    Occupancy Occupant Load Factor
    Business areas 100 sq ft per person
    Mercantile 60 sq ft per person
    Assembly (concentrated) 7 sq ft per person
    Assembly (less concentrated) 15 sq ft per person

    How to use it:

    1. Determine your occupancy type (e.g., Business).

    2. Find the occupant load factor (e.g., 100 sq ft per person).

    3. Divide the floor area by the factor (e.g., 2,000 sq ft / 100 = 20 occupants).

    Example Table: 7.3.3.1 – Egress Capacity

    Component Capacity Factor
    Stairs 0.3 inches per person
    Level components (doors, corridors) 0.2 inches per person

    How to use it:

    1. Determine the occupant load (e.g., 100 people).

    2. Multiply by the factor (e.g., 100 × 0.3 = 30 inches of stair width required).

    Floor plan with egress paths and occupant load calculations


    Section 4: How to Read Occupancy-Specific Tables

    Each occupancy chapter (12–42) contains unique tables that apply to that specific building type.

    Example: Table 14.2.4.2 – Educational Occupancies (Egress)

    Condition Requirement
    Sprinklered building Travel distance ≤ 75 ft
    Unsprinklered building Travel distance ≤ 50 ft

    How to use it:

    1. Find your occupancy (e.g., Educational).

    2. Determine the condition (e.g., Sprinklered or Unsprinklered).

    3. Apply the requirement (e.g., If you have a sprinklered school, travel distance must be ≤ 75 ft).


    Section 5: Understanding “Exceptions” and “Notes”

    Tables often include exceptionsnotes, and reference codes that modify the requirements. These are critical!

    Element What It Means
    Exception (a) An alternative to the main requirement.
    Note 1 Provides additional context or clarification.
    Reference (e.g., 7.4) Directs you to another section for more detail.
    “See also” Points you to related requirements.

    Example: A table might say “Minimum two exits required. Exception (a): Single exit is permitted if occupant load ≤ 50.”

    Code book with sticky notes and yellow highlighted text


    Section 6: Step-by-Step Process for Using NFPA 101 Tables

    Here is a simple 5-step process for navigating any NFPA 101 table:

    Step Action
    1 Identify your occupancy type (e.g., Business, Assembly, Healthcare).
    2 Find the appropriate occupancy chapter (e.g., Chapter 38 for Business).
    3 Navigate to the relevant section (e.g., Section 2 for Means of Egress).
    4 Locate the table and read the title, scope, and any notes.
    5 Apply the requirement to your specific condition.

    Section 7: Practical Exercise

    Let’s walk through a real-world example.

    Scenario: You are designing a 20,000 sq ft office building (Business occupancy) with a sprinkler system. The building has two floors.

    Step 1: Identify occupancy. Business (Chapter 38).

    Step 2: Determine the occupant load. Table 7.3.1.2: Business areas = 100 sq ft per person. 20,000 sq ft / 100 = 200 occupants.

    Step 3: Determine egress requirements. Table 7.3.3.1: Level components = 0.2 inches per person. 200 × 0.2 = 40 inches of door/corridor width required.

    Step 4: Determine travel distance. Chapter 38 (Sprinklered): Maximum travel distance = 200 ft.

    Step 5: Verify with your local AHJ.


    Section 8: Common Mistakes and How to Avoid Them

    Mistake Why It’s a Problem How to Fix
    Reading the wrong table Incorrect requirements. Check the table title and scope.
    Ignoring exceptions Overly conservative design (higher cost). Read all exceptions carefully.
    Missing code references Missing critical requirements. Follow all references (e.g., “See 7.4”).
    Using the wrong edition Requirements change between editions. Always use the edition adopted by your jurisdiction.
    Not verifying with AHJ Local amendments may differ. Confirm with your local authority.

    Conclusion

    NFPA 101 tables are a powerful tool once you understand their structure. By following the steps above, you can confidently navigate the code and design buildings that are safe, compliant, and efficient.

    Take Action Today:

    1. Open your NFPA 101 code book and find the table for your last project.

    2. Walk through the steps to verify the requirements.

    3. Share this guide with a colleague or team member.

  • Commercial Building Maintenance: Fire Safety Systems and Best Practices

    Commercial Building Maintenance: Fire Safety Systems and Best Practices

    A fire safety system is only as good as its maintenance. Regular inspections, testing, and preventative maintenance ensure that your fire protection systems—sprinklers, alarms, extinguishers, emergency lighting, and fire doors—will function when needed.

    Neglecting maintenance can lead to system failurecode violations, and tragic consequences. This guide covers best practices for maintaining all fire safety systems in commercial buildings.

    Fire safety maintenance checklist on a clipboard


    Section 1: The Importance of Fire Safety Maintenance

    Reason Why It Matters
    Life Safety Ensures systems operate during a fire.
    Code Compliance Required by NFPA, IBC, and local codes.
    Liability Reduction Demonstrates due diligence.
    Cost Savings Prevents costly repairs and replacements.
    Insurance Requirements Many policies require documented maintenance.
    Tenant Confidence Demonstrates commitment to safety.

    Pro Tip: Document all maintenance activities—records are essential for compliance and may be requested by inspectors.

    Fire safety maintenance checklist on a clipboard


    Section 2: Fire Sprinkler System Maintenance

    NFPA 25 provides detailed requirements for sprinkler system inspection, testing, and maintenance (ITM).

    Activity Frequency Procedure Code Ref.
    Visual Inspection Monthly Check control valves, pressure gauges, and for visible damage. NFPA 25, 5.2
    Flow Test Annually Test water flow from a test header. NFPA 25, 5.3
    Valve Exercise Quarterly Open and close all control valves (to prevent sticking). NFPA 25, 5.4
    Sprinkler Head Check Annually Check for damage, corrosion, or paint on heads. NFPA 25, 5.6
    Full System Test Annually Test all system components. NFPA 25, 5.5
    Internal Pipe Inspection 5–10 Years Check for corrosion, scale, or obstructions. NFPA 25, 14.2

    Common Violations:

    • Painted or damaged sprinkler heads.

    • Control valves closed or locked incorrectly.

    • Missing escutcheons (cover plates).

    • Blocked or obstructed sprinkler heads (less than 18-inch clearance).

    Technician inspecting a fire extinguisher


    Section 3: Fire Extinguisher Maintenance

    NFPA 10 covers portable fire extinguisher requirements, including maintenance.

    Activity Frequency Procedure Code Ref.
    Visual Inspection Monthly Check pressure gauge (green zone), visible damage, and pin/seal. NFPA 10, 7.2
    Maintenance Check Annually Professional inspection of mechanical parts; refilling if needed. NFPA 10, 7.3
    Hydrostatic Testing 5–12 Years Pressure testing to ensure cylinder is safe for use. NFPA 10, 8.3
    Recharging After use or when needed. Refill if discharged or damaged. NFPA 10, 7.5

    Pro Tip: Ensure that extinguishers are not obstructed and are clearly visible.


    Section 4: Fire Alarm System Maintenance

    NFPA 72 covers fire alarm system inspection, testing, and maintenance.

    Activity Frequency Procedure Code Ref.
    Visual Inspection Weekly/Monthly Check control panel for trouble signals and visible damage. NFPA 72, 14.2
    Functional Test Annually Test each detector, pull station, and notification appliance. NFPA 72, 14.4
    Battery Test Annually Test secondary power under load. NFPA 72, 10.5
    Full System Test Annually Simulate a fire alarm condition; verify all components operate correctly. NFPA 72, 14.4
    Central Station Monitoring Test Annually Verify signal transmission to the monitoring station. NFPA 72, 26.1

    Common Violations:

    • Dead or missing batteries.

    • Blocked or missing detectors.

    • Unrepaired trouble signals.

    • Missing documentation.

    Technician testing an emergency light fixture


    Section 5: Emergency Lighting and Exit Sign Maintenance

    NFPA 101 requires regular testing and maintenance of emergency lighting and exit signs.

    Activity Frequency Procedure Code Ref.
    Visual Inspection Monthly Check lights are on, clean, and not blocked. NFPA 101, 7.9.3
    Functional Test Monthly Press test button; ensure lights illuminate. NFPA 101, 7.9.3
    Full Duration Test Annually Simulate power failure for 90 minutes. NFPA 101, 7.9.3
    Exit Sign Inspection Monthly Ensure signs are illuminated and not blocked. NFPA 101, 7.10.4

    Pro Tip: Document all tests and keep records for at least 3 years.


    Section 6: Fire Door Maintenance

    NFPA 80 covers fire door inspection, testing, and maintenance.

    Activity Frequency Procedure Code Ref.
    Visual Inspection Monthly Check for visible damage, proper closing, and intact labels. NFPA 80, 6.2
    Operational Test Annually Open and close the door; verify it latches automatically. NFPA 80, 6.4
    Drop Test Annually Test hold-open devices release when the alarm activates. NFPA 80, 6.4
    Full Inspection Annually Professional inspection of all components. NFPA 80, 6.2

    Common Violations:

    • Fire doors propped open.

    • Missing or illegible labels.

    • Damaged or missing door closers.

    • Excessive clearance gaps.

    Illuminated emergency exit sign above a door in a commercial building corridor


    Section 7: Fire Safety Plan Maintenance

    A fire safety plan is a living document that must be reviewed and updated regularly.

    Trigger for Update Action
    Annual Review Review the entire plan; update outdated information.
    Building Renovations Update floor plans; adjust evacuation routes.
    Change in Occupancy Update occupant load; revise procedures.
    New Fire Protection Systems Update system descriptions and locations.
    Change in Personnel Update roles and contact information.
    After an Incident Review and improve based on lessons learned.

    Pro Tip: Assign a single person (fire safety director) to be responsible for maintaining the plan.


    Section 8: Record Keeping and Documentation

    Documentation is essential for compliance and liability protection.

    Document Purpose Retention
    Inspection Logs Record all inspections. At least 3 years.
    Test Reports Record all tests and results. At least 3 years.
    Maintenance Records Record all repairs and replacements. At least 3 years.
    Training Records Document training and drills. At least 3 years.
    Fire Safety Plan Living document. Current version always available.

    Section 9: Common Mistakes and How to Avoid Them

    Mistake Why It’s a Problem How to Fix
    Skipping monthly visual inspections Minor issues become major problems. Assign a person to conduct monthly inspections.
    Not testing systems annually Systems may fail when needed. Schedule annual tests well in advance.
    Blocking sprinklers or extinguishers Systems cannot function. Keep areas clear; post signage.
    No documentation Cannot prove compliance. Maintain thorough records.
    Not updating the fire safety plan Information becomes outdated. Review and update the plan annually.
    Using unqualified contractors Improper maintenance. Use licensed, qualified fire protection contractors.

    Conclusion

    Maintaining fire safety systems is not optional—it is a critical responsibility that protects lives, property, and your business. By following these best practices, you can ensure that your systems are ready when needed.

    Your 30-Day Maintenance Checklist:

    1. Monthly: Visual inspections of sprinklers, extinguishers, alarms, exits, and signs.

    2. Quarterly: Exercise control valves.

    3. Annually: Full testing of all systems (sprinklers, alarms, extinguishers, lights).

    4. Ongoing: Update the fire safety plan; conduct training and drills.

    5. Document: Keep records of all activities.

  • Commercial Building Fire Safety Plan: Development and Implementation

    Commercial Building Fire Safety Plan: Development and Implementation

    A fire safety plan is a critical document that outlines procedures for preventing fires, evacuating occupants, and coordinating with emergency services. Every commercial building should have a comprehensive fire safety plan tailored to its specific layout, occupancy, and risks.

    A well-developed fire safety plan:

    • Saves lives by ensuring occupants know what to do in an emergency.

    • Protects property by enabling rapid, organized response.

    • Ensures compliance with NFPA, IBC, and local codes.

    • Reduces liability by demonstrating due diligence.

    This guide covers the essential components of a fire safety plan, including:

    • Emergency evacuation procedures.

    • Fire prevention measures.

    • Roles and responsibilities.

    • Training and drills.

    • Plan maintenance and updates.

    Fire safety plan document on a clipboard with a building floor plan.


    Section 1: Purpose and Scope of a Fire Safety Plan

    The fire safety plan is a formal, written document that outlines:

    Element Description
    Purpose To protect life and property in the event of a fire.
    Scope Applicable to all occupants, visitors, and contractors in the building.
    Legal Basis Required by NFPA, IBC, and local fire codes for most commercial buildings.
    Responsible Party Building owner, property manager, or designated fire safety director.

    Pro Tip: The plan should be approved by the local fire department or authority having jurisdiction (AHJ).

    Fire safety team meeting with building management and fire department


    Section 2: Key Components of a Fire Safety Plan

    A comprehensive fire safety plan includes the following sections:

    1. Building Information

    • Building address and description.

    • Construction type and fire-resistance ratings.

    • Occupancy type and occupant load.

    • Fire protection systems (sprinklers, alarms, extinguishers).

    2. Emergency Procedures

    • How to report a fire.

    • Evacuation procedures.

    • Assembly point locations.

    • Accounting for occupants (headcount).

    3. Roles and Responsibilities

    • Fire safety director.

    • Floor wardens and their deputies.

    • Evacuation coordinators.

    • Building management duties.

    4. Fire Prevention Measures

    • Housekeeping (reduce fire hazards).

    • Storage of flammable materials.

    • Electrical safety.

    • Smoking policies.

    5. Training and Drills

    • Initial and annual training for occupants.

    • Fire evacuation drills (frequency and documentation).

    6. Emergency Equipment

    • Location and inspection of fire extinguishers.

    • Sprinkler and alarm systems.

    • Emergency lighting and exit signs.

    Fire extinguisher and fire alarm pull station in a commercial corridor


    Section 3: Evacuation Procedures

    Evacuation procedures are the core of the fire safety plan.

    Step Action
    1. Discovery If you discover a fire, sound the alarm and call 911.
    2. Alerting Occupants Activate the fire alarm system or verbally alert others.
    3. Immediate Action If trained and safe, use a fire extinguisher to control small fires.
    4. Evacuation Evacuate immediately using the nearest exit.
    5. Assembly Point Proceed to the designated assembly point.
    6. Headcount Conduct a headcount to ensure all occupants are accounted for.
    7. Emergency Services Direct firefighters to the fire location upon arrival.

    Pro Tip: Develop specific evacuation procedures for occupants with disabilities (e.g., workstations, assisted evacuation).

    People evacuating a commercial building during a fire drill


    Section 4: Roles and Responsibilities

    Assigning clear roles ensures an organized and efficient response.

    Role Responsibilities
    Fire Safety Director Overall responsibility for the fire safety plan; coordination with fire department.
    Floor Wardens Lead evacuation on each floor; ensure all occupants evacuate; report to fire safety director.
    Deputy Wardens Assist floor wardens; cover absences.
    Evacuation Coordinators Assist with evacuation of occupants with disabilities.
    Building Management Ensure fire protection systems are maintained; schedule training and drills.
    Security Personnel Monitor fire alarm systems; assist with evacuation and access for emergency services.

    Pro Tip: Document roles with names and contact information. Update the list regularly.

    Emergency response team with vests and hard hats


    Section 5: Training and Fire Drills

    Training ensures that occupants know what to do in an emergency.

    Training Type Frequency Content
    Initial Training Upon hire or new occupancy. Fire safety plan overview; evacuation procedures; extinguisher use.
    Annual Refresher Annually. Review changes to the plan; practice drills.
    Fire Drills Quarterly to annually (varies by occupancy type). Simulate a fire emergency; practice evacuation and headcount.
    Specialized Training As needed. Fire extinguisher use; first aid; emergency communication.

    Pro Tip: Document all training and drills—records are essential for compliance and may be requested by inspectors.

    Fire safety training with employees practicing fire extinguisher use


    Section 6: Fire Prevention Measures

    Prevention is the first line of defense against fires.

    Measure Details
    Housekeeping Keep exits clear; remove trash; store combustibles properly.
    Electrical Safety Inspect wiring; avoid overloaded circuits; use surge protectors.
    Flammable Materials Store flammable liquids in approved containers; limit quantities.
    Smoking Policies Designate smoking areas; provide proper disposal containers.
    Hot Work Permits Require permits for welding, cutting, or other hot work.
    Kitchen Safety Maintain hood suppression systems; clean grease filters regularly.

    Pro Tip: Conduct regular inspections to identify and correct fire hazards.

    Commercial kitchen with clean exhaust hood and fire suppression system


    Section 7: Plan Maintenance and Updates

    A fire safety plan is a living document that must be reviewed and updated regularly.

    Trigger for Update Action
    Annual Review Review the entire plan; update any outdated information.
    Building Renovations Update floor plans; adjust evacuation routes.
    Change in Occupancy Update occupant load; revise procedures.
    New Fire Protection Systems Update system descriptions and locations.
    Change in Personnel Update roles and contact information.
    After an Incident Review and improve the plan based on lessons learned.

    Pro Tip: Assign a single person (fire safety director) to be responsible for maintaining the plan.


    Section 8: Common Mistakes and How to Avoid Them

    Mistake Why It’s a Problem How to Fix
    Outdated plan Information is irrelevant or incorrect. Review and update the plan annually.
    No occupant training Occupants don’t know procedures. Conduct training and drills regularly.
    Missing contact information Can’t reach key personnel in an emergency. Keep contact lists current.
    Blocked exits Evacuation is hindered. Inspect and clear exits regularly.
    No fire drills Occupants are unprepared for an emergency. Conduct fire drills at least annually.
    Incomplete documentation Compliance cannot be proven. Document all training and drills.

    Conclusion

    A fire safety plan is a critical investment in occupant safety and regulatory compliance. By developing a comprehensive plan, training occupants, and conducting regular drills, you can significantly reduce the risk of fire-related injuries and property damage.

    Take Action Today:

    1. Review your current fire safety plan (or create one if missing).

    2. Assign roles and responsibilities (fire safety director, floor wardens).

    3. Conduct training and drills for all occupants.

    4. Document all activities for compliance.

    5. Update the plan annually or after significant changes.

  • Commercial Building Code Requirements for Fire Sprinkler Systems

    Commercial Building Code Requirements for Fire Sprinkler Systems

    Fire sprinkler systems are one of the most effective life-safety systems in commercial buildings. According to the NFPA, sprinklers reduce fire deaths by 89% and property damage by 70% in buildings where they are installed.

    Sprinkler systems can control or extinguish a fire before the fire department arrives, buying precious time for evacuation and reducing property damage.

    This guide covers the essential IBC and NFPA 13 requirements for commercial fire sprinkler systems.

    Commercial building ceiling with exposed fire sprinkler piping


    Section 1: When Is a Fire Sprinkler System Required?

    The IBC mandates fire sprinkler systems based on the building’s construction type, size, and occupancy.

    Condition Requirement Code Reference
    High-Rise Buildings Sprinkler system required for all high-rise buildings ( > 75 ft). IBC 903.2.12.1
    Assembly Occupancies Required if occupant load > 300 (or as specified by local code). IBC 903.2.2
    Educational Occupancies Required for schools with > 12,000 sq ft. IBC 903.2.3
    Healthcare Required for all healthcare buildings. IBC 903.2.6
    Hotels & Dormitories Required for all hotels and dormitories. IBC 903.2.8
    Apartments Required for buildings > 4 stories or > 11 units. IBC 903.2.9
    Mercantile Required for Class A mercantile (and Class B in some jurisdictions). IBC 903.2.7
    Storage Required for high-hazard storage or large warehouse spaces. IBC 903.2.10

    Fire sprinkler riser and control valve in a commercial building


    Section 2: NFPA 13 System Types

    NFPA 13 (Standard for the Installation of Sprinkler Systems) defines several types of sprinkler systems.

    System Type Description Best Use
    Wet Pipe System Water is constantly present in the pipes; discharges immediately when a sprinkler head opens. Heated buildings (offices, retail, hotels).
    Dry Pipe System Pipes contain pressurized air or nitrogen; water is held back by a valve. When a sprinkler opens, air pressure drops, and water flows in. Unheated areas (parking garages, attics, freezer rooms).
    Preaction System A two-step system: fire detection activates the valve, and water only enters the pipes when a sprinkler head opens. Areas with high-value assets (data centers, museums, libraries).
    Deluge System All sprinkler heads are open; water discharges from all heads simultaneously when the system is activated. High-hazard areas (aircraft hangars, chemical storage, power plants).

    Different types of fire sprinkler heads including pendant, upright, and sidewall


    Section 3: Sprinkler Head Types

    The type of sprinkler head used depends on the building’s layout and ceiling design.

    Head Type Description Typical Use
    Pendant Sprinklers Hangs down from the ceiling; discharges water in a downward pattern. Most standard commercial spaces (offices, retail, hotels).
    Upright Sprinklers Mounted on top of the pipe; discharges water upward. Unfinished spaces (warehouses, mechanical rooms).
    Sidewall Sprinklers Mounted on a wall; discharges water in a horizontal pattern. Corridors, small rooms, or areas where ceiling mounting is not possible.
    Concealed Sprinklers Recessed with a cover plate; aesthetically pleasing. High-end commercial spaces (lobbies, restaurants, corporate offices).
    ESFR Sprinklers Early Suppression Fast Response; designed for high-piled storage. Warehouses, distribution centers.

    Fire sprinkler system piping and heads in a commercial warehouse


    Section 4: Sprinkler Design and Layout (NFPA 13)

    NFPA 13 specifies the maximum spacing and location of sprinkler heads.

    Parameter Requirement Code Reference
    Maximum Spacing Standard sprinkler heads: 15 ft (4.6 m) maximum spacing. NFPA 13, 8.5
    Minimum Spacing Minimum 6 ft (1.8 m) between sprinklers. NFPA 13, 8.5
    Distance to Walls Maximum distance to a wall: 7.5 ft (2.3 m). NFPA 13, 8.5
    Ceiling Height Standard sprinklers: up to 45 ft (13.7 m) with specific design criteria. NFPA 13, 8.4
    Obstructions Sprinklers must be clear of obstructions (lighting fixtures, ductwork, beams). NFPA 13, 8.6

    Pro Tip: Always consult a licensed fire protection engineer for sprinkler system layout.

    Emergency light fixture with battery backup indicator


    Section 5: Water Supply and Pressure Requirements

    A fire sprinkler system must have an adequate and reliable water supply.

    Requirement Details Code Reference
    Water Supply Must be capable of providing the required flow and pressure for the full system. NFPA 13, 6.2
    Pressure Must be sufficient to ensure proper sprinkler operation at the highest and most remote point. NFPA 13, 6.2
    Fire Pump Required if the municipal supply cannot provide adequate pressure. NFPA 20
    Water Storage Tank Required in areas with unreliable water supply. NFPA 13, 6.4
    Backflow Prevention Required to prevent contamination of the municipal water supply. NFPA 13, 6.3

    Pro Tip: Perform a flow test to verify the water supply before designing the system.

    Fire pump in a commercial building


    Section 6: Inspection, Testing, and Maintenance (ITM)

    NFPA 25 requires regular inspection, testing, and maintenance of fire sprinkler systems.

    Activity Frequency Procedure Code Reference
    Visual Inspection Monthly Check control valves, pressure gauges, and for visible damage. NFPA 25, 5.2
    Flow Test Annually Test water flow from a test header to verify system performance. NFPA 25, 5.3
    Valve Exercise Quarterly Open and close all control valves (to prevent sticking). NFPA 25, 5.4
    Sprinkler Head Check Annually Check for damage, corrosion, or paint on sprinkler heads. NFPA 25, 5.6
    Full System Test Annually Test all system components (alarm, pressure, flow). NFPA 25, 5.5

    Documentation: All inspections and tests must be recorded and retained for inspection by authorities.

    Fire alarm inspection log and test report on a clipboard


    Section 7: Common Violations and How to Avoid Them

    Violation Why It’s a Problem How to Fix
    Painted sprinkler heads Paint can prevent heads from activating. Never paint sprinkler heads; replace if painted.
    Blocked sprinkler heads Obstructions prevent water from reaching fire. Keep at least 18 inches clearance below sprinkler heads.
    Missing escutcheons Fire can bypass the sprinkler head. Install escutcheons (cover plates).
    Control valves closed System won’t operate. Ensure valves are locked open.
    Obstructed pipe Reduced water flow. Inspect and clean pipes regularly.

    Conclusion

    Fire sprinkler systems are a critical life-safety investment for any commercial building. By understanding the IBC requirements, selecting the right system type, and ensuring proper installation and maintenance, you can protect your building, occupants, and investment.

    Take Action Today:

    1. Verify your building’s sprinkler system is up to code.

    2. Inspect sprinkler heads for damage or obstructions.

    3. Test the system annually (or as required by local code).

    4. Maintain records of all inspections and maintenance.

  • When Is a Fire Alarm System Required? (NFPA 101 Reference Guide)

    When Is a Fire Alarm System Required? (NFPA 101 Reference Guide)

    Not every commercial building requires a fire alarm system. The requirements depend on the occupancy type, the building size, and the occupant load. Knowing when a fire alarm is required can save you from costly design errors and code violations.

    This quick-reference guide summarizes the NFPA 101 fire alarm system requirements for different occupancy types. Always verify with your local authority having jurisdiction (AHJ) and the latest edition of NFPA 101.

    Smoke detector on a commercial building ceiling


    Fire Alarm Requirements by Occupancy Type

    OCCUPANCY TYPE CODE REF. FIRE ALARM REQUIREMENTS
    AMBULATORY (20.3.4.1, and 9.6) ✅ Yes – Required to be provided with a fire alarm system.
    ASSEMBLY (12.3.4.1, and 9.6) ✅ Yes – Required when the occupant load is more than 300 occupants.
    BUSINESS (38.3.4.1, 38.3.4.2, and 9.6) ✅ Yes – Required when any of the following conditions exist: 

    • The building is 2 stories above the level of exit discharge.
    • The occupancy is subject to 50 occupants above or below the level of exit discharge.
    • The total occupant load is 300 occupants or more.
    EDUCATIONAL (14.3.4.1, and 9.6) ✅ Yes – Required. 

    Exceptions: 

    • The building area is less than 93 sqm.
    • The building has a single classroom only.
    • The building is located more than 9.1m from another building.
    HEALTHCARE (18.3.4.1, and 9.6) ✅ Yes – Required to be provided with a fire alarm system.
    ONE & TWO FAMILY DWELLINGS (24.3.4.1, and 9.6) ⚠️ Smoke Alarms Required – Not a full fire alarm system. Smoke alarms shall be installed in: 

    • All sleeping rooms.
    • Each level of dwelling units, including the basement.
    HOTELS & DORMITORIES (28.3.4.1, and 9.6) ✅ Yes – Required. 

    Additional Requirements: 

    • All guest rooms must accommodate hearing-impaired individuals with visible notification appliances.
    • Annunciation shall be provided in buildings more than 3 stories in height or having less than 50 guest rooms.
    APARTMENTS (30.3.4.1, and 9.6) ✅ Yes – Required if the apartment building has 4 or more stories in height or more than 11 dwelling units. 

    Not required when each dwelling unit is separated by at least a 1-hour fire barrier.

    MERCANTILE (36.3.4.1, and 9.6) ✅ Yes – Required for ‘Class A’ mercantile occupancy.
    INDUSTRIAL (40.3.4.1, and 9.6) ✅ Yes – Required. 

    Exceptions: 

    • The total occupant load is less than 100.
    • The occupant load above and below the level of exit discharge is less than 25.
    STORAGE
    • (42.3.4.1, and 9.6)
    ✅ Yes – Required. 

    Exceptions: 

    • It has ‘low hazard’ contents only.
    • The aggregate floor area is less than 9,300 sqm.
    • The building is protected with an approved, supervised automatic sprinkler system.

    Manual pull station on a commercial building wall


    How Fire Alarm Systems Work

    All fire alarm systems operate on the same basic principle:

    “If a detector detects smoke or heat, or someone operates a manual pull station (break glass unit), the alarm sounders operate to warn occupants that there may be a fire and to evacuate.”

    Fire alarm systems may also incorporate remote signaling equipment to alert the fire brigade via a central station.


    Types of Fire Alarm Systems

    Fire alarm systems can be broken down into four main categories:

    Type Description
    Conventional Divides the building into zones; each zone is wired to a specific circuit on the control panel.
    Addressable Each device has a unique address; the control panel identifies exactly which device has been activated.
    Analogue Addressable Provides more detailed information (e.g., “smoke level 65%”) rather than just a simple alarm signal.
    Wireless Uses radio signals instead of hard wiring; ideal for historic buildings or temporary installations.

    NFPA Xchange Community Discussion

    For more insights and discussions on fire alarm requirements, visit the NFPA Xchange community:


    Important Notes

    • Code Reference: NFPA 101 2012 edition unless otherwise noted.

    • Type of Initiation: Refer to __.3.4.2 for the specific ‘type of initiation’ required for each occupancy type.

    • Purpose: This information is not complete and is intended as a quick reference only. Always refer to the full NFPA 101 code or your local codes for complete and up-to-date requirements.