Category: Fire Safety

  • How to Design a Fire Safety Awareness Campaign for Your Building

    How to Design a Fire Safety Awareness Campaign for Your Building

    Fire safety awareness is the foundation of any effective safety program. Employees who understand the risks, recognize hazards, and know what to do in an emergency are far less likely to cause fires and far more likely to respond effectively if one occurs.

    Awareness campaigns bridge the gap between policies and practice, turning written procedures into shared habits. This guide provides a step-by-step framework for designing and implementing a fire safety awareness campaign.


    Section 1: Why Awareness Matters

    Reason Why It Matters
    Prevention Employees who understand fire hazards are less likely to create them.
    Early Detection Awareness means occupants notice and report fires earlier, reducing damage and injury.
    Effective Response Occupants who know procedures evacuate faster and more safely.
    Culture of Safety A strong safety culture means employees look out for themselves and others.
    Regulatory Compliance Many codes require occupant training and awareness programs.

    Pro Tip: Awareness campaigns are not a one-time event—they must be ongoing to be effective.


    Section 2: Understanding Your Audience

    Effective campaigns start with understanding your audience’s existing knowledge, attitudes, and behaviours.

    Audience Factor Questions to Ask
    Knowledge Level How much do occupants already know about fire safety?
    Attitudes Do they view fire safety as important or a burden?
    Behaviours Are they following existing fire safety procedures?
    Communication Preferences Do they prefer emails, posters, meetings, or digital tools?
    Diversity Are there language or accessibility barriers to consider?

    Pro Tip: Conduct a brief survey to understand your audience’s baseline knowledge and attitudes before designing the campaign.


    Section 3: Key Campaign Messages

    Your campaign should focus on the most critical fire safety messages.

    Message Category Key Messages
    Prevention Recognising and reporting fire hazards.
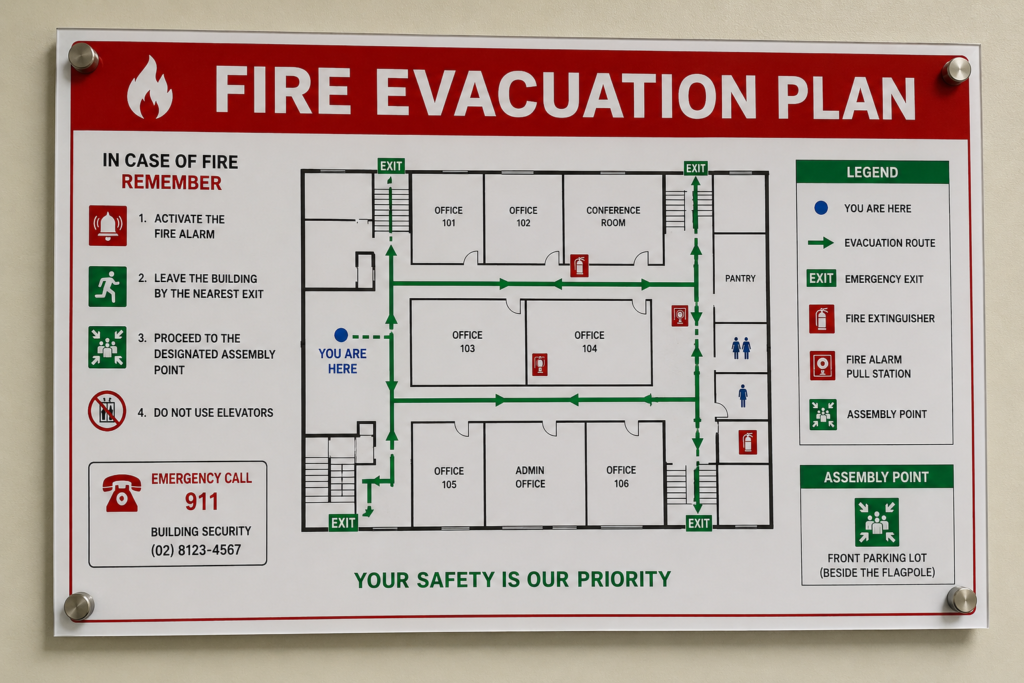
    Evacuation Knowing escape routes, exits, and assembly points.
    Alarm Activation Knowing how and when to pull a fire alarm.
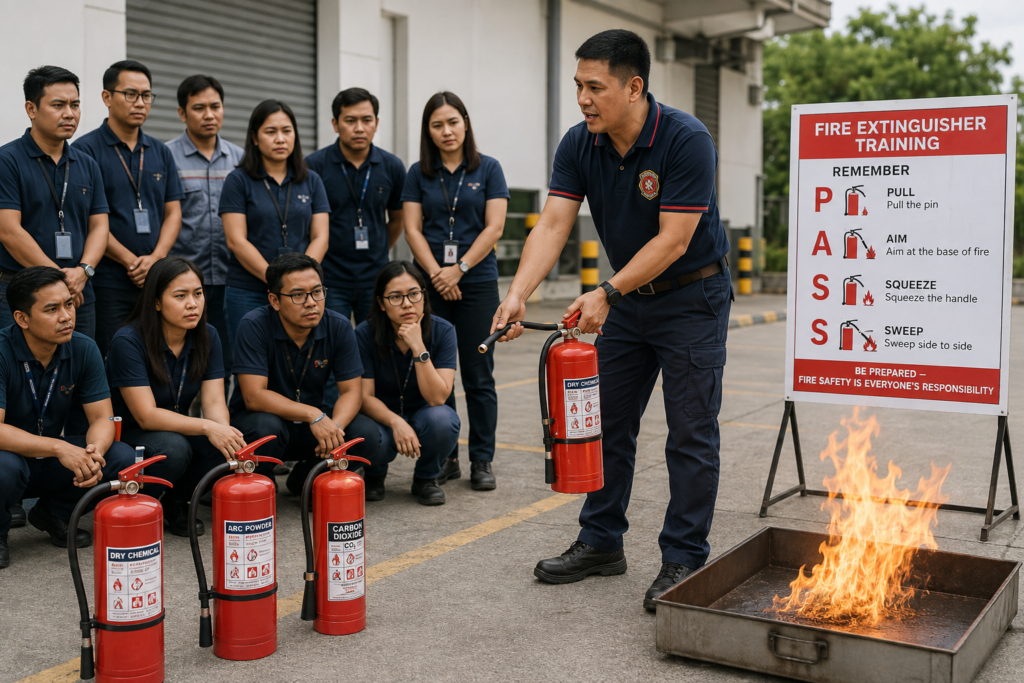
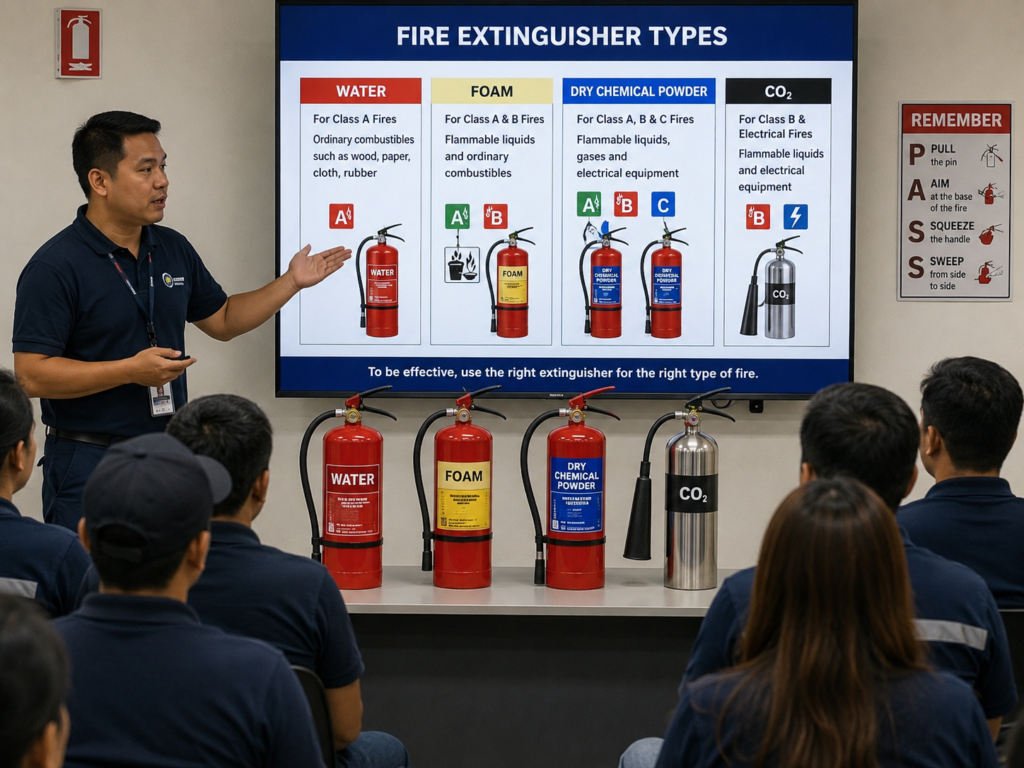
    Extinguisher Use Understanding when and how to use a fire extinguisher (PASS technique).
    Reporting How to report a fire hazard or safety concern.
    Emergency Numbers Know how to contact emergency services.

    Pro Tip: Prioritize messages based on risk—what behaviours are most likely to prevent fires in your building?


    Section 4: Campaign Delivery Methods

    Method Description Best For
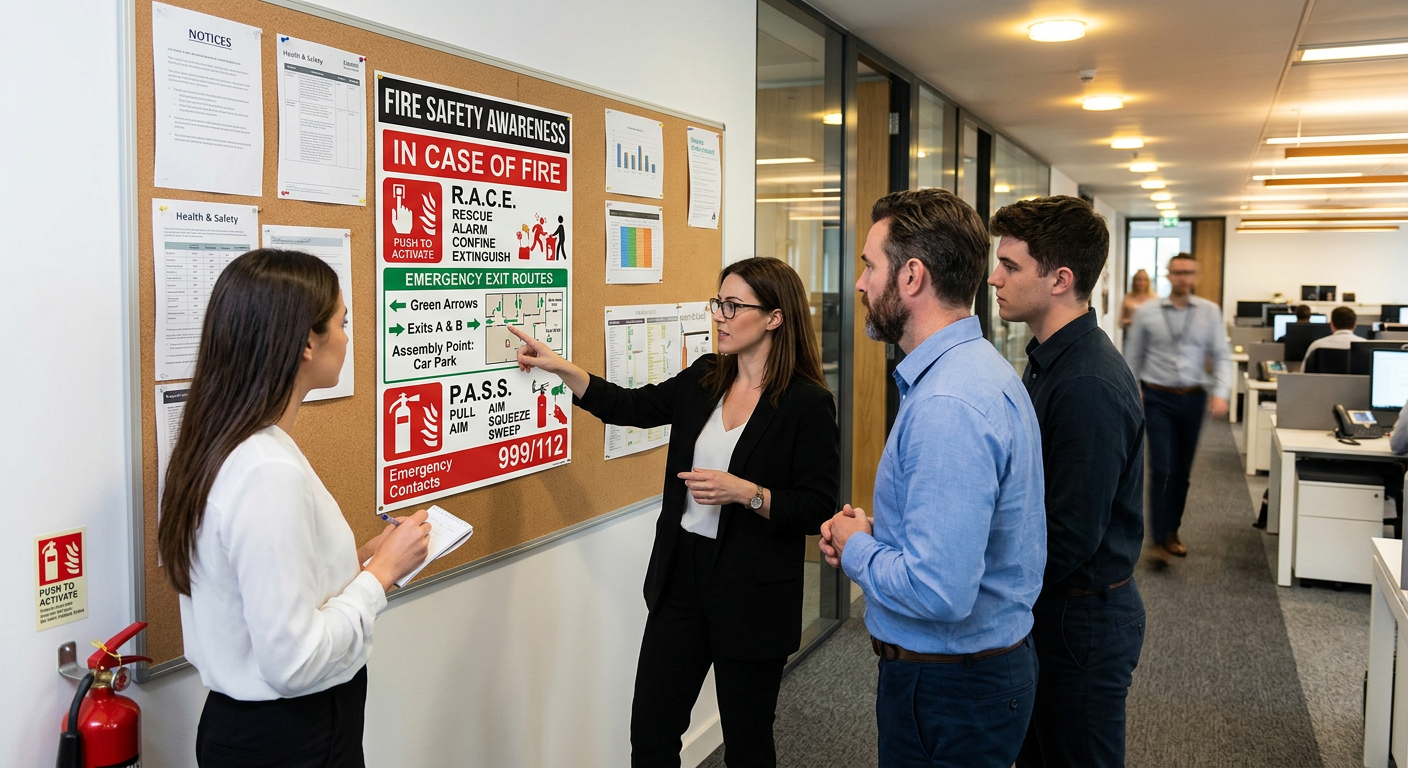
    Posters Visual reminders placed in high-traffic areas. Reinforcing key messages.
    Email Campaigns Regular email updates with safety tips. Remote workers, office-based employees.
    Digital Signage Screens displaying rotating safety messages. Common areas, lobbies, corridors.
    Safety Bulletins Short, focused newsletters. Detailed safety information.
    Intranet / App Dedicated safety page or app. Easy access to information.
    Toolbox Talks Short, focused safety talks. Engaging employees in conversation.
    Competitions Quizzes, safety-related competitions. Increasing engagement.
    Events Safety fairs, demonstrations. High visibility and engagement.
    Social Media Internal social media posts. Reaching a broad audience.

    Pro Tip: Use multiple channels to reinforce messages—people learn best through repetition and variety.


    Section 5: Campaign Calendar

    A campaign calendar helps ensure consistent messaging over time.

    Month Theme Key Messages Activities
    January Fire Safety Basics Recognizing hazards, reporting. Posters, email blast.
    February Evacuation Procedures Escape routes, assembly points. Fire drill, signage review.
    March Fire Extinguishers PASS technique, when to use. Extinguisher training.
    April Electrical Safety Overloading sockets, damaged cords. Safety inspection, tips.
    May Kitchen Safety Cooking hazards, fire blankets. Kitchen safety demonstration.
    June Fire Drills Practice evacuation. Fire drill, debrief.
    July Smoke Detectors Testing, maintenance. Detector inspection.
    August First Response Fire brigade, emergency contacts. Emergency plan review.
    September Fire Doors Keep closed, don’t prop open. Fire door inspection.
    October Fire Safety Month All topics. Safety fair, demonstrations.
    November Winter Safety Heating, holiday hazards. Seasonal safety tips.
    December Review and Plan Review progress, plan next year. Campaign review.

    Pro Tip: Align your campaign with national fire safety events, such as Fire Prevention Week — the NFPA-sponsored U.S. observance held every year during the Sunday-to-Saturday week containing October 9, commemorating the Great Chicago Fire [1].


    Section 6: Engaging Campaign Elements

    Element Description Example
    Visuals Strong, memorable images. Photos of fire hazards, evacuation routes.
    Slogans Catchy phrases. “Stop, Drop, and Roll”; “Be Alert – Don’t Get Hurt.”
    Stories Real-life examples. “Fire that started from an overloaded socket.”
    Quizzes Test knowledge. “Do you know the PASS technique?”
    Challenges Encourage safe behaviours. “Walk to the nearest exit and find the fire extinguisher.”
    Recognition Reward safe behaviours. “Safety Champion of the Month.”

    Section 7: Social Media and Digital Communication

    Platform Content Ideas
    Internal Social Media Safety tips, quizzes, employee stories, photos from drills.
    Email Newsletters Monthly safety updates, hazard alerts, new information.
    Intranet/App Safety resources, training materials, emergency plans, contacts.

    Pro Tip: Use internal social media to share positive stories and recognise employees who demonstrate safe behaviours.


    Section 8: Evaluating Your Campaign

    Evaluation Method What to Assess
    Surveys Knowledge, attitudes, and behaviours.
    Drill Performance Evacuation times, behaviour during drills.
    Hazard Reports Are employees reporting hazards?
    Incident Rates Are fires decreasing?
    Engagement How many people are participating in activities?

    Pro Tip: Use evaluation data to refine and improve your campaign over time.


    Section 9: Design Checklist

    Use this checklist to plan your fire safety awareness campaign:

    Item Status Notes
    Audience Assessment ☐ Understand your audience.
    Campaign Goals ☐ Define what you want to achieve.
    Key Messages ☐ Identify the most important messages.
    Delivery Methods ☐ Choose appropriate channels.
    Campaign Calendar ☐ Plan a schedule.
    Engaging Elements ☐ Plan visuals, slogans, and activities.
    Evaluation Plan ☐ Define how you will measure success.
    Budget and Resources ☐ Identify what you need.

    Section 10: Common Mistakes and How to Avoid Them

    Mistake Why It’s a Problem How to Fix
    One-Time Campaign Messages are quickly forgotten. Run ongoing campaigns.
    Ignoring Audience Needs Messages are not relevant. Understand your audience.
    Too Much Information Overload reduces effectiveness. Focus on key messages.
    Passive Communication Low engagement. Use interactive and engaging methods.
    No Evaluation Cannot measure success or improve. Evaluate and adjust.

    Section 11: The Power of Behavioural Change

    Ultimately, a successful awareness campaign changes behaviour. Use insights from behavioural science to increase effectiveness:

    Technique Application
    Social Norms Show that most people are following safety rules.
    Commitment Ask people to commit to safe behaviours.
    Habit Formation Encourage repetition to form habits.
    Incentives Reward safe behaviours.
    Nudges Make the safe choice the easy choice.

    Conclusion

    A well-designed fire safety awareness campaign is a powerful tool for preventing fires and protecting occupants. By understanding your audience, delivering clear messages through multiple channels, and engaging employees in a variety of ways, you can promote a culture of safety in your building.

    Take Action Today:

    1. Assess your audience—what do they know and need?
    2. Define your key messages—what do you want them to know?
    3. Choose your methods—posters, emails, meetings, digital?
    4. Plan your calendar—spread messages throughout the year.
    5. Measure and improve—evaluate and refine your campaign.

    References & Notes

    [1] National Fire Protection Association (NFPA), Fire Prevention Week — an annual U.S. observance held during the Sunday-to-Saturday week containing October 9, commemorating the Great Chicago Fire of 1871. Sponsored by NFPA since 1922.

    Note: this article is general campaign-planning and behavioural-science guidance rather than a code-compliance reference. It contains no statistics, regulatory citations, or named case studies beyond the Fire Prevention Week reference above, which has been verified. No other fact-checking was required.


    Continue Reading from Our Series:

  • How to Conduct a Post-Fire Investigation and Lessons Learned

    How to Conduct a Post-Fire Investigation and Lessons Learned

    A post-fire investigation is not just about determining what happened—it is about preventing it from happening again. When a fire occurs in a commercial building, the investigation serves multiple critical purposes: identifying the origin and cause, documenting damage, supporting insurance claims, and, most importantly, extracting lessons to prevent recurrence.

    This guide covers the essential steps in conducting a post-fire investigation, documenting findings, and implementing lessons learned.


    Section 1: The Purpose of Post-Fire Investigations

    A post-fire investigation serves several critical functions.

    PurposeWhy It Matters
    Determine Origin and CauseEstablishes where and why the fire started.
    Document DamageProvides a record for insurance claims and remedial works.
    Identify System FailuresEvaluates why fire protection systems may have failed to operate effectively.
    Support Legal ProceedingsProvides evidence for potential subrogation or liability claims.
    Prevent RecurrenceExtracts lessons to prevent future incidents.
    Improve SafetyIdentifies gaps in training, procedures, or building design.

    Pro Tip: A thorough investigation is essential for preventing similar incidents and protecting against liability.


    Section 2: The Scientific Method in Fire Investigation

    The scientific method is the foundation of professional fire investigation. NFPA 921, Guide for Fire and Explosion Investigations, provides the roadmap for scientific investigation methods used to formulate fact-based opinions on incident origin, cause, and responsibility [1]. The methodology includes:

    StepDescription
    Data CollectionGathering all relevant information from the scene, interviews, and documentation.
    Data AnalysisAnalyzing the collected data to identify patterns and potential hypotheses.
    Hypothesis FormulationDeveloping potential explanations for the origin and cause of the fire.
    Hypothesis TestingTesting each hypothesis against the case data and the principles of science.
    DeterminationConcluding the origin and cause of the fire if one and only one hypothesis survives testing.

    Pro Tip: The first determination made in a fire investigation is the origin of the fire—that is, where the fire started. Fire origin hypotheses are developed from the analyzed data, and each hypothesis is tested against the principles of science.


    Section 3: The Investigation Process

    The investigation process can be broken down into three main phases.

    A. Pre-Scene Investigation

    ActivityDescription
    Initial ResponseSecure the scene and ensure safety.
    Documentation ReviewGather building plans, fire safety plans, and previous inspection records.
    Witness InterviewsInterview occupants, employees, and first responders.
    System Data RetrievalRetrieve data from fire alarms, sprinkler systems, and other monitoring systems.

    B. On-Scene Investigation

    ActivityDescription
    Scene DocumentationPhotograph and videotape the entire scene.
    Evidence CollectionCollect and preserve physical evidence.
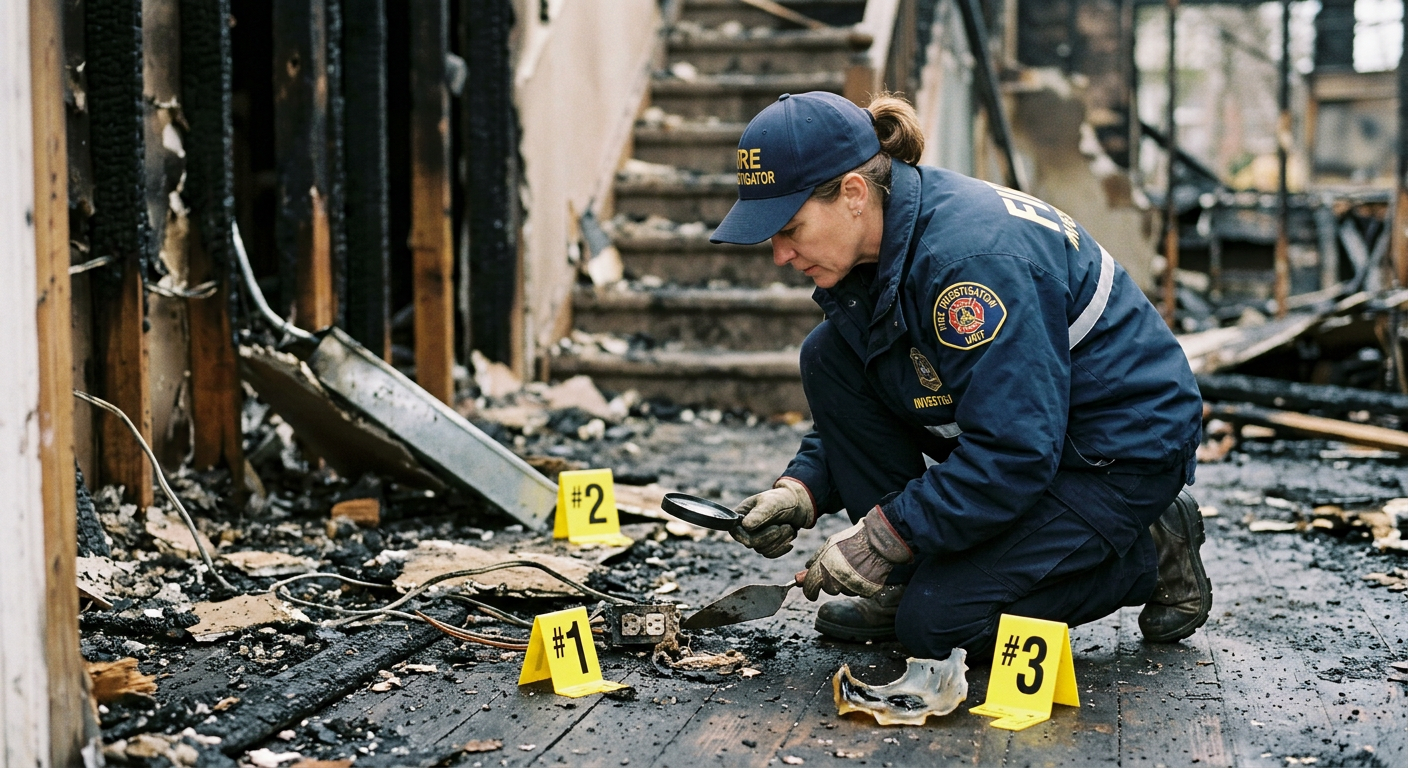
    Fire Pattern AnalysisAnalyze fire patterns to determine the area of origin.
    System EvaluationInspect fire protection systems (sprinklers, alarms, extinguishers).
    Damage AssessmentAssess structural, thermal, smoke, and water damage.

    C. Post-Scene Investigation

    ActivityDescription
    Laboratory TestingSend samples to a fire laboratory for analysis.
    Document AnalysisReview insurance policies, financial statements, and business records.
    Report PreparationPrepare a final investigation report.
    Lessons LearnedIdentify recommendations for prevention.

    Section 4: Documenting the Investigation

    Proper documentation is essential for a credible investigation. The Bureau of Fire Protection in the Philippines, for example, requires a comprehensive set of substantiating documents for a final investigation report [2]:

    Document TypeExamples
    Official RecordsSpot Investigation Report, Progress Investigation Report.
    Financial DocumentsAffidavit of loss, insurance policies, income tax returns, financial statements.
    Business DocumentsMayor’s permit, business license, occupancy permit, SEC registration.
    Building RecordsApproved floor, building, and electrical plans, lease contract, land title.
    Employee RecordsComplete list of employees.
    EvidencePhotographs of the fire scene, Fire Laboratory Services Report.
    Witness StatementsSworn statements of witnesses.

    Fire Incident Report Template Structure:

    SectionContent
    HeaderDate, time, location, GPS coordinates, department, room.
    Incident TypeBuilding fire, vehicle fire, alarm activation, evacuation, obstructed exit routes, extinguisher discharge.
    DetailsPeople involved, problems identified, fire brigade attendance.
    EvidencePhotographs, observations, and notes.

    Section 5: Common Failures in Fire Protection Systems

    A critical part of post-fire investigation involves evaluating whether fire protection systems performed as intended.

    Sprinkler System Effectiveness:

    According to an NFPA report, sprinkler systems were effective in 89% of fires large enough to trigger them, with fire spread limited to the room or object of origin in the large majority of reported cases (NFPA’s own figures vary by report year, generally in the 94–97% range) [3]. However, sprinkler systems failed to operate in roughly 8% of reported structure fires large enough to activate them and operated ineffectively in a further small percentage of cases [3].

    Cause of FailureDescription
    System ShutdownsThe system was off or shut down at the time of the fire.
    Manual InterventionDeliberate actions, such as disabling the system.
    Damaged ComponentsDamage to system parts preventing proper operation.
    Neglected MaintenanceWithout regular upkeep, systems may not function as intended.
    Inappropriate SystemUsing the wrong type of system for the specific fire situation.
    Agent Delivery IssuesFire suppression agent fails to reach the flames or insufficient agent is discharged.

    Pro Tip: Evaluating the performance of fire protection systems is essential for understanding why a fire spread and identifying potential subrogation opportunities.


    Section 6: Real-World Case Study – New Zealand International Convention Centre

    The NZICC fire provides a powerful example of a complex post-fire investigation [4]. On October 22, 2019, while construction was nearing 80% completion, the roof caught fire. The nature of the roof design prevented firefighters from fully extinguishing the fire until ten days later, leading to extensive structural, thermal, smoke, and water damage throughout the building’s fourteen levels.

    Key Lessons Learned:

    LessonApplication
    Complex InvestigationThe investigation involved multiple experts across all aspects of the building.
    Structural IntegrityFull-scale, in-situ proof testing of roof trusses was required to verify structural adequacy.
    Remediation ChallengesThe multi-year remediation process included reconstructing the damaged structure, evaluating new coating and fire protection systems, and replacing architectural systems and finishes.
    Fire vs. Water DamageDistinguishing between fire and water damage was critical for insurance claims.

    Section 7: Implementing Lessons Learned

    The ultimate goal of any investigation is to prevent recurrence. Lessons learned should be documented and implemented.

    Key Steps in Implementing Lessons Learned:

    StepAction
    1. Identify FindingsDocument the root causes and contributing factors.
    2. Develop RecommendationsCreate specific, actionable recommendations.
    3. Assign ResponsibilityAssign responsibility for implementing each recommendation.
    4. Set TimelinesEstablish deadlines for completion.
    5. Monitor ImplementationTrack progress and ensure completion.
    6. Share LessonsCommunicate lessons learned to relevant stakeholders.

    Section 8: Design Checklist

    Use this checklist to conduct a thorough post-fire investigation:

    ItemStatusNotes
    Secure the Scene☐Ensure safety and preserve evidence.
    Document the Scene☐Photographs, videos, and sketches.
    Collect Evidence☐Physical evidence and samples.
    Review Building Records☐Plans, inspection records, and maintenance logs.
    Evaluate Fire Protection Systems☐Sprinklers, alarms, and extinguishers.
    Interview Witnesses☐Occupants, employees, and first responders.
    Determine Origin and Cause☐Using NFPA 921 methodology.
    Prepare Investigation Report☐Document findings and recommendations.
    Implement Lessons Learned☐Recommendations assigned and tracked.

    Section 9: Common Mistakes and How to Avoid Them

    MistakeWhy It’s a ProblemHow to Fix
    Incomplete DocumentationMissing evidence for insurance or legal proceedings.Use a comprehensive checklist.
    Ignoring Fire Protection System FailuresMisses opportunities to identify root causes.Evaluate all fire protection systems thoroughly.
    Not Preserving EvidenceEvidence may be lost or contaminated.Secure the scene and preserve evidence.
    Jumping to ConclusionsMay lead to incorrect findings.Use the scientific method and test hypotheses.
    Failing to Implement Lessons LearnedSimilar incidents may recur.Assign responsibility and track implementation.

    Conclusion

    A post-fire investigation is a critical tool for understanding what happened, why it happened, and how to prevent it from happening again. By following a systematic approach based on NFPA 921, documenting findings thoroughly, and implementing lessons learned, you can protect your building, your occupants, and your organization.

    Take Action Today:

    1. Familiarize yourself with NFPA 921 and the scientific method for fire investigation.
    2. Develop a post-fire investigation plan for your organization.
    3. Document all findings thoroughly using standard templates.
    4. Evaluate fire protection systems to identify potential failures.
    5. Implement lessons learned to prevent recurrence.

    References & Notes

    [1] NFPA 921, Guide for Fire and Explosion Investigations — establishes the scientific-method framework for determining fire origin, cause, and responsibility.

    [2] Bureau of Fire Protection (Philippines) — documentation requirements for fire investigation reports, as an example of a jurisdiction-specific documentation standard.

    [3] NFPA, “U.S. Experience with Sprinklers” — sprinkler systems operated and were effective in 89% of fires considered large enough to activate them (verified figure); fire spread limited to the room of origin has been reported in the 94–97% range depending on the report year and dataset. Sprinklers failed to operate in roughly 8% of qualifying fires, most commonly because the system had been shut off before the fire.

    [4] Case study drawn from published post-fire investigation accounts of the New Zealand International Convention Centre (NZICC) fire, Auckland, 22 October 2019 (SGH Engineers; Fire and Emergency New Zealand Fire Investigation Report; Fire Technology, Springer, 2023 post-fire structural evaluation). Correction: the original article stated the fire took “four days” to fully extinguish. Independent sources — including Fire and Emergency New Zealand’s official investigation report and the engineering case study this section is drawn from — consistently state the fire burned for approximately ten days before being fully extinguished. This has been corrected above. The fire was determined to be accidental, caused by a cardboard roll of roofing membrane that smoldered after inadvertent exposure to a worker’s gas torch.


    Continue Reading from Our Series:

  • How to Write Effective Fire Safety Reports and Documentation

    How to Write Effective Fire Safety Reports and Documentation

    Fire safety documentation is not just a regulatory requirement—it is a critical tool for managing risk, demonstrating compliance, and protecting your organization. Clear, well-organized documentation can save time during inspections, reduce liability, and provide a clear record of your safety efforts.

    This guide covers the essential elements of fire safety documentation, including:

    • Inspection reports.
    • Fire safety plans.
    • Compliance records.
    • Maintenance logs.
    • Training and drill records.

    Section 1: Why Documentation Matters

    Documentation serves multiple critical functions in fire safety management.

    ReasonWhy It Matters
    Demonstrates ComplianceProvides evidence of compliance with codes and standards.
    Reduces LiabilityShows that you have taken reasonable steps to ensure safety.
    Supports InspectionsEnables quick access to required records during inspections.
    Identifies TrendsHelps identify recurring issues that need attention.
    Improves AccountabilityAssigns clear responsibility for safety tasks.
    Facilitates TrainingProvides reference materials for employee training.
    Supports Insurance ClaimsDocumentation can support claims and demonstrate proactive risk management.

    Pro Tip: The quality of your documentation can be as important as the quality of your safety systems. Clear, well-organized records inspire confidence during inspections.


    Section 2: Required Documentation

    The following documents are typically required for fire safety compliance.

    DocumentDescriptionCode Reference
    Fire Safety PlanDocument outlining emergency procedures.NFPA 101 [1]
    Inspection LogsRecords of routine inspections (fire extinguishers, sprinklers, alarms).NFPA 10, NFPA 13, NFPA 72
    Testing and Maintenance ReportsReports from annual testing of fire protection systems.NFPA 13, NFPA 72, NFPA 25
    Training RecordsRecords of employee training and fire drills.NFPA 101, OSHA 1910.157 [2]
    Fire Drill RecordsDocumentation of fire drills, including date, time, and duration.NFPA 101 [1]
    Equipment CertificatesCertificates for fire extinguishers, sprinkler systems, and other equipment.NFPA 10, NFPA 13

    Section 3: Writing Effective Inspection Reports

    An inspection report should provide a clear, accurate, and actionable record of what was inspected, what was found, and what needs to be done.

    Key Elements of an Inspection Report:

    ElementDescriptionExample
    HeaderTitle, location, date, and inspector’s name.“Fire Extinguisher Inspection Report – Building A”
    ScopeWhat was inspected and why.“Monthly inspection of all fire extinguishers per NFPA 10.”
    ObservationsWhat was found during the inspection.“Extinguisher #12 is missing; #15 is blocked by storage.”
    FindingsWhat needs to be addressed.“Replace #12; clear obstruction around #15.”
    PriorityHow urgent the finding is.High (critical), Medium (needs attention), Low (minor).
    Action PlanWho is responsible for fixing the issue and by when.“John Smith to replace #12 by [target date].”
    AttachmentsPhotos, diagrams, or supporting documents.“Photo of obstructed extinguisher attached.”

    Structure for a Simple Inspection Report:

    SectionDescription
    1. IntroductionPurpose and scope of the inspection.
    2. ObservationsList of observations with photos.
    3. Non-CompliancesList of non-compliances with code references.
    4. Corrective ActionsRecommended actions and timelines.
    5. AttachmentsPhotos, drawings, and supporting documents.
    6. SignaturesInspector’s signature and date.

    Pro Tip: Use a standard template to ensure consistency and save time.

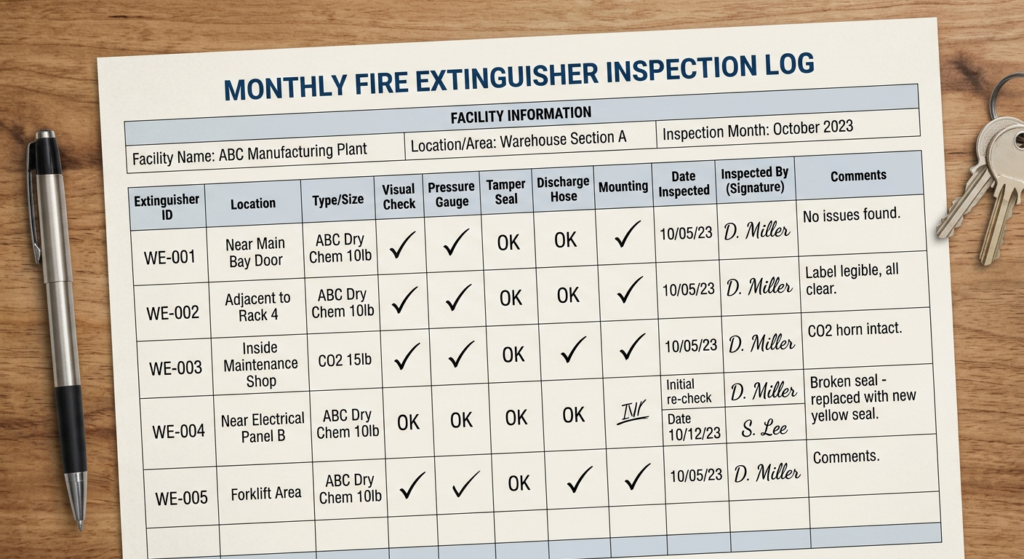
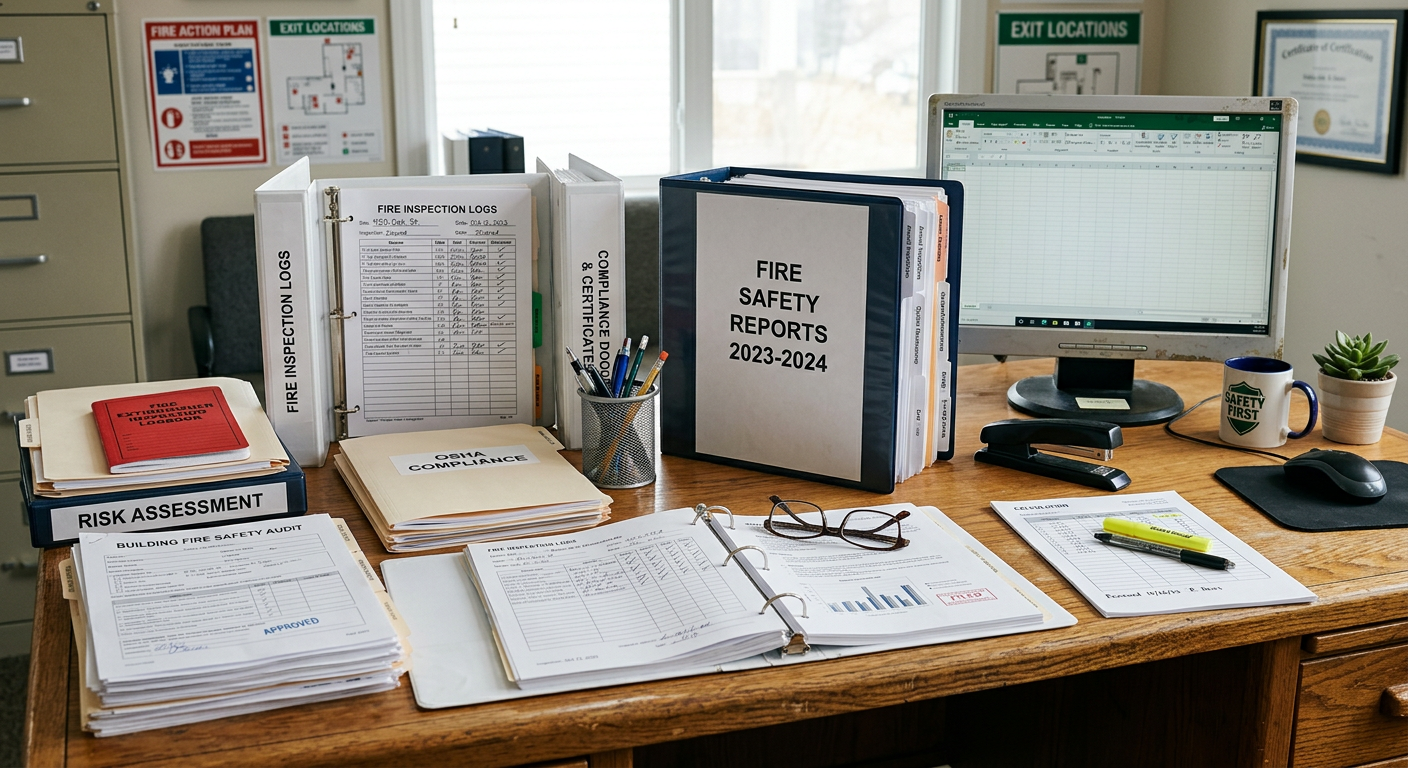
    Sample fire extinguisher inspection form showing completed entries

    Section 4: Developing a Fire Safety Plan

    A fire safety plan is the cornerstone of your documentation. It outlines the procedures to be followed in a fire emergency.

    Key Elements of a Fire Safety Plan:

    ElementDescription
    Building InformationAddress, description, and occupancy type.
    Fire Protection SystemsDescription of sprinklers, alarms, extinguishers, and other systems.
    Evacuation ProceduresRoutes, assembly points, and procedures for evacuating occupants.
    Roles and ResponsibilitiesAssignments for fire safety director, floor wardens, and evacuation coordinators.
    Emergency CommunicationHow occupants will be notified and how emergency services will be contacted.
    Training and DrillsSchedule and procedures for training and fire drills.
    Maintenance and TestingSchedule for inspecting and testing fire protection systems.

    Example Fire Safety Plan Outline:

    1.0 INTRODUCTION
      1.1 Purpose
      1.2 Scope
      1.3 Building Description
    
    2.0 FIRE PROTECTION SYSTEMS
      2.1 Fire Sprinkler System
      2.2 Fire Alarm System
      2.3 Fire Extinguishers
      2.4 Standpipe System
    
    3.0 EMERGENCY PROCEDURES
      3.1 Detection and Reporting
      3.2 Evacuation Procedures
      3.3 Assembly Points
    
    4.0 ROLES AND RESPONSIBILITIES
      4.1 Fire Safety Director
      4.2 Floor Wardens
      4.3 Evacuation Coordinators
    
    5.0 TRAINING AND DRILLS
      5.1 Training Schedule
      5.2 Drill Schedule
    
    6.0 MAINTENANCE AND TESTING
      6.1 Fire Sprinkler System
      6.2 Fire Alarm System
      6.3 Fire Extinguishers
    
    7.0 APPENDICES
      7.1 Floor Plans
      7.2 Inspection Checklists

    Pro Tip: The fire safety plan should be reviewed and updated annually, or whenever significant changes occur to the building or occupancy.


    Section 5: Training and Drill Records

    Training and drill records document that occupants are prepared for a fire emergency.

    Key Elements of Training Records:

    ElementDescription
    DateDate of the training session.
    ParticipantsNames of employees who attended.
    Topics CoveredDescription of what was covered.
    InstructorName of the person delivering the training.
    DurationLength of the training session.
    CertificatesAny certificates issued.

    Key Elements of Drill Records:

    ElementDescription
    DateDate of the fire drill.
    TimeStart and end times.
    ParticipantsNumber and names of participants.
    Evacuation TimeTime taken to evacuate.
    Issues EncounteredAny problems or observations.
    DebriefSummary of the debrief session.

    Section 6: Maintenance and Testing Logs

    Maintenance and testing logs document that fire protection systems are in working order.

    Key Elements of Maintenance Logs:

    ElementDescription
    SystemSystem being maintained (sprinklers, alarms, extinguishers).
    DateDate of the maintenance activity.
    DescriptionWhat was done (e.g., “Inspected and recharged extinguisher #12”).
    Performed ByName of the technician or staff member.
    Next Maintenance DateScheduled date for the next maintenance.

    Pro Tip: Use a digital system to track maintenance activities and set reminders for upcoming due dates.


    Section 7: Best Practices for Documentation

    Best PracticeWhy It Matters
    Use Standard TemplatesEnsures consistency and completeness.
    Keep Records CurrentOutdated records can undermine credibility.
    Store Records SecurelyProtect records from loss, damage, or unauthorized access.
    Retain Records for Required PeriodTypically at least 3 years (check your local requirements).
    Use Clear, Concise LanguageEnsure records are understandable to all readers.
    Include Photos and DrawingsVisual evidence can support written records.
    Regularly Review and UpdateEnsure documentation reflects current conditions.

    Section 8: Common Mistakes and How to Avoid Them

    MistakeWhy It’s a ProblemHow to Fix
    Incomplete RecordsMissing information; cannot demonstrate compliance.Use a checklist to ensure all required information is included.
    Outdated DocumentationReflects old conditions; may not be valid.Schedule regular reviews and updates.
    Poor OrganizationDifficult to find required information during an inspection.Organize records logically and use a consistent filing system.
    Illegible HandwritingRecords are unreadable.Use typed records or a digital system.
    No BackupRecords can be lost in a fire or other disaster.Keep digital backups offsite or in the cloud.

    Section 9: Digital Documentation Systems

    Consider using a digital system to manage your fire safety documentation.

    BenefitDescription
    Centralized StorageAll records in one place, accessible from anywhere.
    Automated RemindersSet reminders for maintenance, inspections, and training due dates.
    Easy Search and RetrievalQuickly find specific records.
    Version ControlTrack changes and updates to documents.
    Secure BackupProtect against loss due to fire or other disaster.
    Audit TrailTrack who made changes and when.

    Pro Tip: Many digital documentation systems are available as software-as-a-service (SaaS) solutions, making them affordable and easy to implement.


    Section 10: Design Checklist

    Use this checklist to ensure your fire safety documentation is complete and effective:

    ItemStatusNotes
    Fire Safety Plan☐Reviewed and updated annually.
    Inspection Logs☐Completed and stored for all systems.
    Testing and Maintenance Reports☐Completed and stored for all systems.
    Training Records☐Completed and stored for all employees.
    Fire Drill Records☐Completed and stored for all drills.
    Equipment Certificates☐Current and accessible.
    Digital Backup☐Records backed up offsite.
    Review Schedule☐Schedule for regular reviews.

    Conclusion

    Effective fire safety documentation is essential for managing risk, demonstrating compliance, and protecting your organization. By understanding the required documents, following best practices, and using a consistent system, you can ensure that your documentation is clear, accurate, and actionable.

    Take Action Today:

    1. Review your current fire safety documentation against the requirements in this guide.
    2. Identify any gaps and develop a plan to address them.
    3. Implement standard templates for inspection reports, training records, and other documents.
    4. Schedule regular reviews to keep documentation current.
    5. Consider a digital documentation system for improved organization and backup.

    References & Notes

    [1] NFPA 101, Life Safety Code — fire safety and evacuation plan requirements. Note: the original article cited a specific section number (“4.8”) for this requirement, which could not be confirmed against current sources; fire safety/evacuation plan requirements in NFPA 101 are set primarily within the individual occupancy chapters (e.g., Chapters 11–43) rather than a single universal Chapter 4 section. Verify the applicable section for your specific occupancy and adopted edition before citing a section number in a published document.

    [2] OSHA, 29 CFR 1910.157(g) — Portable Fire Extinguishers, Training and Education, requiring documented training upon initial employment and annually thereafter for designated employees.

    Note: this article is general documentation-practice guidance rather than a citation-heavy compliance reference. The system-specific standards named in Section 2 (NFPA 10 for extinguishers, NFPA 13 for sprinklers, NFPA 72 for alarms, NFPA 25 for water-based system inspection/testing/maintenance) are correctly matched to their systems but are cited here at the standard level, not to specific sections, since this article doesn’t quote specific numeric requirements from them the way other guides in this series do.


    Continue Reading from Our Series:

  • How to Design and Implement a Fire Safety Training Program
    How to Design and Implement a Fire Safety Training Program
    A fire safety training program is one of the most effective ways to protect occupants and property. A well-trained workforce can prevent fires, respond effectively to emergencies, and ensure a safe evacuation when needed.

    This guide covers the essential steps for designing and implementing a comprehensive fire safety training program, from assessing needs to evaluating effectiveness.


    Section 1: Why Training Matters

    Training is not just a regulatory requirement—it is a critical investment in safety.

    Reason Why It Matters
    Prevention Trained employees can identify and report fire hazards before they cause a fire.
    Early Response Trained employees can use extinguishers to control small fires before they spread.
    Safe Evacuation Trained employees know evacuation routes and assembly points.
    Regulatory Compliance NFPA 101, OSHA 1910.157, and other codes require fire training.
    Liability Reduction Documented training demonstrates due diligence.
    Confidence Trained employees are less likely to panic in an emergency.

    Pro Tip: Training is not a one-time event—it must be ongoing and reinforced regularly.


    Section 2: Key Regulations and Standards

    Several codes and standards govern fire safety training requirements.

    Regulation Scope Key Requirement
    NFPA 101 Life Safety Code Occupants must be trained on fire safety procedures and evacuation plans [1].
    OSHA 1910.157 Portable Fire Extinguishers Employees designated to use extinguishers must be trained upon initial assignment and annually thereafter [2].
    OSHA 1910.38 Emergency Action Plans Employers must designate and train employees to assist in safe and orderly evacuation [3].
    NFPA 1 Fire Code Fire safety training and drills are required for certain occupancies [4].

    Pro Tip: Check your local jurisdiction for additional training requirements that may apply to your occupancy type.


    Section 3: Assessing Training Needs

    Before designing your program, assess the specific needs of your building and occupants.

    Assessment Factor Questions to Ask
    Building Type Is it an office, hotel, healthcare facility, or industrial building?
    Occupant Profile Are there individuals with disabilities or language barriers?
    Fire Hazards What are the specific fire hazards in the building?
    Existing Systems What fire protection systems are in place (sprinklers, alarms, extinguishers)?
    Regulatory Requirements What training is required by code?

    Section 4: Core Training Components

    A comprehensive training program should include the following components.

    A. Fire Prevention Awareness

    Topic Key Points
    Common Causes of Fire Electrical faults, cooking, smoking, improper storage.
    Housekeeping Keep exits clear, store flammables safely, maintain a clean workspace.
    Hazard Reporting How to report fire hazards to management.
    Smoking Policies Designated smoking areas and proper disposal.

    B. Evacuation Procedures

    Topic Key Points
    Evacuation Routes Primary and secondary routes.
    Assembly Points Designated safe areas outside the building.
    Accounting for Occupants Procedures for checking that everyone has evacuated.
    Assisting Others How to help individuals with disabilities or special needs.

    C. Fire Extinguisher Training

    Topic Key Points
    Types of Extinguishers Class A, B, C, D, and K—what each is used for.
    PASS Technique Pull, Aim, Squeeze, Sweep.
    When to Fight a Fire Small, contained fires only—never fight a fire that is spreading or blocking your exit.
    When to Evacuate If the fire is too large, the extinguisher is empty, or the smoke is thick, evacuate immediately.

    D. Alarm and Notification

    Topic Key Points
    Alarm Signals Recognizing the fire alarm sound.
    Manual Pull Stations How to activate the alarm if they discover a fire.
    Communication How to notify management and emergency services.
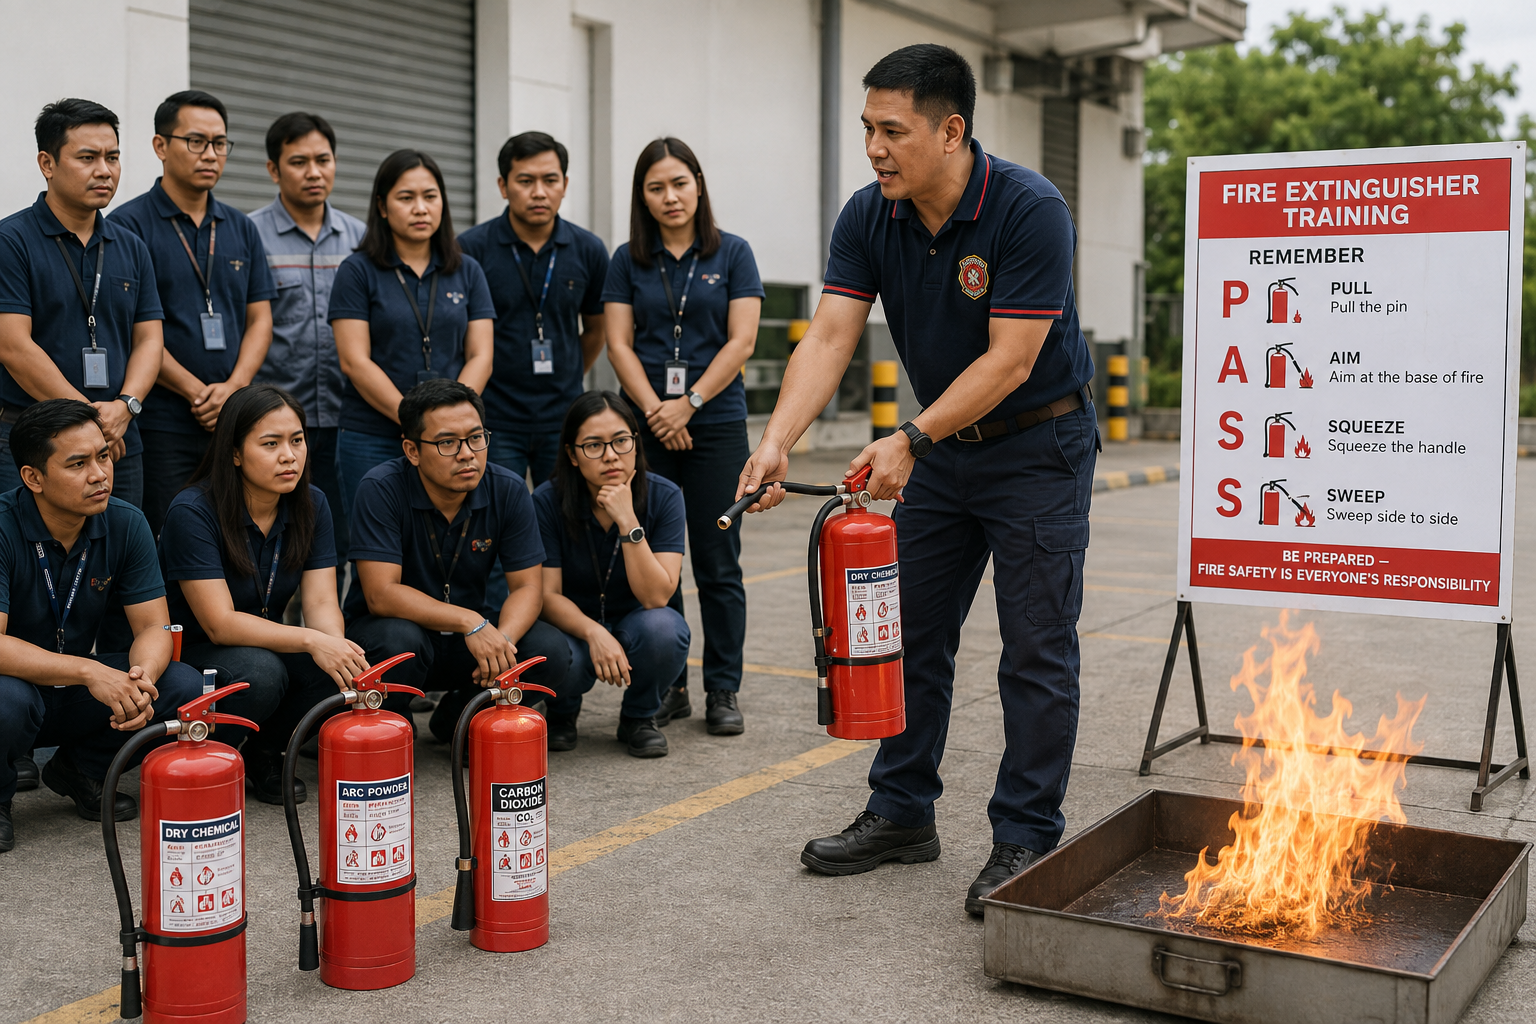
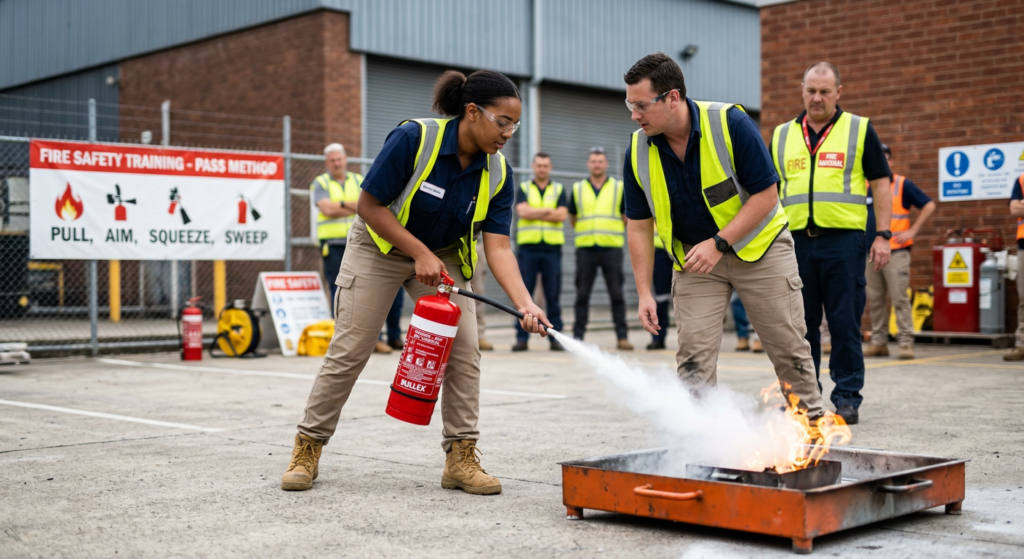
    Employee practicing the PASS technique on a training extinguisher

    Section 5: Training Methods

    Use a variety of training methods to cater to different learning styles.

    Method Description Best For
    Classroom Training Instructor-led presentations covering theory and procedures. New hires, annual refresher training.
    Hands-On Practice Practical exercises using training extinguishers or simulators. Fire extinguisher training, evacuation drills.
    Fire Drills Simulated emergency evacuations. Testing the entire plan.
    Online Modules Self-paced e-learning courses. Off-site employees, refresher training.
    Video Demonstrations Visual demonstrations of procedures. Supplement to other training methods.
    Tabletop Exercises Discussion-based scenarios. Management teams, emergency response teams.

    Pro Tip: Combine multiple methods to reinforce learning and keep training engaging.


    Section 6: Fire Drills

    Fire drills are the most critical component of training, as they test the entire system.

    Element Requirement
    Frequency Annually at minimum; quarterly for high-occupancy buildings.
    Advance Notice Notify occupants in advance, but occasionally conduct unannounced drills.
    Evacuation Time Measure how long it takes to evacuate and account for all occupants.
    Scenario Variation Practice different scenarios (blocked exits, power outage, etc.).
    Documentation Record the date, time, duration, and any issues encountered.
    Debrief Review the drill with employees and management to identify improvements.

    Pro Tip: Conduct drills at different times of day and in different weather conditions to prepare for real emergencies.


    Section 7: Training Frequency

    Training Type Frequency Description
    New Hire Orientation Upon hire Basic fire safety training for all new employees.
    Annual Refresher Annually Review of procedures and updated information.
    Fire Drills Annually (minimum) Practical evacuation exercises.
    Extinguisher Training Annually Hands-on practice with fire extinguishers.
    Specialized Training As needed Training for emergency response teams, floor wardens, etc.

    Section 8: Documentation and Record Keeping

    Document What to Record Retention
    Training Attendance Employee names, date, topics covered. At least 3 years.
    Drill Records Date, time, duration, participants, issues. At least 3 years.
    Extinguisher Training Records Employee names, date, type of training. At least 3 years.
    Certificates Completion certificates for specialized training. As required.

    Pro Tip: Consider using a digital training management system to track and document employee training.


    Section 9: Special Considerations

    A. Individuals with Disabilities

    Consideration Action
    Evacuation Assistance Assign “buddies” to assist individuals with mobility, hearing, or vision impairments.
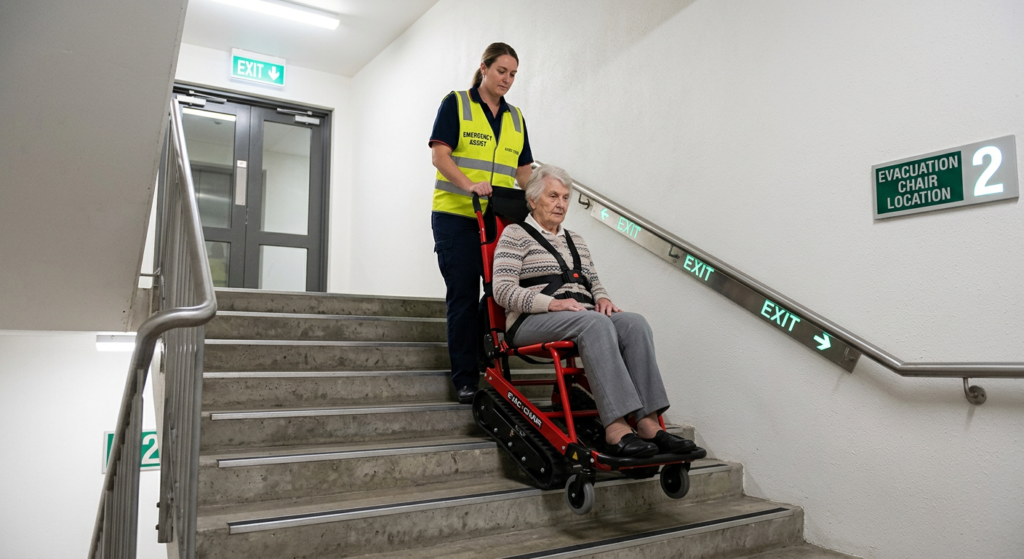
    Evacuation Devices Provide evacuation chairs or sleds for stairwells.
    Notification Provide strobe lights or vibrating pagers for individuals with hearing impairments.
    Practice Include individuals with disabilities in drills to ensure procedures work.

    B. Language and Literacy

    Consideration Action
    Multiple Languages Provide training materials in languages spoken by employees.
    Visual Aids Use pictograms, diagrams, and videos to supplement written materials.
    Simple Language Use clear, simple language in written materials.

    C. Night Shift and Remote Workers

    Consideration Action
    Night Shift Training Ensure night shift employees receive the same training as day shift.
    Remote Workers Provide online training and ensure they know evacuation procedures for their location.
    Evacuation chair in a stairwell for assisting individuals with mobility impairments

    Section 10: Evaluating and Improving Your Program

    Evaluation Method What to Assess
    Training Feedback Gather feedback from participants on training quality and relevance.
    Drill Performance Measure evacuation times and identify bottlenecks.
    Knowledge Assessments Test employee knowledge of fire safety procedures.
    Incident Reports Review after incidents to identify training gaps.
    Regulatory Updates Stay current with code changes and update training accordingly.

    Pro Tip: Use a continuous improvement cycle—plan, implement, evaluate, and improve.


    Section 11: Common Mistakes and How to Avoid Them

    Mistake Why It’s a Problem How to Fix
    One-time training only Employees forget procedures over time. Provide annual refresher training.
    Not practicing with extinguishers Employees freeze when they need to use one. Provide hands-on practice.
    No drills Employees are unprepared for a real emergency. Conduct regular fire drills.
    Not documenting training Cannot prove compliance. Maintain thorough records.
    Ignoring individuals with disabilities May leave vulnerable employees behind. Include them in planning and drills.

    Conclusion

    A well-designed fire safety training program is one of the most effective investments you can make in occupant safety. By providing comprehensive training, conducting regular drills, and maintaining thorough documentation, you can ensure that your employees are prepared to respond quickly and safely in an emergency.

    Take Action Today:

    1. Assess your current training program against the components in this guide.
    2. Schedule annual refresher training for all employees.
    3. Conduct fire drills and document them.
    4. Provide hands-on fire extinguisher training using the PASS technique.
    5. Update your training materials to include individuals with disabilities and language considerations.

    References & Notes

    [1] NFPA 101, Life Safety Code — occupancy chapters set requirements for emergency egress and relocation plans and fire drills specific to each occupancy type.

    [2] Occupational Safety and Health Administration (OSHA), 29 CFR 1910.157(g) — Portable Fire Extinguishers, Training and Education. Employees designated to use fire-fighting equipment as part of an emergency action plan must be trained in the use of the equipment upon initial employment and at least annually thereafter.

    [3] OSHA, 29 CFR 1910.38 — Emergency Action Plans. Requires employers to designate and train a sufficient number of employees to assist in the safe and orderly evacuation of other employees.

    [4] NFPA 1, Fire Code — general fire prevention, training, and drill requirements; specific frequency and content requirements vary by occupancy chapter.

    Note: this article presents general program-design guidance rather than a single code’s exact requirements. Frequencies, retention periods, and specific training content shown in the tables above (e.g., “quarterly for high-occupancy buildings,” “at least 3 years” record retention) are common industry practice recommendations, not verified as a single universal regulatory minimum — confirm exact requirements for your occupancy and jurisdiction against the current edition of the codes cited.


    Continue Reading from Our Series:

  • How to Design Firefighter Access and Building Features for Rescue Operations

    How to Design Firefighter Access and Building Features for Rescue Operations

    A firefighter’s ability to quickly and safely access a building can mean the difference between a contained fire and a catastrophic loss. Ensuring a building is designed for firefighter access is not just about compliance—it is about enabling the people who risk their lives to save others.


    Section 1: The 150-Foot Rule

    The foundation of firefighter access is the “150-foot rule.” For buildings and facilities, the basic requirement is that all portions of the facility, and all points on the exterior wall of the first story of a building, must be within 150 feet of a fire apparatus access road [1].

    Why 150 Feet?

    • Hose Length: Fire attack hose lines are normally no longer than 200 feet. The 150-foot access ensures that firefighters can deploy their hoses to reach the far corners of a building without excessive friction loss.
    • Aerial Reach: Aerial apparatus have limited reach. Any further away, and water streams become ineffective, requiring the strict use of ground ladders.

    Allowances and Flexibility: The 150-foot requirement can be extended in sprinklered buildings where the fire is likely to be controlled. In NFPA 1, where NFPA 13 sprinkler systems are installed, the 150-foot criteria for access is extended to 450 feet [2]. However, if the 150-foot dimension cannot be met, the code requires “an approved alternative means of fire protection.”

    Pro Tip: Model regulations are minimum requirements. They should not be modified to require less access or a lower level of safety.


    Section 2: Fire Apparatus Access Roads

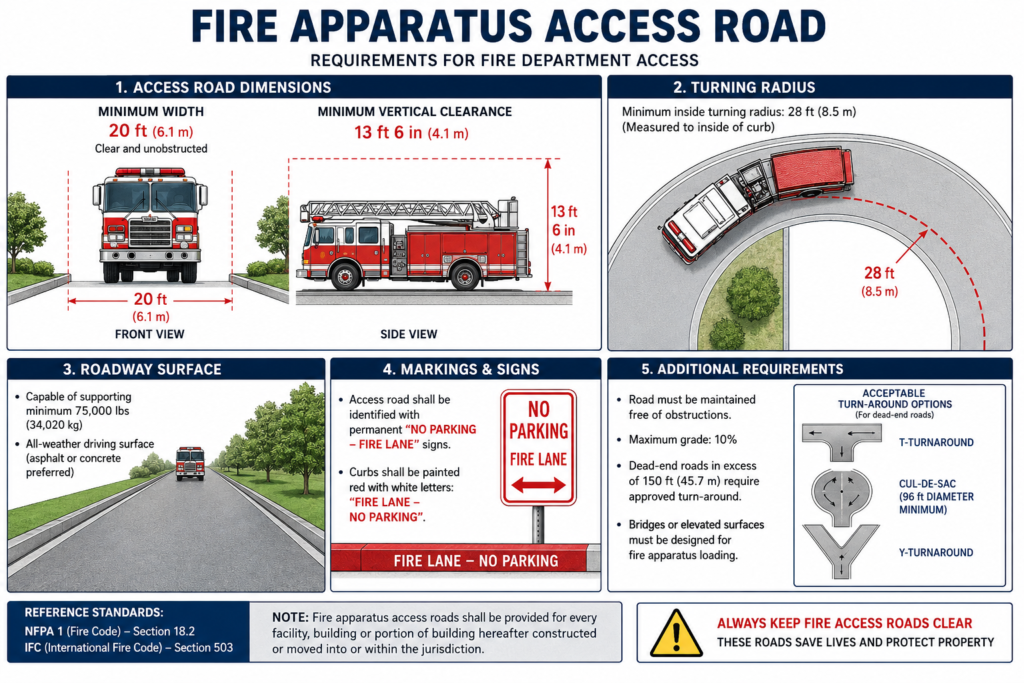
    The term used in the code for the means used to reach a building is “fire apparatus access roads.” To qualify, roads must meet specific requirements:

    RequirementDetails
    WidthAt least 20 feet (6.1 m).
    Vertical ClearanceAt least 13 feet, 6 inches (4.1 m).
    Load CapacityDesigned to withstand the imposed load of fire apparatus.
    SurfaceAll-weather surface.
    Turning RadiusAdequate to permit fire apparatus to negotiate turns; commonly enforced as a 25 ft inner / 50 ft outer radius by the fire code official.
    Dead-EndsNo dead-ends greater than 150 feet (46 m) without adequate turnarounds.
    GradesThe IFC’s base standard caps access road grade at 10%. Some jurisdictions permit up to 12% under specific conditions (limited grade length, distance from intersections, sprinkler requirements) [3]. NFPA 1 sets a stricter 5% maximum grade for fire lanes [4]. Confirm the figure that applies with your local AHJ rather than assuming a single universal number.

    Marking and Signage: Fire engine accessways and access roads must be marked with reflective strips or road stud reflectors on both sides at intervals of not more than 5m. Signs with upper-case wording of not less than 70mm in height must be provided at the start, junction, and end of a fire engine accessway.

    Pro Tip: Fire lanes serving buildings over 30 feet in height must be provided along the longest facade of the building or along at least two remote sides.

    Diagram showing fire apparatus access road dimensions, width, height, and markings

    Section 3: Fire Department Key Boxes

    Security concerns often conflict with the need for rapid emergency access. The fire department key box provides a solution. The key box can only be opened by a master key carried by the company officer, or access is electronically granted by the fire department’s communication center.

    RequirementDetails
    LocationApproved by the fire code official.
    Number of KeysRequired number and type approved by the fire code official.
    ManufacturerApproved by the fire code official; must be evaluated by a nationally recognized testing laboratory to demonstrate resistance to burglars.
    Exterior DoorsExterior doors or openings required by code must be maintained accessible for use by emergency responders.

    Pro Tip: A fire department key box saves valuable time and prevents damage from forcible entry, allowing firefighters to focus on rescue and firefighting operations.


    Section 4: Roof Access

    The International Building Code requires that one of the building stairways has a means of accessing the roof when the building height is four or more stories above the grade plane [5].

    RequirementDetails
    Access LocationThrough a penthouse or through a roof hatch.
    MarkingThe stairway must be marked to indicate that it has roof access.
    ExceptionRoof access is not required when the roof is pitched and the slope is greater than 4 units vertical in 12 units horizontal (18.3-degree slope).

    Why Roof Access Matters: Roof access can be used as a location to deploy fire streams to protect the structure from an exposure building fire. It is also used for ventilation and rescue operations.


    Section 5: Interior Access and Identification

    Once firefighters enter the building, they need to quickly locate and operate critical equipment.

    FeatureRequirement
    Sprinkler Riser RoomRooms containing the fire sprinkler system riser and control valves must be identified for ready access in an emergency.
    Fire Alarm Control PanelThe location of the fire alarm control panel must be identified.
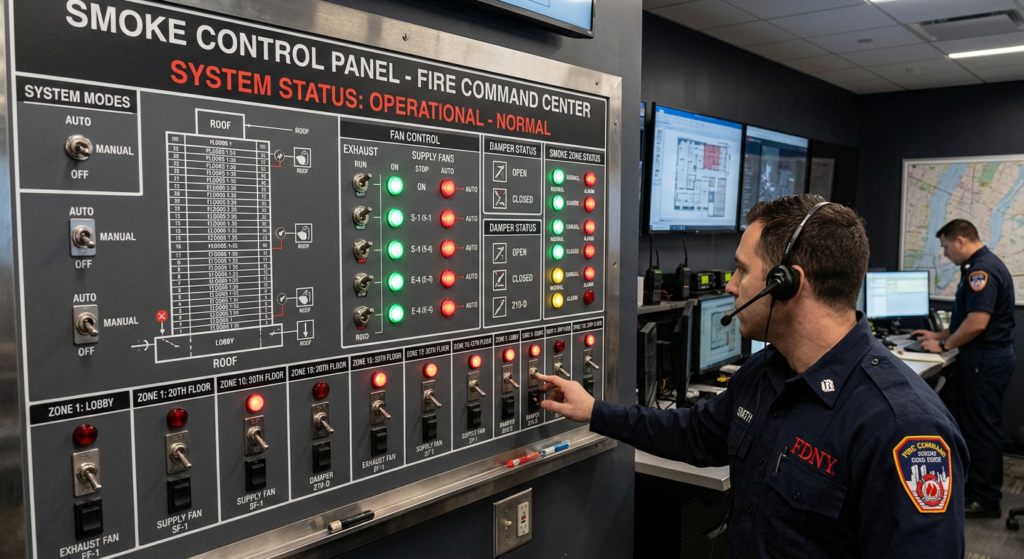
    Smoke Control System PanelThe location of the smoke control system panel must be identified for ready access.
    Utility ShutoffsElectric meters, gas shutoff valves, and solar photovoltaic switches may be required to be identified so they can be located and turned off.

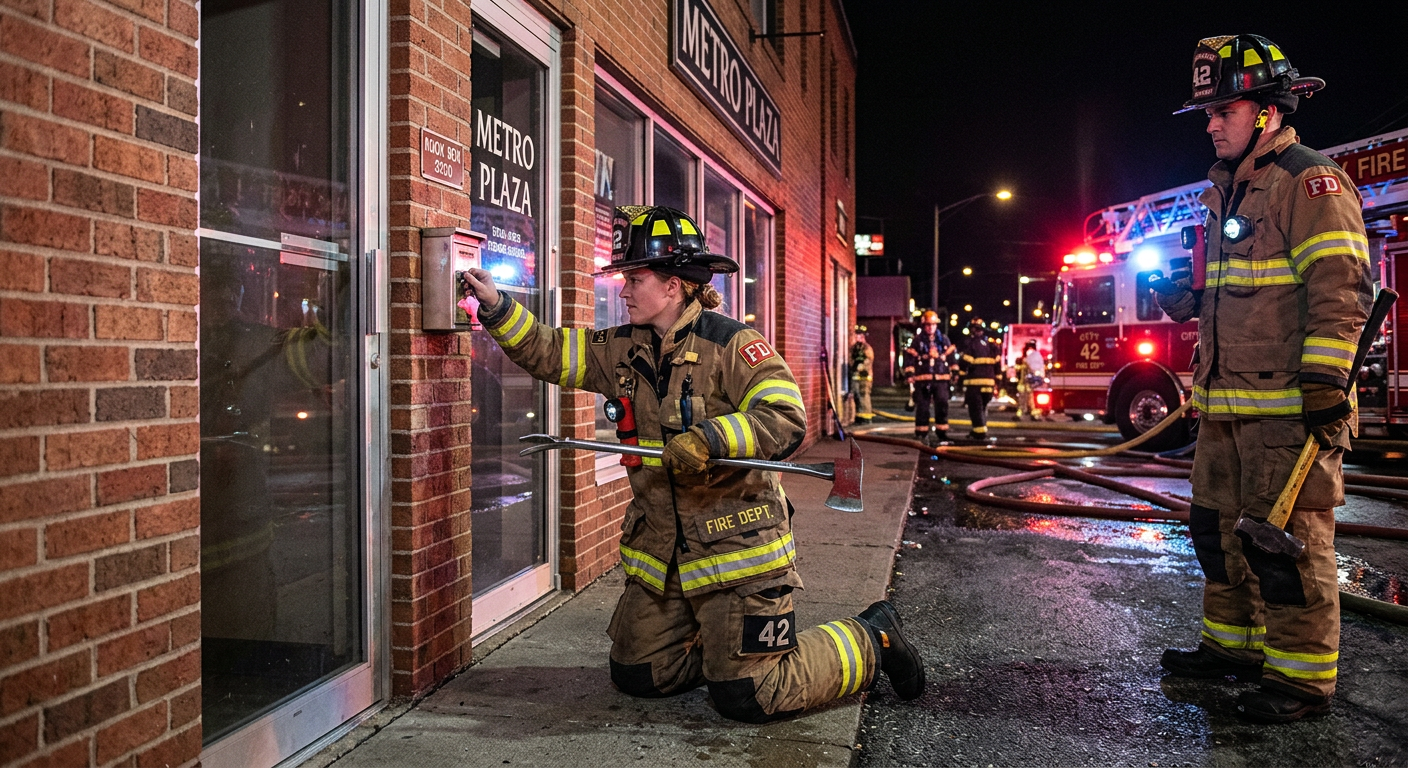
    Firefighter Access Panels: Firefighter access doors or panels on the exterior side of a building provide a point of entry. These should be well-marked and equipped with a key box to avoid forcible entry delays. In some jurisdictions, fire department access doors are required at least one in each 100 ft of building facade.

    Pro Tip: Building access is a common issue for firefighters. Commercial incidents requiring fire department response are often not during business hours, so 24-hour access is critical.


    Section 6: Fire Service Access Elevators

    In high-rise buildings, fire service access elevators are essential for transporting firefighters and equipment to upper floors [6].

    RequirementDetails
    Trigger HeightRequired in all high-rise buildings (occupied floors more than 120 feet above the lowest level of fire department vehicle access).
    Number RequiredAt least one elevator in each bank must meet the requirements.
    Cab SizeMinimum 84 inches wide × 60 inches deep (to accommodate a stretcher).
    LobbyA protected elevator lobby at each floor, with 1-hour fire barriers and smoke partitions.
    Two-Way CommunicationBetween the cab, machine room, and fire command center.
    Water ProtectionThe cab interior and hoistway equipment must be protected against water intrusion from sprinkler system activation.
    Standby PowerOn standby power.
    Emergency RecallPhase I (automatic recall to designated level) and Phase II (firefighter operation) controls.
    PressurizationPressurization of an elevator hoistway is an acceptable option instead of an enclosed elevator lobby.

    Pro Tip: Fire service access elevators must be approached by a firefighting lobby at each storey. The lobby serves as a protected staging area for firefighters entering or exiting the elevator.


    Section 7: Access for Rescue Openings

    For buildings where rescue openings are required (typically sleeping rooms in residential buildings), specific access provisions apply.

    RequirementDetails
    Laddering PadA clear, flat space for laddering rescue openings shall be provided beneath each rescue opening.
    Setback DistanceBased on the sill height, a setback will be required for the ladder footings. For 2nd and 3rd floors, a 5-8-foot setback is typically required.
    Clear PathVegetation, buildings, and site features must not obstruct access walkways or laddering operations.

    Section 8: Design Checklist

    Use this checklist to verify firefighter access and building features for rescue operations:

    ItemStatusNotes
    Fire Apparatus Access Road☐20 ft width, 13 ft 6 in height, all-weather surface.
    150-Foot Access Requirement☐All exterior wall points within 150 ft of access road.
    Fire Department Key Box☐Approved location, manufacturer, and key type.
    Roof Access☐For buildings 4+ stories.
    Sprinkler Riser Room Identification☐Visible and accessible.
    Fire Alarm Control Panel Identification☐Visible and accessible.
    Smoke Control Panel Identification☐Visible and accessible.
    Utility Shutoff Identification☐Electric, gas, and solar PV switches identified.
    Fire Service Access Elevators☐For high-rise buildings.
    Access Openings☐Fire department access doors at intervals.

    Section 9: Common Mistakes and How to Avoid Them

    MistakeWhy It’s a ProblemHow to Fix
    Inadequate access road widthFire apparatus cannot navigate to the building.Ensure at least 20 ft clear width.
    Dead-end access without turnaroundFire apparatus cannot turn around.Provide cul-de-sac or approved turnaround for dead-ends > 150 ft.
    No key boxFirefighters waste time on forcible entry.Install a fire department key box.
    Unidentified critical roomsFirefighters waste time searching for equipment.Identify sprinkler riser, fire alarm, and smoke control rooms.
    No roof access for 4+ story buildingsLimits firefighting operations.Provide roof access as required.
    Rescue openings blocked by landscapingLaddering operations are obstructed.Coordinate landscaping design with access requirements.

    Conclusion

    Designing for firefighter access is a critical responsibility. By ensuring that fire apparatus can reach the building, that firefighters can enter quickly, and that critical equipment is identified, you enable firefighters to do their jobs effectively and safely.

    Take Action Today:

    1. Check your building’s access road for width, height, and dead-end turnarounds.
    2. Install a fire department key box at an approved location.
    3. Identify all critical rooms (sprinkler riser, fire alarm panel, smoke control panel).
    4. Provide roof access for buildings 4+ stories.
    5. Coordinate landscaping to avoid blocking rescue openings.

    References & Notes

    [1] International Fire Code (IFC), Section 503.1.1 — Buildings and Facilities (the “150-foot rule” for fire apparatus access).

    [2] NFPA 1, Fire Code — access distance may be extended where NFPA 13 automatic sprinkler systems are installed throughout.

    [3] IFC Appendix D, Section D103.2 — the base standard caps fire apparatus access road grade at 10%, with an exception allowing steeper grades as approved by the fire code official. Some local jurisdictional amendments (e.g., certain Texas county fire codes) permit up to 12% under specific conditions: grade length not exceeding 300 ft, termination point not within 150 ft of a downhill intersection or cul-de-sac, and additional water-supply and sprinkler requirements above 12%. Note: the original article stated a flat 12% (1:8.3) figure as if it were the universal rule — this has been corrected to reflect that 10% is the IFC’s own base figure, with 12% being a jurisdiction-specific allowance under conditions, not the default.

    [4] NFPA 1, Fire Code, and NFPA 1141, Standard for Fire Protection Infrastructure for Land Development in Wildland, Rural, and Suburban Areas — commonly cited as setting a stricter 5% maximum grade for fire lanes and access roads.

    [5] International Building Code (IBC), Section 1011.12 — Stairway to Roof (roof access requirement for buildings four or more stories in height, with the sloped-roof exception noted).

    [6] IBC, Sections 3007/3008 — Fire Service Access Elevators and Occupant Evacuation Elevators; ASME A17.1/CSA B44, Safety Code for Elevators and Escalators — governs elevator cab, communication, and emergency operation requirements referenced in this section. Note: the specific cab dimension (84 in × 60 in) and other individual figures in this table should be verified against the current edition adopted by your jurisdiction before use in a design document.


    Continue Reading from Our Series:

  • What Are the Requirements for Fire Engine Access and Hardstanding?

    What Are the Requirements for Fire Engine Access and Hardstanding?

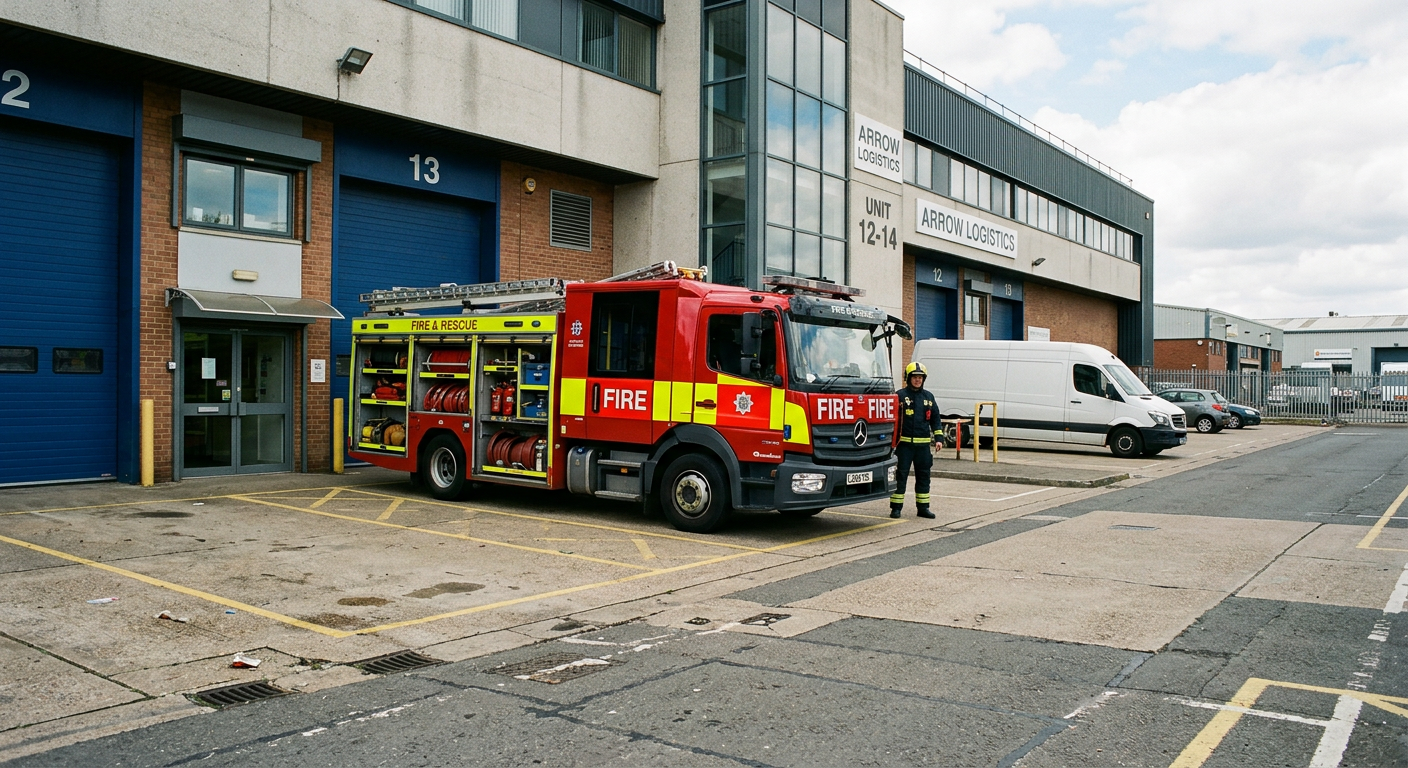
    Fire engine access and hardstanding are critical components of a building’s fire safety infrastructure. They ensure that firefighting appliances can get close enough to a building to deploy hoses effectively, access fire hydrants, and connect to fire department connections.

    This guide covers the essential requirements for fire engine access roads and hardstanding areas, based on the QCDD Technical Requirements Guide 2024, the International Fire Code, and NFPA standards.

    A note on jurisdiction: Sections 1–4 below present the requirements of the QCDD (Qatar Civil Defence Department) Technical Requirements Guide 2024, in metric units. Sections 5–6 present the separate model-code requirements of the U.S.-based International Fire Code (IFC) and NFPA 1, in imperial units. These are two distinct regulatory frameworks with different numeric thresholds — for example, QCDD requires a 4.0 m (13.1 ft) wide access road, while the IFC requires 20 ft (6.1 m). Do not mix figures between the two systems. Confirm with your local Authority Having Jurisdiction (AHJ) which framework — or local amendment of either — actually applies to your project.


    Section 1: Fire Engine Access Roads

    A fire engine access road is the route a fire apparatus drives to reach a building or facility. The following requirements are based on the QCDD Technical Requirements Guide 2024.

    General Requirements:

    RequirementDetails
    WidthMinimum clear width of 4.0 m.
    HeightMinimum unobstructed vertical clearance of 4.5 m.
    Load CapacityDesigned to withstand the stationary load of a 60-ton fire appliance.
    Turning RadiusAdequate to permit fire apparatus to negotiate any turns.

    Dead-End Access Roads:

    Dead-end fire department access roads in excess of 46 m in length shall be provided with approved provisions for the fire apparatus to turn around. Approved turnaround options include:

    Turnaround TypeDescription
    T-TurnA T-shaped turnaround with each leg at least 60 ft long and 20 ft wide.
    Cul-de-SacAt least 90 ft in diameter.
    Y-TurnA Y-shaped turnaround.

    Pro Tip: For buildings three stories or more, the inside turning radius should be a minimum of 35 ft and the outside turning radius 50 ft.


    Section 2: Fire Engine Hardstanding Areas

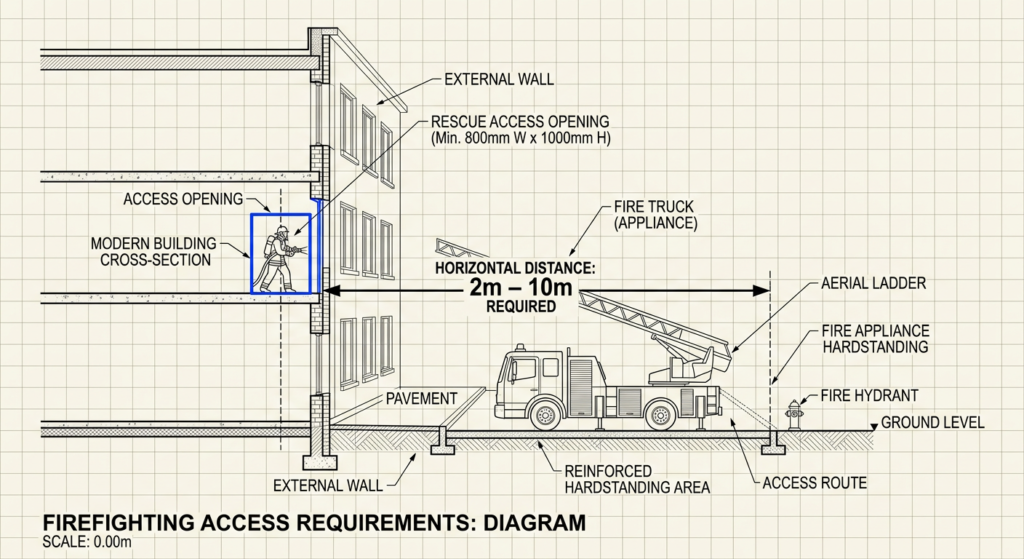
    A hardstanding is a paved area where a fire engine can park to deploy hoses, access fire hydrants, and connect to fire department connections.

    A. Minimum Dimensions

    RequirementDetails
    Minimum Size6 m x 15 m (longer side parallel to the building facade).
    LocationNearer edge shall not be less than 2 m or more than 10 m from the center of the access opening.
    GradientLevel and paved; if on an incline, the gradient shall not exceed 1:15.
    Load CapacityMust withstand the stationary load of a 60-ton fire appliance under QCDD; other jurisdictions set their own figure (e.g., Singapore’s Fire Code specifies 44 tonnes).
    Distance to HydrantEvery part of the hardstanding and/or access road shall be within 50 m of a fire hydrant.

    B. Relationship to Access Opening

    The hardstanding shall be positioned so that its nearer edge is not less than 2 m or not more than 10 m from the center position of the access opening, measured horizontally. Access openings shall be provided along the external wall of the building fronting the hardstanding to provide access for firefighting and rescue operations.

    Diagram showing hardstanding dimensions and relationship to access opening

    Section 3: Hardstanding Requirements by Building Type

    The QCDD Technical Requirements Guide 2024 specifies different hardstanding requirements based on building type and height.

    A. Residential Buildings

    Building TypeHardstanding Requirement
    Bungalow, Semi-Detached, Terrace HousesNot required.
    Landed Residential with Shared FacilitiesAccess road required; maximum travel distance from fire engine to any point on the project plan area: 60 m.
    Residential > 10 m Habitable HeightRequired; hardstanding shall be within 18 m of the breeching inlet.
    Residential ≤ 10 m Habitable HeightAccess road must be within 60 m of every point on the projected plan area.

    B. Institutional, Office, Shop, and Places of Public Resort

    Building HeightHardstanding Requirement
    ≤ 10 mNot required if access road is within 45 m of every point on the projected plan area.
    > 10 mRequired; length based on gross floor area of the largest floor.

    C. Industrial and Storage Buildings

    Building TypeHardstanding Requirement
    Factory/IndustrialRequired regardless of habitable height; length based on gross cubic volume of the building.
    Storage/WarehouseRequired regardless of habitable height; length based on gross cubic volume of the building.

    Pro Tip: The length of hardstanding required is expressed as a fraction of the building perimeter. For example, for institutional buildings with a gross floor area of 2,000–4,000 m², the hardstanding must cover 1/4 of the perimeter.


    Section 4: Overhead Clearance Requirements

    Overhead structures or building projections over fire engine access roads or hardstanding areas are subject to specific requirements.

    RequirementDetails
    Vertical ClearanceAt least 4.5 m.
    Width of Overhead StructureNot more than 10 m.
    Separation DistanceAdjacent overhead structures shall be at least 20 m apart.
    End-Stretch LengthAt least 20 m with no overhead structure.

    Pro Tip: If these overhead clearance requirements cannot be met, consider alternative fire protection measures, such as additional sprinkler protection or early warning systems.


    Section 5: International Standards (IFC and NFPA)

    The International Fire Code (IFC) and NFPA 1 provide model requirements for fire apparatus access roads, which are adopted by many jurisdictions.

    IFC Requirements:

    RequirementDetails
    WidthNot less than 20 ft (6.1 m).
    Vertical ClearanceNot less than 13 ft 6 in (4.1 m).
    Load CapacityDesigned to withstand the imposed load of fire apparatus.
    SurfaceAll-weather surface.
    Turning RadiusAdequate to permit fire apparatus to negotiate turns.
    Dead-EndsNot greater than 150 ft (46 m) without approved turnarounds.
    GradesNot exceed 10% (approved by AHJ).

    NFPA 1 Requirements:

    RequirementDetails
    Access to Exterior DoorAccess road must be within 50 ft (15 m) of at least one exterior door.
    Sprinklered BuildingsAccess distance may be extended to 450 ft (137 m) where NFPA 13 sprinklers are installed.
    Multiple Access RoadsRequired for buildings > 30 ft or > 62,000 sq ft.

    Pro Tip: The model codes are minimum requirements. Local jurisdictions may have stricter standards, so always check with the local Authority Having Jurisdiction (AHJ).


    Section 6: Aerial Apparatus Access

    Buildings or portions of buildings exceeding 30 ft (9.1 m) or three stories in height require additional access for aerial apparatus.

    RequirementDetails
    WidthMinimum unobstructed width of 26 ft (7.9 m).
    Multiple AccessAt least two means of fire apparatus access for buildings exceeding 30 ft or three stories.
    TurnaroundsAdequate provisions for fire apparatus to turn around.

    Section 7: Common Mistakes and How to Avoid Them

    MistakeWhy It’s a ProblemHow to Fix
    Insufficient widthFire apparatus cannot access the building.Ensure access roads are at least 4 m (20 ft) wide.
    Inadequate vertical clearanceFire apparatus cannot pass under overhead structures.Ensure at least 4.5 m (13 ft 6 in) clearance.
    Hardstanding too far from access openingFirefighters cannot reach the building.Ensure hardstanding is within 2–10 m of the access opening.
    Hardstanding too far from hydrantInsufficient water supply.Ensure every part of the hardstanding is within 50 m of a hydrant.
    No all-weather surfaceAccess road becomes impassable in wet conditions.Provide an all-weather surface.
    Dead-end without turnaroundFire apparatus cannot turn around.Provide approved turnaround provisions for dead-ends > 46 m.

    Section 8: Design Checklist

    Use this checklist to verify fire engine access and hardstanding provisions in your building design:

    ItemStatus
    Access Road Width (≥ 4 m)☐
    Access Road Height (≥ 4.5 m)☐
    Access Road Load Capacity (60-ton)☐
    Hardstanding Dimensions (6 m x 15 m)☐
    Hardstanding Distance to Access Opening (2–10 m)☐
    Hardstanding Distance to Hydrant (≤ 50 m)☐
    Hardstanding Gradient (≤ 1:15)☐
    Overhead Clearance (≥ 4.5 m)☐
    Dead-End Turnarounds (if > 46 m)☐
    Aerial Apparatus Access (if > 3 stories)☐

    Conclusion

    Fire engine access and hardstanding are essential for effective firefighting operations. By following the QCDD, IFC, and NFPA requirements, you can ensure that fire apparatus can reach your building and that firefighters have the space they need to operate safely.

    Take Action Today:

    1. Check your building’s access road for width, height, and load capacity.
    2. Verify hardstanding dimensions and distance to the access opening.
    3. Ensure hardstanding is within 50 m of a fire hydrant.
    4. Consult with your local AHJ for specific requirements in your jurisdiction.

    References & Notes

    [1] Qatar Civil Defence Department (QCDD), Technical Requirements Guide, 2024 Edition — fire engine access road and hardstanding provisions (Sections 1–4).

    [2] International Fire Code (IFC), Section 503 — Fire Apparatus Access Roads; Appendix D — Fire Apparatus Access Roads (aerial apparatus access, dead-end turnaround tables).

    [3] NFPA 1, Fire Code, Chapter 18 — Fire Department Access and Water Supply, Section 18.2 — Fire Department Access.

    Note: Figures for exact access distances, sprinklered-building extensions, and dead-end turnaround dimensions vary by code edition and local amendment. Always confirm current requirements with your local AHJ before finalizing a design.


    Continue Reading from Our Series:

  • How to Conduct a Fire Risk Assessment: A Step-by-Step Guide

    How to Conduct a Fire Risk Assessment: A Step-by-Step Guide

    A fire risk assessment (FRA) is the foundation of any effective fire safety strategy for a commercial building. It is a structured, systematic review of your premises to identify fire hazards, evaluate the risks to occupants, and implement measures to eliminate or control those risks.

    A properly conducted risk assessment is not just a legal requirement in most jurisdictions—it is a critical tool for protecting lives, property, and business continuity. This guide provides a clear, step-by-step approach to conducting a fire risk assessment, suitable for most commercial buildings.


    Section 1: Who Is Responsible?

    In the United States, fire risk assessment responsibility isn’t assigned to a single named legal role the way it is in some other countries. Instead, it falls to whichever party controls the premises, shaped by OSHA’s general duty obligations and the specific occupancy requirements in NFPA 101 and NFPA 1 [1][2].

    RoleDescription
    EmployerUnder OSHA, the employer is responsible for maintaining a safe workplace, including fire prevention and emergency action planning.
    Building Owner or LandlordFor rented or multi-occupied premises, the owner or landlord often holds the duty for base building fire protection systems.
    Facilities or Building ManagerA manager or managing agent may be the designated duty holder for day-to-day compliance.

    Key Point: You can delegate the task of carrying out the assessment to a competent professional, but the legal responsibility for ensuring it is done correctly remains with you.


    Section 2: The 5-Step Fire Risk Assessment Process

    Most fire risk assessments follow a straightforward five-step process.

    Step 1: Identify Fire Hazards

    This crucial first step involves thoroughly inspecting the premises to identify potential sources of fire.

    Hazard TypeWhat to Look ForExamples
    Sources of IgnitionAnything that could start a fire.Faulty electrical equipment, overloaded sockets, naked flames, heaters, cooking appliances, hot industrial machinery.
    Sources of FuelMaterials that will burn and feed a fire.Paper, cardboard, packaging, textiles, soft furnishings, flammable liquids, solvents, chemicals, wood, and plastics.
    Sources of OxygenThings that can intensify a fire or feed it with air.Air conditioning systems, poorly ventilated spaces, medical oxygen supplies, and natural ventilation.

    Pro Tip: A good starting point is to consider your business activities. Is your building a warehouse with large amounts of cardboard? A kitchen with cooking oils? An office with many computers and electrical outlets? These all present different hazards.

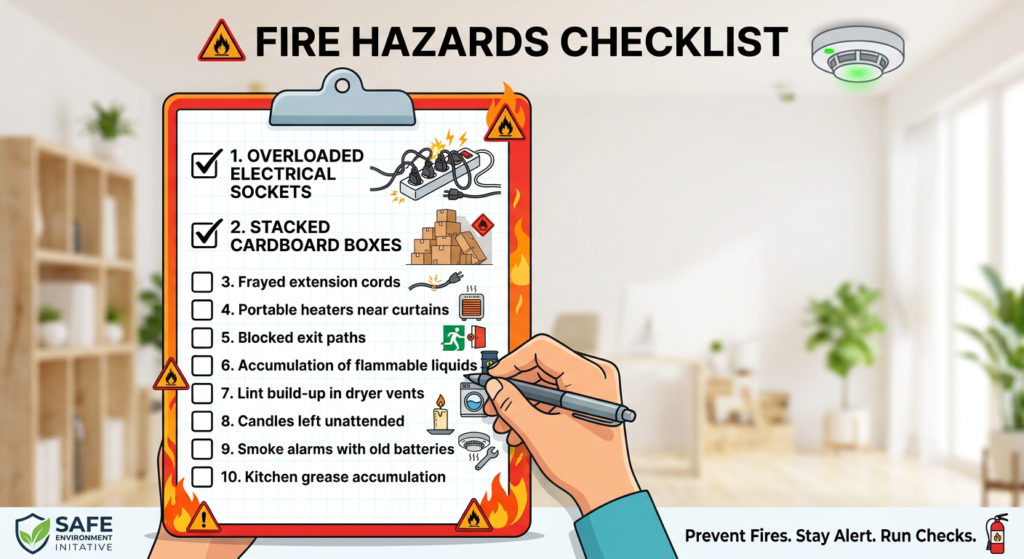
    Checklist highlighting common commercial fire hazards

    Step 2: Identify People at Risk

    The next step is to consider everyone who might be on your premises and could be in danger if a fire occurred.

    CategoryWho to Consider
    Regular OccupantsYour employees, including those working in isolated areas, alone, or on night shifts.
    VisitorsCustomers, clients, contractors, or members of the public.
    Vulnerable PeopleIndividuals who may need extra help, including those with disabilities, mobility issues, or sensory impairments. Also, consider children, the elderly, or those in sleeping accommodations (e.g., hotels).

    Pro Tip: You need to pay special attention to people who are located in remote areas of the building or in rooms with no alternative exits. Your emergency plan must consider how these individuals will be protected and evacuated.


    Step 3: Evaluate, Remove, or Reduce Risks

    With your list of hazards and people at risk, the next step is to evaluate the level of risk posed and decide what actions to take. This involves assessing the likelihood of a fire occurring and the potential consequences.

    ActionWhat It Means
    Remove the HazardThe most effective control measure. For example, replace a highly flammable material with a less flammable alternative.
    Reduce the HazardMinimize the risk if the hazard cannot be removed. For instance, reduce the quantity of flammable stock held on site, or ensure all electrical equipment is regularly maintained.
    Implement ControlsPut measures in place to protect people from the hazard. This includes installing and maintaining fire detection and alarm systems, emergency lighting, fire doors, and firefighting equipment.

    Pro Tip: This is also the stage to ensure that all your passive fire protection (like compartmentation) and active systems (like sprinklers and alarms) are suitable and well-maintained.


    Step 4: Record Your Findings and Create an Emergency Plan

    Under OSHA, an emergency action plan and fire prevention plan must be in writing and kept in the workplace once you have more than 10 employees; employers with 10 or fewer may communicate the plan orally instead [1][2]. Regardless of size, putting your findings in writing is good practice for demonstrating compliance and consistency.

    DocumentationWhat to Include
    Fire Risk Assessment RecordA written document that lists the hazards you identified, the people at risk, what you’ve done to reduce or remove those risks, and any further action required.
    Emergency PlanA clear, actionable plan detailing what to do in the event of a fire. This should include evacuation procedures, designated assembly points, emergency communication methods, and the roles and responsibilities of staff.

    Pro Tip: Keeping these documents up to date and easily accessible is essential for demonstrating compliance to fire safety inspectors.


    Step 5: Review and Update Regularly

    A fire risk assessment is not a static document. It is a living plan that must be kept up to date.

    Review TriggerWhat to Do
    Annual ReviewEven without changes, it is good practice to review your assessment at least once a year.
    Significant ChangesReassess whenever there are changes to the premises, such as new equipment, layout changes, or construction work.
    Changes in OccupancyReview the assessment if the way you use the building or the people using it changes significantly.
    After an IncidentIf there has been a fire, near-miss, or false alarm, you should review your assessment to identify any weaknesses in your plan.

    Pro Tip: Regularly reviewing your assessment helps you stay ahead of potential risks and ensures your fire safety measures are always effective.


    Section 3: Tools and Methods

    While the 5-step process is the foundation, more complex buildings may require specialized assessment methods.

    Tool / MethodDescriptionApplication
    NFPA 101ANFPA’s “Guide on Alternative Approaches to Life Safety” provides a risk-based method for evaluating equivalency. It can be used to determine if alternative safety measures are acceptable.Complex or unique buildings where strict compliance with every code provision is difficult.
    FRAME (Fire Risk Assessment Method for Engineering)A well-established method for quantitative risk assessment, developed by Swiss engineer M. Gretener. It evaluates risk in three areas: property, people, and activities.Commercial complexes, shopping centers, and other high-risk buildings to get a numerical risk score.
    Checklist-Based AssessmentA practical and widely used method that uses checklists to evaluate fire safety compliance against recognized standards.General commercial buildings to ensure a systematic review.

    Section 4: Common Mistakes to Avoid

    MistakeWhy It’s a ProblemHow to Fix
    Failing to UpdateThe assessment becomes outdated and irrelevant.Schedule a regular review and update it after any significant change.
    Not Considering Vulnerable PeopleEvacuation plans may fail for those who need the most help.Factor the needs of disabled or vulnerable individuals into all stages of your plan.
    Underestimating the Importance of Passive Fire ProtectionSystems like fire doors are only effective if properly maintained and closed.Ensure all fire doors are rated, self-closing, and unobstructed. Conduct regular inspections.
    Treating It as a “Tick-Box” ExerciseMisses hidden or non-obvious risks.Take a thorough, systematic approach that considers layout, occupancy, and daily operations.
    Inadequate RecordsYou cannot prove compliance to an inspector or insurer.Document findings, actions taken, and review dates.

    Conclusion

    A fire risk assessment is not just a bureaucratic requirement; it is the cornerstone of a robust fire safety strategy. By following the five-step process outlined in this guide, you can systematically identify hazards, protect the people in your building, and ensure you are doing everything reasonably practical to prevent a fire and keep everyone safe. Regular review and maintenance of your assessment are essential for ongoing safety and compliance.


    References & Notes

    [1] Occupational Safety and Health Administration (OSHA), 29 CFR 1910.38 — Emergency Action Plans. A written plan is required once another OSHA standard calls for one; employers with more than 10 employees must keep it in writing, while 10 or fewer may communicate it orally.

    [2] OSHA, 29 CFR 1910.39 — Fire Prevention Plans. Follows the same written-vs-oral 10-employee threshold as the Emergency Action Plan and covers fire hazard housekeeping, ignition source control, and equipment maintenance responsibilities.

    [3] NFPA 101, Life Safety Code — occupancy chapters (Chapters 11–43) set requirements for emergency egress and relocation plans and fire drills specific to each occupancy type; NFPA 1, Fire Code, contains general fire prevention and inspection requirements.

    [4] NFPA 101A, Guide on Alternative Approaches to Life Safety; FRAME (Fire Risk Assessment Method for Engineering), developed by M. Gretener.


    Continue Reading from Our Series:

  • Understanding Smoke Control Systems in Commercial Buildings

    Understanding Smoke Control Systems in Commercial Buildings

    Smoke is the leading cause of death in building fires. According to the NFPA, more people die from smoke inhalation than from burns or structural collapse. The toxic gases, particulate matter, and reduced visibility in a smoke-filled building can incapacitate occupants within minutes, making safe evacuation nearly impossible.

    Smoke control systems are engineered to manage this deadly threat. These systems are designed to contain or exhaust smoke, heat, and other toxic gases, maintaining tenable conditions long enough for occupants to reach safety, support firefighter visibility, and reduce property damage during an emergency.

    This guide explores the fundamentals of smoke control systems in commercial buildings, including:

    • What is a smoke control system? (Active and passive components).
    • Types of systems (Containment vs. management).
    • Design strategies (Pressurization, exhaust, opposed airflow).
    • Key components (Fans, dampers, detectors, barriers).
    • Code requirements (NFPA 92, IBC, and NFPA 101).
    • Real-world applications (High-rise buildings, atriums, large spaces).

    Section 1: The Fundamentals of Smoke Control Systems

    A smoke control system is a system that controls the movement of smoke and air in a building. It can be made up of multiple different components and use several methods to achieve its design objective, which is typically to maintain a tenable environment long enough for all occupants to egress the building.

    The Purpose of Smoke Control Systems

    NFPA 92, the standard for smoke control systems, establishes the following purposes:

    Purpose Why It Matters
    Inhibit smoke from entering stairwells, means of egress, smoke refuge areas, and elevator shafts Protects the primary evacuation routes.
    Maintain a tenable environment in smoke refuge areas and means of egress Provides time for safe evacuation.
    Inhibit the migration of smoke from the smoke zone Prevents fire spread to other areas.
    Provide conditions outside the smoke zone that enable emergency response personnel to conduct search and rescue operations Supports firefighter operations.
    Contribute to the protection of life and to the reduction of property loss The ultimate goal of the system.

    Section 2: Smoke Containment vs. Smoke Management Systems

    NFPA 92 covers two primary types of smoke control systems:

    Type Description Typical Application
    Smoke Containment Systems Keep smoke from entering specific areas using pressurization. Smaller enclosed spaces such as enclosed stairwells, elevators, vestibules, and smoke refuge areas.
    Smoke Management Systems Maintain tenable environments in the means of egress from large-volume spaces or prevent the movement of smoke into surrounding spaces. Buildings with large, multilevel atriums, malls, warehouses, and large spaces.
    Diagram showing stairwell pressurization preventing smoke from entering the stairwell

    Section 3: Smoke Containment Systems – Pressurization

    Smoke containment systems use pressurization to keep smoke from entering specific areas. A mechanical fan creates a pressure difference across a barrier, ensuring that smoke does not migrate into certain areas of a building.

    Common Types of Smoke Containment Systems:

    System Type How It Works Application
    Stairwell Pressurization Pressurizes the stair shaft to a higher pressure than the floor areas, pushing smoke back into the floor space. Exit stairwells in high-rise buildings.
    Elevator Pressurization Pressurizes elevator shafts to prevent smoke from traveling through the shaft. Elevator shafts in high-rise buildings.
    Vestibule Pressurization Pressurizes vestibules between corridors and stairs to create an additional barrier. High-rise buildings with pressurized stairs.
    Zone Smoke Control Depressurizes the smoke zone to create a negative pressure gradient across the stair and vestibule doors. Office and hotel floors.
    Smoke Refuge Area Pressurization Pressurizes areas designated as refuges for occupants. High-rise buildings, healthcare facilities.

    Pro Tip: In a well-designed system, stair pressurization cascades into vestibules on each floor via cracks under and around doors or via transfer grills where larger quantities of air are required to achieve the required pressure gradients.


    Section 4: Smoke Management Systems – Exhaust and Ventilation

    Smoke management systems for larger areas use exhaust and ventilation to remove smoke.

    Types of Smoke Management Systems:

    Type How It Works Application
    Mechanical Smoke Exhaust Uses electrically powered exhaust fans to remove smoke and air from the building. Large buildings, multiple fans are installed on the roof over the entire storage area.
    Natural Smoke Ventilation Removes smoke by taking advantage of the buoyancy of the smoke and wind pressure (chimney effect). Atriums, large spaces, interior exit stairwells.

    Design Strategies for Smoke Management Systems:

    Strategy Description Key Requirements
    Exhaust Method Exhausts smoke through an opening or exhaust fan located at high points of a building. Make-up air must be introduced at a lower level to maintain balanced pressure and controlled airflow.
    Passive Method Uses areas of a building separated by walls that extend from floor to the bottom of the roof deck. Self-closing doors, fire dampers, and other self-closing devices are used to “trap” smoke and create a smoke reservoir.
    Opposed Airflow Method Uses low-pressure air currents to prevent smoke travel to parts of a building. Often used in conjunction with pressurization or exhaust methods to limit smoke spread.

    Pro Tip: Mechanical smoke exhaust systems require a way for makeup air to be injected into the large space; otherwise, the pressure could build up so high that it starts to negatively affect other building systems. The pressure across a barrier must not result in a door-opening force that exceeds 30 lbf (133 N), or it might be too heavy for occupants to use.


    Section 5: Key Components of Smoke Control Systems

    Smoke control systems consist of both active and passive fire protection elements.

    Component Type Function
    Detectors and Control Panels Active Act as the “brain” of the system, coordinating system responses and signaling the activation of connected active elements.
    Fire and Smoke Dampers Active Close to prevent the spread of smoke and fire where ducts pass through fire-resistive construction.
    Smoke Vents Active Open to release smoke to the exterior; typically found at the top of interior exit stairwells or as roof-penetrating components.
    Fans and Motors Active Electrically operated devices that play a critical role in expelling smoke quickly from the building.
    Fire Doors Passive Operable openings within fire-rated walls that close to maintain the barrier.
    Fire-Resistant Walls and Floors Passive Permanent structural barrier assemblies that provide compartmentation.
    Smoke Curtains Passive Flexible or deployable barriers that are often concealed in the ceiling until activated by a fire alarm.
    Firefighter Smoke Control Panel Active Located in the fire command center; provides an intuitive interface for firefighters to control smoke zones and stairwell pressurization fans.

    Pro Tip: The firefighters’ smoke control station is housed in the fire command center — a protected and conditioned space. A mechanical test and inspection panel provides control over each actively managed damper and fan in the building.


    Section 6: Activation of Smoke Control Systems

    Both smoke management and smoke containment systems are automatically activated by one or more fire detection devices.

    Activation Method Description
    Sprinkler Waterflow Activation of a sprinkler head triggers the smoke control system.
    Smoke Detectors Smoke detection in a zone triggers the smoke control system for that zone.
    Heat Detectors Heat detection triggers the smoke control system.

    Pro Tip: Manual pull stations should not be used for smoke control systems that need to know the location of the fire since the likelihood of someone activating the smoke control system in the area of fire origin is low.


    Section 7: Code Requirements and Standards

    Several codes and standards govern the design, installation, and testing of smoke control systems.

    Key Standards:

    Standard Scope
    NFPA 92 – Standard for Smoke Control Systems Contains requirements for the design, installation, and testing of smoke control systems. Combines the requirements of former standards NFPA 92A (smoke control systems utilizing barriers and pressure differences) and NFPA 92B (smoke management systems in malls, atria, and large spaces).
    NFPA 101 – Life Safety Code Section 9.3 outlines requirements for smoke control systems while the occupancy chapters (11–43) tell you when they are required.
    IBC – International Building Code Chapter 9 (Fire Protection Systems) includes requirements for smoke control systems.
    NFPA 1 – Fire Code Smoke control requirements, which reference NFPA 92, can be found in Section 11.8.
    EN 12101-7 (European Standard) Applies to the design, installation, and maintenance of smoke control and ventilation systems in buildings.

    When Are Smoke Control Systems Required?

    NFPA 92 contains requirements on how to design a smoke control system, but it doesn’t govern when a smoke control system is required. For that information, the first place you should look is your local building and fire codes to see if your facility requires a smoke control system.

    In NFPA 101, the occupancy chapters (11–43) tell you when they are required. For example, in assembly occupancies with stages or platforms, NFPA 101 requires a smoke control system that will keep the smoke level at least 6 ft (1830 mm) above the highest level of seating.

    Firefighter smoke control panel in a fire command center

    Section 8: Special Applications and Considerations

    A. High-Rise and Supertall Buildings

    In supertall buildings, vertical smoke control and occupant protection are governed by regional codes. Key systems — including atrium smoke exhaust and makeup air, stair and elevator shaft pressurization, and egress corridor pressurization — must adhere to requirements such as the IBC and NFPA in the U.S., GB codes in China, local standards in Korea, and Civil Defense regulations in the Middle East.

    Example: Wilshire Grand Center (Los Angeles)

    The 73-story Wilshire Grand Center is the tallest building west of the Mississippi River. Its smoke control system includes:

    Feature Description
    Atrium Extends from the first floor to the seventh floor.
    Pressurized Stairs Ten pressurized stairs with pressurized vestibules.
    Negatively Pressurized Corridors Negatively pressurized corridors in the hotel and negatively pressurized floors on the office levels.
    Independent Smoke Exhaust Each office floor has an independent smoke exhaust fan.
    Firefighter Smoke Control Panel Intuitive interface for control over each smoke zone and stairwell pressurization fans.

    B. Atriums

    Buildings with atriums require specialized smoke management systems. NFPA 92B provides specific requirements for smoke management in atriums. The design objectives are typically to maintain the smoke layer interface above the highest occupiable level that is open to the large space for a certain period of time.

    C. Underground and Limited Access Structures

    Smoke control is particularly challenging in underground structures. The IBC and NFPA 101 require additional smoke control and ventilation measures for underground buildings, including automatic smoke venting systems where occupant loads exceed 100 or where floors are more than 9.1m below exit discharge.


    Section 9: Common Mistakes and How to Avoid Them

    Mistake Why It’s a Problem How to Fix
    Not using makeup air Pressure can build up, affecting other building systems and door-opening forces. Ensure makeup air is introduced at a rate similar to the rate of air being exhausted.
    Makeup air intake near smoke exhaust Recirculates smoke into the building. Locate makeup air intakes away from exhaust points.
    Manual pull stations for smoke control Activation in the wrong zone can spread smoke. Use automatic detection devices (smoke detectors, sprinkler waterflow).
    Inadequate commissioning Systems may not perform as designed. Conduct thorough commissioning and testing.
    Blocked smoke vents Smoke cannot escape. Ensure vents are clear of obstructions.
    Dampers not closing properly Smoke can spread through ducts. Inspect and test dampers regularly.

    Section 10: Design Checklist

    Use this checklist to verify smoke control provisions in your building design:

    Item Status Notes
    Identify Smoke Control Requirements ☐ Check IBC, NFPA 101, and local codes for your occupancy.
    Determine System Type ☐ Containment (pressurization) or management (exhaust/ventilation).
    Design Stairwell Pressurization ☐ Calculate pressure differentials and fan capacities.
    Design Smoke Exhaust Systems ☐ Include makeup air and smoke vent locations.
    Select Compatible Components ☐ Ensure fans, dampers, detectors, and controls are compatible.
    Design Firefighter Smoke Control Panel ☐ Intuitive interface with manual and automatic modes.
    Plan Commissioning and Testing ☐ Verify system performance through field testing.
    Coordinate with Other Systems ☐ Integrate with HVAC, fire alarm, and sprinkler systems.

    Conclusion

    Smoke control systems are a critical component of life safety in commercial buildings. They protect occupants, support firefighter operations, and reduce property damage. By understanding the fundamentals, design strategies, and code requirements, you can ensure that your building is equipped to manage the deadly threat of smoke.

    Take Action Today:

    1. Check your local building and fire codes to see if your facility requires a smoke control system.
    2. Engage a qualified engineer for design and commissioning.
    3. Inspect and test all components regularly.
    4. Train staff on the operation of the system.
    5. Document all inspections and tests.

    References & Notes

    [1] National Fire Protection Association (NFPA), annual U.S. fire loss and fire death statistics reports — smoke inhalation is consistently cited as a leading factor in fire fatalities, alongside burns and structural collapse.

    [2] NFPA 92, Standard for Smoke Control Systems — Chapter 4 (purposes and design objectives of smoke control systems); design pressure differentials and the door-opening-force limit of 30 lbf (133 N).

    [3] NFPA 101, Life Safety Code — Section 9.3 (Smoke Control); occupancy chapters 11–43 for when a smoke control system is required, including the requirement for assembly occupancies with stages/platforms to maintain a smoke layer at least 6 ft (1830 mm) above the highest level of seating.

    [4] International Building Code (IBC), Chapter 9 — Fire Protection Systems (smoke control requirements); underground building provisions requiring automatic smoke venting where occupant load exceeds 100 or floors are more than 9.1 m (30 ft) below the level of exit discharge.

    [5] NFPA 1, Fire Code, Section 11.8 — Smoke Control (references NFPA 92); EN 12101-7, Smoke and Heat Control Systems — Pressure Differential Systems (European standard).

    [6] “Case Study: Super-Tall Building Smoke Control System,” Consulting-Specifying Engineer — Wilshire Grand Center (Los Angeles) smoke control system design, cited for the pressurization, atrium, and corridor details in Section 8.


    Continue Reading from Our Series:

  • The Ultimate Guide to Commercial Building Safety

    The Ultimate Guide to Commercial Building Safety

    Commercial building safety is a broad and multifaceted discipline, encompassing everything from fire protection systems and building codes to emergency planning and occupant training. For building owners, facility managers, and architects, ensuring safety is not just a regulatory requirement—it is a fundamental responsibility.

    This guide serves as a comprehensive roundup of the key principles and systems that underpin commercial building safety. It is designed to be a “hub” article, connecting to deeper dives on specific topics throughout this series.


    ◆ Section 1: The Foundation – Understanding the Codes

    Safety in commercial buildings is built on a foundation of codes and standards. These documents provide the minimum requirements for protecting occupants and property.

    Code/Standard Purpose Key Focus Areas
    NFPA 101 – Life Safety Code Occupant safety and means of egress[1]. Exits, corridors, doors, emergency lighting, occupant load[1].
    International Building Code (IBC) Building construction and fire-resistance[2]. Construction types, fire barriers, structural integrity[2].
    NFPA 72 – National Fire Alarm and Signaling Code Fire detection and notification[3]. Fire alarms, smoke detectors, pull stations, notification appliances[3].
    NFPA 13 – Standard for the Installation of Sprinkler Systems Sprinkler system design and installation[4]. Sprinkler types, spacing, water supply[4].
    NFPA 10 – Standard for Portable Fire Extinguishers Fire extinguisher selection and placement[5]. Types, placement, inspection, maintenance[5].
    NFPA 70 – National Electrical Code (NEC) Electrical safety[6]. Wiring, equipment, electrical rooms[6].
    NFPA 20 – Standard for the Installation of Stationary Pumps for Fire Protection Fire pump installation[7]. Location, sizing, testing[7].
    NFPA 110 – Standard for Emergency and Standby Power Systems Emergency power generation[8]. Generator location, fuel supply, testing[8].

    Pro Tip: Familiarity with these core codes is the first step to ensuring a safe and compliant commercial building[1][2][3].

    Stack of NFPA books.


    ◆ Section 2: The Means of Egress – The Path to Safety

    The means of egress—the path from any point in a building to a safe outdoor area—is the most critical life safety feature in any building[1].

    Component Function Key Requirements
    Exit Access The portion of the means of egress leading to an exit[1]. Corridors, aisles, doors[1].
    Exit The portion separated from the building (e.g., stair enclosure)[1]. Enclosed stairs, horizontal exits[1].
    Exit Discharge The portion between the exit and the public way[1]. Direct path to the outside, clear of obstructions[1].
    Exits Minimum of two exits required (with limited exceptions)[1]. Occupant load determines the number of exits[1].
    Travel Distance Distance from any point to an exit[1]. Limited based on occupancy and sprinkler protection[1].
    Common Path of Travel Distance before two exits are available[1]. Limited to specific distances[1].
    Dead-End Corridors Corridors with only one exit direction[1]. Limited to specific distances[1].
    Exit Signs Mark the path to exits[1]. Illuminated, visible from any direction[1].
    Emergency Lighting Provide visibility in a power outage[1]. 1 foot-candle average, 90-minute duration[1].
    Fire Doors Prevent fire spread through openings[9]. Self-closing, rated assemblies[9].

    Pro Tip: Regularly inspect your means of egress to ensure they are clear, well-lit, and properly marked[1].

    Illuminated exit sign in a clear corridor


    ◆ Section 3: Fire Protection Systems – The First Line of Defense

    Fire protection systems are designed to detect, contain, and extinguish fires, protecting both occupants and property[3][4][5][7].

    System Function Key Requirements
    Fire Sprinkler Systems Automatically extinguish or control fires[4]. Pendant, upright, sidewall, and ESFR heads[4].
    Fire Alarm Systems Detect fires and notify occupants[3]. Smoke detectors, heat detectors, pull stations[3].
    Manual Call Points (Pull Stations) Occupant-initiated alarm[3]. Located within 5 feet of exits, 42-48 inches high[3].
    Fire Extinguishers Portable fire suppression[5]. Proper type, placement, and maintenance[5].
    Standpipe Systems Provide water for firefighter use[7]. Wet or dry risers, landing valves[7].
    Fire Pumps Maintain water pressure in sprinkler and standpipe systems[7]. Proper location, sizing, and testing[7].

    Pro Tip: A combination of active and passive fire protection systems provides the most comprehensive protection[1][4].

    Fire sprinkler head and alarm panel


    ◆ Section 4: Building Construction and Compartmentation

    The building itself is a critical component of fire safety. Compartmentation prevents fire and smoke from spreading throughout the building[2].

    Element Function Key Requirements
    Fire Barriers Prevent fire spread between occupancies[2]. 1-hour to 3-hour fire-resistance ratings[2].
    Smoke Barriers Limit the spread of smoke[1]. 1-hour fire-resistance rating[1].
    Smoke Compartments Subdivide spaces to limit smoke travel[1]. Max 2,100 sqm, max travel distance 61 m[1].
    Fire Doors Protect openings in fire barriers[9]. Self-closing, rated assemblies[9].
    Firestops Seal penetrations in fire barriers[2]. Fire-rated materials around pipes, ducts, cables[2].
    Construction Type Defines the fire resistance of the building[2]. Types I through V (most to least fire-resistant)[2].
    Exterior Walls Prevent fire spread between buildings[2]. Fire resistance depends on distance to property lines[2].

    Pro Tip: Maintaining the integrity of fire barriers and firestops is essential for compartmentation to work effectively[2].

    Firestop penetration with proper sealing


    ◆ Section 5: Hazardous Areas and Special Risks

    Hazardous areas require additional protection due to the increased risk of fire or explosion[1].

    Hazardous Area Examples Protection Requirements
    Electrical Rooms Transformer rooms, switchgear rooms[10]. 2-hour fire-rated enclosure or automatic suppression system[10].
    Generator Rooms Emergency power generators[8]. 1-hour to 2-hour fire-rated enclosure[8].
    Kitchens Commercial cooking operations[11]. NFPA 96 hood suppression, self-closing doors[11].
    Storage Rooms Storage of flammable materials[1]. 1-hour fire-rated enclosure, sprinkler protection[1].
    Mechanical Rooms Boilers, HVAC equipment[1]. 1-hour fire-rated enclosure[1].
    Labs Research or testing laboratories[1]. Varies based on the hazards present[1].
    Diesel Tanks Fuel storage for generators[8]. NFPA 30 requirements for flammable and combustible liquids[8].

    Pro Tip: A thorough hazard assessment is essential for identifying and mitigating special risks[1].


    ◆ Section 6: Emergency Planning and Preparedness

    A comprehensive emergency plan ensures that occupants know what to do in an emergency[1][12].

    Component Description Key Requirements
    Fire Safety Plan Document outlining emergency procedures[1]. Updated annually[1].
    Employee Training Training on evacuation, extinguishers, and alarms[12]. Annual refresher training required[12].
    Fire Drills Practice evacuations[1]. Annually minimum, more frequently for high-occupancy buildings[1].
    Fire Safety Director Designated leader for emergency response[1]. Responsible for implementing the fire safety plan[1].
    Floor Wardens Assist with floor-level evacuations[1]. Designated per floor[1].
    Documentation Records of training, drills, and inspections[1]. Maintained for at least 3 years[1].

    Pro Tip: Regularly test and update your emergency plan to keep it effective[1][12].

    Emergency response team meeting


    ◆ Section 7: Inspection, Testing, and Maintenance (ITM)

    Regular inspection, testing, and maintenance are essential to ensure that fire protection systems function when needed[3][4][5][7].

    System Inspection Frequency Testing Frequency
    Fire Sprinklers Monthly (visual), Annual (flow test)[4]. Annual (full system test)[4].
    Fire Alarms Monthly (visual), Annual (functional test)[3]. Annual (full system test)[3].
    Fire Extinguishers Monthly (visual)[5]. Annual (maintenance check)[5].
    Emergency Lighting Monthly (visual)[1]. Monthly (functional test), Annual (90-minute test)[1].
    Fire Doors Monthly (visual)[9]. Annual (operational test)[9].

    Pro Tip: Document all inspections and tests and retain records for at least 3 years[1].


    ◆ Section 8: The Human Element – Training and Awareness

    All the systems in the world are useless if occupants do not know how to respond.

    Training Component Key Elements
    Evacuation Procedures Primary and secondary routes, assembly points[1].
    Fire Extinguisher Use PASS technique: Pull, Aim, Squeeze, Sweep[5].
    Alarm Recognition Understanding fire alarm signals and procedures[1].
    Reporting Hazards How to report fire hazards to management[1].
    Assisting Others How to help individuals with disabilities[1].

    Employees participating in fire extinguisher training


    ◆ Section 9: The Business Case for Safety

    Investing in fire safety is not just a cost—it is a sound business decision[13].

    Benefit Impact
    Reduced Property Damage 70% reduction in damage with sprinklers[14].
    Lower Insurance Premiums 10-30% savings with protection systems[13].
    Reduced Business Interruption Faster reoccupancy after a fire[13].
    Tenant Attraction and Retention 75% of tenants consider fire safety[15].
    Reduced Liability Fewer lawsuits and legal claims[1].
    Code Compliance Avoided fines and penalties[2].
    Protection of Human Life The most important benefit[1].

    ◆ Conclusion

    Commercial building safety is a comprehensive and ongoing process. By understanding the codes, implementing the right systems, and training occupants, you can create a safe and resilient building that protects its occupants and its value.

    Take Action Today:

    1. Review your building’s fire safety plan and systems.

    2. Train employees on fire emergency procedures.

    3. Inspect and test all fire protection systems.

    4. Maintain thorough documentation.

    5. Invest in safety—it is a sound business decision.


    Continue Reading from Our Series:


    References & Notes:

    [1] NFPA 101, Life Safety Code, 2012 Edition.
    [2] International Building Code (IBC), 2021 Edition.
    [3] NFPA 72, National Fire Alarm and Signaling Code, 2019 Edition.
    [4] NFPA 13, Standard for the Installation of Sprinkler Systems.
    [5] NFPA 10, Standard for Portable Fire Extinguishers.
    [6] NFPA 70, National Electrical Code (NEC).
    [7] NFPA 20, Standard for the Installation of Stationary Pumps for Fire Protection.
    [8] NFPA 110, Standard for Emergency and Standby Power Systems.
    [9] NFPA 80, Standard for Fire Doors and Other Opening Protectives.
    [10] NFPA 13, 8.15.10.3 (Electrical Equipment Rooms).
    [11] NFPA 96, Standard for Ventilation Control and Fire Protection of Commercial Cooking Operations.
    [12] OSHA 1910.157, Portable Fire Extinguishers (Training requirements).
    [13] Insurance Services Office (ISO), “Fire Protection and Insurance Premiums,” 2022.
    [14] National Fire Protection Association, “Sprinkler Effectiveness,” 2021.
    [15] National Multifamily Housing Council, “Tenant Preferences and Fire Safety,” 2020.

  • How to Train Employees for Fire Emergencies

    How to Train Employees for Fire Emergencies

    Your fire safety plan is only as good as the people who execute it. A well-trained workforce can mean the difference between a minor incident and a major catastrophe. Effective fire emergency training ensures that employees know what to do, where to go, and how to respond when every second counts[1].

    This guide provides a step-by-step framework for training employees on fire emergencies, covering everything from initial awareness to hands-on extinguisher use.


    Fire evacuation plan posted on a wall

    Section 1: Why Employee Fire Training Matters

    Reason Why It Matters
    Life Safety Trained employees can evacuate quickly and safely, reducing the risk of injury or death [1].
    Regulatory Compliance NFPA 101 and OSHA require fire training and drills for most occupancies [2][4].
    Property Protection Quick and correct use of extinguishers can extinguish small fires before they spread [3].
    Liability Reduction Documented training demonstrates due diligence in the event of an incident [1].

    Pro Tip: Training is not a one-time event—it must be ongoing and reinforced regularly.


    Trainer explaining fire extinguisher types to employees

    Section 2: Core Training Components

    An effective fire emergency training program should include the following components [1][2][3]:

    A. Fire Prevention Awareness

    Topic Key Points
    Common Fire Causes Electrical faults, unattended cooking, improper storage of combustibles [3].
    Housekeeping Keep exits clear, store flammable materials safely, and maintain a clean workspace [3].
    Reporting Hazards Employees should know how to report fire hazards to management [1].
    Smoking Policies Designated smoking areas and proper disposal of smoking materials [3].

    B. Evacuation Procedures

    Topic Key Points
    Evacuation Routes Employees must know the primary and secondary evacuation routes[2].
    Assembly Points Designated safe areas outside the building for headcounts[2].
    Accounting for Occupants Procedures for checking that all employees have evacuated[2].
    Assisting Others How to assist individuals with disabilities or special needs[1].

    C. Fire Extinguisher Training

    Topic Key Points
    Types of Extinguishers Class A, B, C, D, and K—what each is used for [3].
    PASS Technique Pull, Aim, Squeeze, Sweep—the correct way to use an extinguisher [3].
    When to Fight a Fire Small, contained fires only—never fight a fire that is spreading or blocking your exit [3].
    When to Evacuate If the fire is too large, the extinguisher is empty, or the smoke is thick, evacuate immediately [3].

    D. Alarm and Notification

    Topic Key Points
    Alarm Signals Employees should recognize the fire alarm sound [1].
    Manual Pull Stations How to activate the alarm if they discover a fire [3].
    Communication How to notify management and emergency services [1].

    Employee practicing the PASS technique on a training extinguisher

    Section 3: The PASS Technique (Hands-On Training)

    Every employee should be trained in the PASS technique for using a fire extinguisher [3]:

    Letter Action Description
    P Pull Pull the pin at the top of the extinguisher, breaking the seal.
    A Aim Aim the nozzle or hose at the base of the fire, not the flames.
    S Squeeze Squeeze the handle to release the extinguishing agent.
    S Sweep Sweep the nozzle from side to side at the base of the fire until it is out.

    Pro Tip: Provide hands-on training with a training extinguisher (water or digital simulator) so employees can practice the technique safely [3].


    Section 4: Training Methods and Delivery

    Method Description Best For
    Classroom Training Instructor-led presentations covering theory and procedures [1]. New hires, annual refresher training.
    Hands-On Practice Practical exercises using training extinguishers or simulators [3]. Fire extinguisher training, evacuation drills.
    Fire Drills Simulated emergency evacuations [2]. All employees, testing the entire plan.
    Online Modules Self-paced e-learning courses [3]. Off-site employees, refresher training.
    Video Demonstrations Visual demonstrations of procedures [3]. Supplement to other training methods.
    Tabletop Exercises Discussion-based scenarios [1]. Management teams, emergency response teams.

    Pro Tip: Use a combination of methods to cater to different learning styles [1].


    Employees participating in a fire drill

    Section 5: Fire Drills: The Practical Test

    Fire drills are the most critical component of employee training [1][2].

    Fire Drill Checklist:

    Item Requirement
    Frequency Annually at minimum, quarterly for high-occupancy buildings [2].
    Advance Notice Notify employees in advance (to avoid panic) but occasionally conduct unannounced drills [1].
    Evacuation Time Measure how long it takes to evacuate and account for all occupants [1].
    Scenario Variation Practice different scenarios (e.g., blocked exits, power outage) [2].
    Documentation Record the date, time, duration, and any issues encountered [1][2].
    Debrief Review the drill with employees and management to identify areas for improvement [1].

    Pro Tip: Conduct drills during different times of day and in different weather conditions to prepare for real emergencies [1].


    Section 6: Training Frequency

    Training Type Frequency Description
    New Hire Orientation Upon hire Basic fire safety training for all new employees[1].
    Annual Refresher Annually Review of procedures, updated information[1].
    Fire Drills Annually (minimum) Practical evacuation exercises[2].
    Extinguisher Training Annually Hands-on practice with fire extinguishers[3].
    Specialized Training As needed Training for emergency response teams, floor wardens, etc.[1].

    Section 7: Documentation and Record Keeping

    Document What to Record Retention
    Training Attendance Employee names, date, topics covered[1]. At least 3 years.
    Drill Records Date, time, duration, participants, issues[2]. At least 3 years.
    Extinguisher Training Records Employee names, date, type of training[3]. At least 3 years.
    Certificates Completion certificates for specialized training[1]. As required.

    Pro Tip: Consider using a digital training management system to track and document employee training[1].


    Section 8: Special Considerations

    A. Individuals with Disabilities

    Consideration Action
    Evacuation Assistance Assign “buddies” to assist individuals with mobility, hearing, or vision impairments [1].
    Evacuation Devices Provide evacuation chairs or sleds for stairwells[1].
    Notification Provide strobe lights or vibrating pagers for individuals with hearing impairments[1].
    Practice Include individuals with disabilities in drills to ensure procedures work[1].

    B. Language and Literacy

    Consideration Action
    Multiple Languages Provide training materials in languages spoken by employees[1].
    Visual Aids Use pictograms, diagrams, and videos to supplement written materials[1].
    Simple Language Use clear, simple language in written materials[1].

    C. Night Shift and Remote Workers

    Consideration Action
    Night Shift Training Ensure night shift employees receive the same training as day shift[1].
    Remote Workers Provide online training and ensure they know evacuation procedures for their location[1].

    Evacuation chair in a stairwell for assisting individuals with mobility impairments

    Section 9: Common Mistakes and How to Avoid Them

    Mistake Why It’s a Problem How to Fix
    One-time training only Employees forget procedures over time[1]. Provide annual refresher training[1].
    Not practicing with extinguishers Employees freeze when they need to use one[3]. Provide hands-on practice[3].
    No drills Employees are unprepared for a real emergency[2]. Conduct regular fire drills[2].
    Not documenting training Cannot prove compliance[1]. Maintain thorough records[1].
    Ignoring individuals with disabilities May leave vulnerable employees behind[1]. Include them in planning and drills[1].

    Conclusion

    Effective employee training is the cornerstone of fire safety in any commercial building. By providing comprehensive training, conducting regular drills, and maintaining thorough documentation, you can ensure that your employees are prepared to respond quickly and safely in an emergency.

    Take Action Today:

    1. Assess your current training program against the components listed in this guide.

    2. Schedule annual refresher training for all employees.

    3. Conduct fire drills and document them.

    4. Provide hands-on fire extinguisher training using the PASS technique.

    5. Update your training materials to include individuals with disabilities and language considerations.


    Continue Reading from Our Series:


    References & Notes:

    [1] NFPA 101, Life Safety Code, 2012 Edition.
    [2] NFPA 101, 4.8, 14.7, and 38.7 (Fire Safety Plans and Drills).
    [3] NFPA 10, Standard for Portable Fire Extinguishers.
    [4] OSHA 1910.157, Portable Fire Extinguishers (Training requirements).


    [End of Article]